Showing posts with label vintage. Show all posts

Sunday, 2 February 2014

Rhythm Riot 2013.... Can't wait til the next one - only 285 days to go!

Hello Ladies and Gents,


One Packed Mini!
With my tofino lounge trousers now ready, I had suitable lounge wear to go to Rhythm Riot!!! Those who don't know what Rhythm Riot is, its a 1950s Rhythm and Blues and Rock 'n' Roll weekend that takes place every year in November at Camber Sands, East Sussex. There's music, shopping, eating, drinking, dancing and more dancing that takes place in Pontin's... a perfect weekend to spend with good friends and make new ones. This was my first time to the Riot, but had been looking forward to it since we booked it in the summer 2013. 
Missy Malone 

The biggest challenge was what clothes and accessories (not to mention shoes) to take with us... so in the end I think we took everything but the guinea pig! (don't panic, I had someone to look after the furry old man!). With the Mini packed within in an inch of its life we set off from London to Camber with music playing and sun shining. 

As I'm a bit late in sharing - as this is now over two months ago since the Riot - I'll spare you all the details of the whole weekend, but it was everything I expected and more. The shopping was fantastic with a wide range of original and repro clothes from the 1930s, 1940s and 1950s. I picked up some hair flowers and the most gorgeous wicker handbag. The music was sensational... on the Saturday night we went to watch 'The Teenagers' and they just took my breath away... they had to be the best performance of the weekend. The cabaret in the Lady Luck Room had the delightful Missy Malone, Cherry Shakewell and Little Miss Bodacious to tantalise and tease you with their burlesque. 
The Teenagers
 All rooms played wonderful music and I really enjoyed watching people dance. Husbandy and I had a few dances too which was really good fun. Everyone looked glamorous and most importantly were enjoying themselves! 


All in all it was a perfect weekend... a great break with good friends... role on November - Rhythm Riot!!

Happy Dancing x

P.S. My tofino trousers were very comfy especially when nursing my gin-induced hangover :)

Sunday, 8 September 2013

Twenty Counties of August... Week 1

Hello Ladies and Gents,

Yet another gorgeous September day...with this sunny weather it reminds
Dartmouth
me of my glorious vacation I had during the last two weeks in August. I went back to work last week and a few people commented on my tan and said 'Where did I go on holiday?' I said 'England...and I either visited or drove through twenty counties of it!' Yes, you read right, I went to twenty counties in two weeks and had a blast! Let me tell you about some of my adventures....


Southern Valley Railway
During July when the weather was so fabulous, Husbandy and I booked to go to Devon...now the day had come so we packed up the Mini and set off...! The sun was shining and the skies were blue - even an overturned lorry on the M5 was not going to dampen my mood...we were off to Devon to start our holiday - first stop, the Southern Valley Railway. We soon ate the miles and passed through Middlesex, Berkshire, Wiltshire, Somerset and arrived in the beautiful county of Devon in time for the 3pm train from Buckfastleigh to Totnes. This beautiful restored railway is seven miles long and passes through some quintessentially British countryside following the River Dart and rolling hills. Husbandy and I were lucky enough to get a carriage all to ourselves so we
On the ferry to Kingswear
relaxed and enjoyed the ride in 193
0s style. Soon the rail ride was over and after eating some scrummy clotted cream ice cream we traveled on to our B&B in the picturesque town of Dartmouth. The B&B was called 'The Captain's House' and it was such a quaint B&B. The room was large with a double bed and en-suite shower room. After a fish and chip supper from the Frying Pan (best chip shop in Dartmouth) we went back to the B&B to dream of Devonshire cream teas and sunshine! 


Goodrington Sands
Morning came and after a hearty breakfast we went down to catch the ferry from Dartmouth to Kingswear to go on another train... this time the Paignton and Dartmouth Steam Railway. This line follows the cost from Kingswear to Paignton and again goes through some majestic countryside. It passes the lovely sea side town of Goodrington Sands which was so colourful with all its beach huts. It also stops at Greenway Halt which is where Poirot was filmed as Agatha Christie did live and write some of her books in Devon! Again we were fortunate to get a carriage all to ourselves and loved the style of
Husbandy at Blackpool Sands
the 1950s decor. On arrival back to Kingswear we got the ferry back across and made our way to Blackpool sands for an afternoon of relaxing and sunbathing.


After another night and breakfast in The Captain's House we had to say goodbye to the lovely little place...we packed up the Mini but before we moved on we had a morning in Dartmouth. There was a band playing in the bandstand and a lovely little market where we indulged in some yummy scotch eggs and hot dogs. After having a mooch
Dartmouth looking over to Kingswear
around we decided to move on to Totnes. Totnes is a little town on the River Dart - a paradise for charity shop hunters, tearooms lovers and sewing bees. Husbandy and I had a yummy Devonshire Cream Tea at the Anne of Cleves tearoom.....my, it was tasty. I also purchased a lovely bedspread from a charity shop. With full bellies we left Totnes to travel to Dartmoor to our next place to stay. 


It was now Thursday and the sun was still shining and reaching temperatures of
Dartmoor Ponies
25 degrees. Husbandy and I decided to have a day on Dartmoor so traveled to Princetown. Princetown is a town right in the centre of the Moor with a prison dating back to the seventeen hundreds. The town itself has a few little shops (a great jewellery shop) and a couple of museums with the prison museum being a must visit. After a short while we drove up further into the Moor parked the car and walked onto the Moor for a relaxing afternoon - seeing no-one but sheep for hours - it was magical! Sadly time
On the Moor
rushed by and we went back to the car to travel all the way to Ludlow to stay with my in-laws and see our little guinea pig who had been there for his holidays. Now to get to Ludlow we travelled through B&NES, South Gloucestershire, City and County of Bristol, Monmouthshire, Herefordshire and Shropshire... making a total of eleven counties so far... wow.


On the Friday we went to Ludlow to visit Pepper Lane Vintage which is a great vintage shop (I've mentioned on a previous blog). I tried on some beautiful items but they were either to big or a little snug so left empty handed this time...but I know I will back again soon. We both started to feel a little peckish so we went to De Greys Tea Room for a spot of lunch. The food in their was scrumptious and the best flapjack I had ever tasted! On leaving Ludlow we went to Malvern (Worcestershire). If you've not been to Malvern there is so much to
Hairdressers in Malvern 
see and do...we wanted to walk to the top but sadly the sun had hidden itself for the day (our only grey day) so we headed for Brays instead. Brays is a shop that has not changed inside since it was opened so is a magnificent store to go to. It has some lovely bits as well as some unusual items of clothing...I picked up a handmade Japanese Kimono...its fabulous and so comfy.


Burgh Island 2008
With the weather not improving we decided to head back from Ludlow to London late on the Friday night so managed to sneak in another county (Gloucestershire) before reaching London in the small hours of Saturday morning. With one week done and with plenty of sunshine we felt we had been truly blessed....Devon is a special place for us...one reason being as its where my gorgeous Husbandy and I went to Burgh Island for our honeymoon in 2008. I hate to say the old cliche but there is nothing like holidaying in England when you have the weather.... I shall leave this blog here and share with you the other counties and delights in a second installment of the Twenty Counties of August...Week 2.

Links to places we visited:


Happy Summertime xx

Sunday, 11 August 2013

My Vintage Clothes & Accessories Paradises...

Hello Ladies and Gents,

Firstly let me apologies for not blogging for a while...with the absolutely stunning weather the British Isles has been having I have been more outside than in but today is to be a day of relaxation and recovery so an-in day it is... plus I see grey skies! I thought I would share with you my latest vintage finds and where I found them... I love finding out about new hidden gems so thought I would share them with you all. 


Dress & bolero - Vintage Fashion Fair
Vintage Fashion Fair - http://www.vintagefashionfairlondon.co.uk/
A good friend of mine told me of this vintage fair... it takes place once a month at Cecil Sharp House, near Primrose Hill. I went to the fair in May and it sold an assortment of clothes, jewellery, shoes and homewares - plus other bits and pieces. Its a snip to get in at £3 with a select range of original vintage stock with a lovely tearoom and by being indoors you can go come rain or shine - well worth a visit. 


Pop Up Vintage Fairs - Islington
Another great vintage fair is the Pop Up Vintage Fair. I visited an event held in the Islington Town Hall. It has a wide range of original vintage clothes, jewellery, shoes, homewares plus it has pop up hair and make up booth, repro items, artists, card stalls, tea and cake stand and probably other wonderful stalls that I can't remember! From memory I think it was £3 to get in and runs every month, but I'm not sure if it in the same place every month. They have a facebook page with full details and if you goggle 'Pop Up Vintage Fairs' it will tell you when the next one is.

Pepper Lane Vintage, Ludlow - http://pepperlanevintage.wordpress.com/
Dress & bolero - Pepper Lane Vintage

This little gem of a shop was stumbled across by pure accident! Husbandy and I were in Ludlow and I was hunting through the charity shops. One of the ladies in the shop said you would love the shop down the road called 'Pepper Lane Vintage'. I rushed out the shop and went on the hunt...when I found it it was like a vintage dream selling original vintage clothes (for both men and women), jewellery, shoes, homewares and furniture.  They have an online shop but going to the shop itself opens your eyes to all the stock the place has - perhaps Ludlow is now the holiday destination of choice?? 


Cardi - Pop Up Vintage/ Skirt - Blackout II
Blackout II - http://www.blackout2.com/
This hidden gem in the centre of Covent Garden is a delight for all those original vintage items. This shop is stocked to the rafters of original clothes (mens and womens), jewellery, hats, handbags and shoes ranging from the 1930s to the 1970s. This shop is over two floors and after some hunting you will find an outfit you wondered how you lived without. 


Ooh La La! Vintage Swap and Sell Shop - Facebook
This site is run through Facebook. Lovely people list vintage items of women's clothes, jewellery, shoes and handbags from all over the world  (a picture with some description on the garment) and if you want it you leave the comment 'interested' - this then ensures you get first dibs on the item. I have purchased some ear-rings and handbag from this site and have been delighted with them!

I'm sure you all have you own little favourite places to find your perfect vintage items.... please do feel free to share them with us and if you pop to any of them listed above let me know what you think!

Top Tips when shopping vintage style:

  • Take a tape measure...I always find this useful as original vintage clothes are on the small size and to avoid disappointment I give it a quick measure up
  • Examine the item thoroughly... this takes minutes and can save disappointment and frustration later
  • Take cash... seems a simple thing but the amount of times I've gone with just a £5 in my pocket and then had to scurry the streets is countless!
  • Taking care of the garment... now this is on a case by case basis. If an item is cotton I do risk putting it in the washing machine on a cool, low spin cycle. However this is not the case for everything as my dry cleaning bill proves so make a judgement also what the worth is before washing the garment
  • If buying a vintage item online don't be afraid to ask for more pictures or more information - at the end of the day you need to know the quality and make sure you are happy before buying 
Happy Shopping x

Friday, 14 June 2013

Sewing, Facing and Invisible Zips.... The Finale

Dear Ladies and Gents....

Let me firstly apologies for the delay in getting the final installment to you on completing the 'A' line skirt - mostly to 'The Thrifty Stitcher', Claire-Louise - life has got in the way and now I will finish what I started.

So with all the sides overlocked it was now time to join all the pieces together. With the pieces pinned together and the sewing machine set to a straight stitch, follow the tailors chalk line to join the two back pieces to the front piece - taking the pins out as you go. Now its time to insert the invisible zip! Take the 10 inch invisible zip and line the top of the zip with the top of the skirt and mark with tailors chalk where the bottom of the zip is to go on the fabric. The zip goes right side down onto the right side of the fabric - this is then pinned into place (remembering to be 15mm away from the fabric edge). On the sewing machine change the zipper foot to an invisible zipper foot. Align the foot over the zip. To align the zip, it should go down the small hole to the left as you look at the sewing machine and stitch as close to the zip teeth as you can remember not to backstitch as it may damage the fabric and needle. Sew down the side of the zip until the place where you marked the fabric. Top Tip: You need to go as far down as you can so its secure but not too far down otherwise you will catch the zip lever and snap the needle. Also remember as there is not back stitch at either end don't forget to unpick the last loop and manually tie a knot. Now, do the same the otherside. Un-zip the zip and pin the zip to the right side of the fabric remembering to keep the same distance from the fabric edge. Top Tip: do not panic at this point! My brain could not work out how it would work, but trust me and the experts - it does! Do the same as the other side and slip the zip teeth into the right hand hole on the invisible zipper foot. You're almost there! Now swap the invisible zipper foot to a general-purpose foot. Start at the top of the zip and stitch as close as you can get and then all the way to the bottom of your skirt and ta-dah you have a skirt-ish!! I appreciate this is complex but do persevere... once done it is so satisfying! A great tutorial to help you out is 'How to sew an invisible zip' by ctquiltingvideos - link below.

Joining the facing
Now there is only a couple more part to do and one of them is fixing your facing. A facing is not required all the time but for this skirt one was inserted. To create the facings trace the pattern onto dressmakers square patterned paper using the pattern from the skirt. Before tracing remember to take out the darts and measure down approximately 3.5inches - do this for both the front piece and back two pieces. This then needs to be pinned to the fabric and cut out using fabric scissors - remember to place the front facing on the edge of folded fabric to make one long piece and cut out two back pieces. Once cut out pin the back pieces to the front pieces remember the 15mm hem line. Once the three pieces are joined together, overlock the sides and the bottom. Once overlocked, pin the right sides together at the top of the skirt. Now to ensure you don't go over you zip, mark each side with a pin - this will be your start and end point. Go back to the sewing machine and sew the facing to the skirt. Turn the facing into the skirt and its almost done!


The hem ready to the hand-stitched
The final part of the skirt is the bottom hem. As I wanted my skirt to have a more vintage feel I hand sewed this by using a herringbone stitch. I would describe this as hand sewn zig-zag stitch; only catching a tiny thread on the outer fabric and catching the hem as you go - this should also appear invisible on the outside. I decided to do this bit at home as the day was all ready drawing to a close - but one thing was for sure...I had made a skirt :)

Top tips:
  • Equipment: Hemming ruler, fabric scissors, fabric, dressmakers square patterned paper, pins, sewing machine, invisible zipper foot, invisible zip and patience!
Useful websites/ blogs:
  • 'How to sew an invisible zip' by ctquiltingvideos - http://www.youtube.com/watch?v=V2Dz6tk_fW4

Blurred photo of finished item!
I wear the stunning blue skirt regularly and its been complimented a great deal. I never appreciated the time and effort it takes to make a garment and I now have first hand stitching experience. Before I made a skirt I used to think about where my clothes were made and now this is more important than ever. I do try and buy British made where I can and that is why businesses like Vivien of Holloway and other independent shops are so important to me and to keep the British textile industry alive.

For anyone learning to sew I would highly recommend 'The Thrifty Stitcher'. The course is relaxed with clear guidance and support. The day goes so quickly and you will learn a great deal of skills in a short amount of time and retain them for years to come! Again, I'd would like to say a massive thank you to Claire-Louise and to all at The Thrifty Stitcher for a wonderful creative day - I will use all these wonderful skills to make another skirt and other clothes! 

Happy Stitching x

Saturday, 4 May 2013

Cutting, Pinning and Overlocking...

Hello Ladies and Gentlemen....

With another sunny day in London I cracked on with my next sewing project and am well pleased with my progress... I'll blog on this soon but as it is a gift for a good friend it'll have to be kept under wraps for a little while longer! 

In my last bloggie I got to the point of pinning the pattern to the fabric. So, armed with fabric scissors I snipped out the pattern - slowly and carefully to make sure it was as accurate as possible. With the pattern still attached the fabric the darts needed to the drawn on. As I wanted a more vintage skirt, I put all the darts on the skirt - this gives it more shape and shows off those dangerous curves. This part is a little fiddly and takes patience - the best way to do this is to put a pin through the dart pattern (where the little circles are) all the way through to the pattern from the wrong side of the fabric. By putting the pin through you will be able to see where the dart goes and be able to mark with tailors chalk on the wrong side of the fabric. Once marked, remove the pins and join the tailors chalk together to make a 'V' shape. A great link to show this is called Accurate Darts without Permanent Mark posted on Thread Magazine website - link below. Do this for all darts.

 
Trying on for size
With my pattern pieces successfully cut out I was eager just to pin the pieces together, but this wasn't the case - the seam needed to marked on the wrong side of the fabric. When marking the seam, I used a hemming ruler to measure 1.5cm along the edge to ensure the seam would be equal on the inside. A great blog on marking fabric is by Tilly and the Buttons called Marking and Cutting Fabric - link below. Once marked with tailors chalked I pinned the pieces together, also not forgetting to pin the darts (when pinning the darts, align where the tailors chalk is and pin it - it'll make a mini 3D triangle) and for the first time I could actually visualise the skirt.  Top tip: Before going on, do try on what you have pinned. Be careful not to stab yourself when doing this but this will help to see how the skirt will fit and check the length. With some assistance, the waist of my skirt had to be taken in a bit to make it more snug. This was simply pinned on both sides. As the waist was altered the darts needed to be checked but I was lucky as the alignment was still good. With the skirt ajusted I gently wiggled out of it and went and make the slight alterations. To ensure this was accurate, where the new pins
Marking with chalk
were I marked with tailors chalk on the wrong side of the fabric before removing them. This shows a line which will need to be drawn and again measured 1.5cm to get the seam correct.
Top tip: If any alterations are made at this stage it is good to pin the pattern back on the fabric when cutting out the alterations. This will save time when you make the skirt next time as the measurements will all ready have been done!

Overlocking bliss!
With the fabric cut the edges needed to be tidied in order not to fray or damage the fabric. There are numerous ways this can be done however we were fortunate enough to have overlockers. I've never used an overlocker before so Claire-Louise showed me how to use it and I was amazed by this machine. It first cuts the fabric then encapsulates the edges by weaving four threads around them - it was flippin' fantastic and now on the wants list! Top tip: If you don't have an overlocker another way to tidy the edges is with a zig-zag stitch. Let one stitch go into the fabric and the other fall out of it so it catches the loose threads. This is good but won't work on all fabrics, so please check before trying! The pieces of fabric were overlocked on three sides (leaving the top) and I was ready to join the pieces together.... but that is for another day and another blog.

Again, I learnt so much in a short amount of time. From cutting the fabric, marking darts, using overlockers and again that patience is crucial when learning something new. Next time I will look at sewing, facings and invisible zips!


Top tips:
  • Equipment: Pattern, dress makers ruler (or a long ruler), hemming ruler, tape measure, scissors, tailors chalk, pins, overlocker (or a zig zag stitch) and a mirror to look at your garment under construction.
  • Before going on, do try on what you have pinned. Be careful not to stab yourself when doing this but this will help to see how the skirt will fit and check the length
  • If any alterations are made at this stage it is good to pin the pattern back on the fabric when cutting out the alterations. This will save time when you make the skirt next time as the measurements will all ready have been done!
  • If you don't have an overlocker another way to tidy the edges is with a zig-zag stitch. Let on stitch go in the fabric and the other fall out of it so it catches the loose threads. This is good but won't work on all fabrics, so please check before trying! 
  • Patience!!!!!!!!!!

Happy Overlocking x

Sunday, 21 April 2013

Patterns, Measurements and Maths

Hello Ladies and Gentlemen...

Let me firstly apologies for not blogging sooner... it's been two weeks since I shared with you my adventures but I do have a genuine excuse...it was my birthday! I had a super weekend and birthday day thanks to my husbandy and friends. I was spoilt rotten which can't be a bad thing. I'm now back and spreading the love.

Since my last sewing blog, I have made a few other bits and pieces - primarily involving squares! But my skills were well and truly put to the test when I attended an all day sewing course that involved making an 'A' line skirt. In a previous blog on sewing, I mentioned a great website called 'The Thrifty Stitcher' which has lots of hints and tips to help with sewing projects. The Thrifty Stitcher is an friendly sewing school ran by Claire-Louise Hardie who was a consultant to the BBC2 programme 'The Great British Sewing Bee'. She runs evening, half days and day courses for all levels to try and de-mystify the art of sewing. So with all these exciting courses to chose from I selected the 'An Introduction to Dress Making - Making a Skirt' (link below). 

Fabric Made in UK
Once booked, an email came through of what to expect from the day and what to bring. The key items to bring were fabric, an invisible zip and thread to match the fabric. With these instructions I jumped straight onto the 'Ray Stitch' website where I clicked and examined all the glorious fabrics they had on offer. When it came to the actual selection I remembered the first episode of the GBSB and decided not to get a complex pattern or anything too lightweight! So I selected a truly stunning shade of royal blue in a medium weight cotton (made in the UK) with matching zip and thread.

Thrifty Stitcher HQ
Soon the time passed and the day arrived to head over to Thrifty Stitcher HQ in Stoke Newington. Travel links are simple and they are very, very clear on the website with great photos to help you locate landmarks. I traveled to Highbury and Islington station, hopped on a local bus and after 2 minute walk from the bus I was there.  I entered the building and was greeted by Claire-Louise aka 'The Thrifty Stitcher'. The room had a lovely set up with a big sewing table, sewing machines, over-lockers, samples, fabric, toiles - everything you would expect to see in a sewing room!  I was soon settled down with a cup of tea and chatting away. Some other sewing bees arrived (four in total and the maximum size class) and soon we were all examining each others fabrics. With the creative juices flowing the class began....

Now the plan is to split the day over a series blog. I had to take in a great deal of tips, hints and skills and to get the full benefit from it and not to lose you by reading streams of text, I will break them down into smaller chunks. So, this blog starts at the beginning by focusing on patterns and pattern cutting...

'A' line skirt pattern
The stitching aim of the day was to make an 'A' line skirt. This being my first pattern I have ever cut I was both a little excited and nervous. The skirt pattern is by Butterick (B4461). However before the pattern was released from the packet we needed to be measured. With Claire-Louise armed with a tape measure I had my waist and hips measured. Top tip: If taking measurements, take the measurements from the side of the person and not the front - it will save a lot of embarrassment when you have your face in a strangers crotch! 


Size guide

To select the size of the pattern look at the waist and hip measurements closest to your size (normally located on the back of the packet). If you like a snug fit, go for a size down or if you like a loose fit go for a size up. Top tip: Check the waistline on the pattern itself as it actually tells you how much 'give' it will have once made. A great blog that goes into more detail is by 'Tilly and the Buttons' called 'How to select your sewing  pattern size' (link below). Top tip: Don't worry of you make it larger - it is generally easier to take fabric away than add in. My measurements were a 30" waist and a 41"hip. After checking the guidelines we decided to follow a size 14 pattern (as I like a snug fit) and add an extra 2" to the waist.  To add the 2" to the pattern add 0.5" the front and back piece. (NB: this calculation is based on 2"/4 as you work on four pieces of fabric). 

Adding width
With the packet now in my hands, I opened it and started to make the personal adjustments to the pattern. I added a half of an inch to the front and back piece. To ensure it blended nicely back into the pattern I used a dress making curved ruler and a pencil. Once this was done I cut out the pattern - slowly and accurately. Once cut out it was now time to look at the length. As I wear 1950s/ vintage style clothes I wanted an on-the knee length. To achieve this 5" were added to the pattern. Now I thought this would just be added to the bottom of the pattern - WRONG! On the pattern there is a line that says
Adding length
'lengthen or shorten here' - this is where the additional 5" will be added. Tracing paper can be used but we used a dressmakers square patterned paper. The pattern was cut along the line and pinned to a sewing board that had inches clearly marked on it. The extra pattern paper was inserted and taped (using scotch tape). To ensure continuity a small side piece had to be added and again I used the dressmakers ruler to smooth the curve. The extra paper was cut off and ta-dah I had my finished pattern.

Being my first item made from a pattern I was surprised at the amount of preparation it took even to make the pattern the correct size. I took for granted that a pattern was taken out of the packet, attached to fabric and that was it - boy, was I wrong. Even making sure the pattern fits correctly by adding extra inches to the waist and length takes time but I suppose it's like all things - make sure the preparation is correct and the rest should be easy (well, you will have to wait for the next bit!). Next time I'll look at the fabric and starting to make the skirt!

Top tips:
  • Equipment: Pattern, dress makers ruler (or a long ruler), hemming ruler, tape measure pencil, scissors, calculator and a cutting mat. You may also need additional dressmakers paper and scotch tape depending if any alterations are required
  • Take body measurements from the side and not the front - it will save a lot of embarrassment when you have your face in a strangers crotch!
  •  Don't worry of you make it larger - it is generally easier to take fabric away than add in.
  • Check the waistline on the pattern as it actually tells you how much 'give' it will have once made
Useful websites/ blogs:


I'd would like to say a massive thank you to Claire-Louise and to all at The Thrifty Stitcher for a wonderful creative day - I will definitely be back for the dress making day! 

Happy Pattern Cutting x

Friday, 15 March 2013

'Lindy Lou's' - Belle of the South-East

Hello Ladies and Gentlemen,

Earlier in the week, when my long weekend was fast approaching, Husbandy and I were wondering what to do. Husbandy was looking at eBay and noticed I had put some vintage clothes in the 'watch list' (or hint list as I like to call it!). He started to look at what they did more closely and contacted the seller to see if they had a shop and to our delight they do! So yesterday, I phoned 'Lindy Lou's' to see if they were open and when they said 'yes' we were ready and heading East to Rayleigh, Essex. 90 minutes later we arrived at the quaint town of Rayleigh and wondered around and at the top end of the high road there it was, 'Lindy Lou's'.


Lindy Lou's shop front
We walked in and were presented with an array of vintage replica (and some original) clothes for both men and women. I was in vintage heaven as there was such a wide selection of clothes to choose from! After having a look around and selecting a few pieces to try on we started chatting to the owner. We were talking about the store (which had only been open 7 weeks) and the replica garments. The replica garments are all made in England and from original 1940s/ 1950s patterns and made by very talented seamstresses. For men the items range from trousers, shirts, jackets, hand knitted jumpers, hats and some original vintage items. For women again the range from hand knitted jumpers, cardis, skirts, blouses, dresses, head-wear and a whole range of accessories. 


I tried on some swing trousers, Freddies of Pinewood jeans, blouses, a wiggle dress and an emerald green jumper. I fell in love with all the items - especially the swing trousers  - but they were sadly too short. When the owner saw this she said that we do make made to measure so sizing is not an issue. This made my day as swing trousers always come up as ankle biters on my long legs and at last I have a solution! After trying on my items, Husbandy tried on some great pieces. In the end we walked away with three jolly spiffing things and will definitely be back for more! Afterwards we went for a wonder around Rayleigh and it has a great high street. There was a wonderful vintage cafe called 'Coles Vintage Tea Rooms' and next time we will be going in there!


With the goodies...
'Lindy Lou's' is a little gem in Southern Essex. It's a well presented shop with friendly owners who are more then happy to help. The bonus with this shop is that the clothes are made in England and by being made in England the clothes can be made to measure. There are also some great original vintage pieces. If you're into vintage, rockabilly, swing, jive - anything to do with the 1940s/ 1950s this is a great clothes shop for you and well worth the trip. Also don't forget to check them out on eBay - eBay name 'qbiffer'.

Lindy Lou's Flyer
Nearest Train Station: Rayleigh (trains leave London Liverpool Street approx. every 15 mins). Only a 8 minute walk from the station. 


Thursday, 14 February 2013

Eyebrows... the Vintage Way

Good Evening Ladies and Gentlemen...

Way back in the early noughties I graduated from university. I couldn't wait to get my photos of the graduation day. When they came through the post I took one glance and almost died as I never had realised how bad my eyebrows were. They were like two privet hedges perched on my forehead. For some reason this photo captured them in all their hairy glory and at once I had to attack them with a Flymo. Since moving to London eyebrow maintenance has been much easier as there are plenty of places that do brow-maintenance and my preferred method is threading. I actually find threading almost relaxing. Threading is by far the best way to remove those pesky hairs - it removes all the fine ones and gives you a great shape... that is if you don't want anything other than a standard TOWIE. Since following the alternative look I have asked numerous different threading beauticians to do the 1950s arched eyebrow.... but to my disappointment all have said "no".


Before
Recently I found out that Lipstick & Curls were doing a Vintage Mini Makeover over at What Katie Did in Notting Hill. Lipstick & Curls specialises in vintage hair and make-up and they featured in lots magazines, worked with a number of different vintage clothing brands and have worked with celebrities including the late great Amy Winehouse. I read what delicious treatments were on offer and to my delight I noticed 'Brow Grooming Session, Pluck, Shape and Style!' on the list. This could be just the ticket for the style I've been after for ages so I made an appointment and allowed the little buggers to grow like a meadow.

Eventually the time of my appointment came which was handy as I had the Amazon Rain-forest growing on my brow. I got ready in usual fashion, applied make-up but held back on the eyebrows. It's surprising how much eyebrows finish off your face and I did feel a little naked when I left the flat. Here is a picture before (this is approximately eight weeks growth):


Before


For those that don't know I thought I'd better let you know a bit about What Katie Did. What Katie Did is a faux vintage lingerie and hosiery boutique located at the north end of Portobello Road, Notting Hill. WKD offer the most gorgeous selection of underwear ranging from bullet bras to waist cinchers to stockings. They also sell Besame cosmetics and Bernie Dexter pieces (I was lucky enough to receive the Bernie Dexter Scarlett Poppy dress at Christmas). WKD is one of London's retail gems tucked away in a discrete location under the Westway and in my opinion independents like WKD make London... well... London. In the past twelve months I've bought some gorgeous lingerie and the best stockings and hold ups and it's a real pleasure to shop there. The girls are always friendly and helpful (and stunning). On this occasion Katie herself was there and it was a real pleasure to meet the lady who is the inspiration for the lingerie and hosiery.

As I was there I tried on a few things and of course I was itching to buy but January/February are not good months for my bank balance. So I finished my cuppa and got myself ready for preening. I was greeted by Amanda from Lipstick & Curls. She sat me down and started plucking my eyebrows... I felt a bit sorry for her as they were very untidy but she charged on and after 15 minutes the job was done! Verdict...... WOW! Amanda had given me the perfect eyebrows, she had finally given me the look I have been after for ages!


After
I'd like to say a massive thank you to Amanda of Lipstick & Curls and to all at What Katie Did for a wonderful morning. Please, please, please get together again, I will be first to book. 

Happy Eyebrows!x

After

Tuesday, 5 February 2013

Rockalily Cuts and Pink Flashes!

Good Evening Ladies and Gentlemen,

A subject that always has been close to my heart (or should I say my head) is my hair. Since being a teenager I have been obsessed with it - from the colour, to the cut to the style. I would describe my natural hair as dark blonde and fine and a bit volume-less. In my teenage years and still to this day, I'm always looking at products to help add volume to my hair starting with shampoos and conditioners and then styling products. One thing I have always loved is the excitement of the hairdresser experience. From the time I make the appointment I think about what to have done: short, bleached, red, trimmed, highlighted - I'm sure I bore everyone to tears talking about it! For a while now I've been going to Rockalily Cuts on Kingsland Road, E2. 

Rockalily Cuts, Hoxton

My latest visit was at the weekend; I booked it weeks ago and have been looking forward to it ever since. I showered, dressed, put headscarf on (to hide my dirty great rootz) and off I trotted. Transport links to the salon are super with the nearest overground station being Hoxton (and there's tons of local buses).

As soon as you grace Rockalily Cuts you see straight away its like no other salon you've been to before. It's totally unique and very special. Every effort has been made to make you feel relaxed and comfortable. There is real attention to detail in making the shop look and feel different to the norm; it's like no other salon you've been to. I was offered a nice homely cuppa (I've been offered Babycham before) while I waited for the gorgeous Lucie.

Roots 'r' us
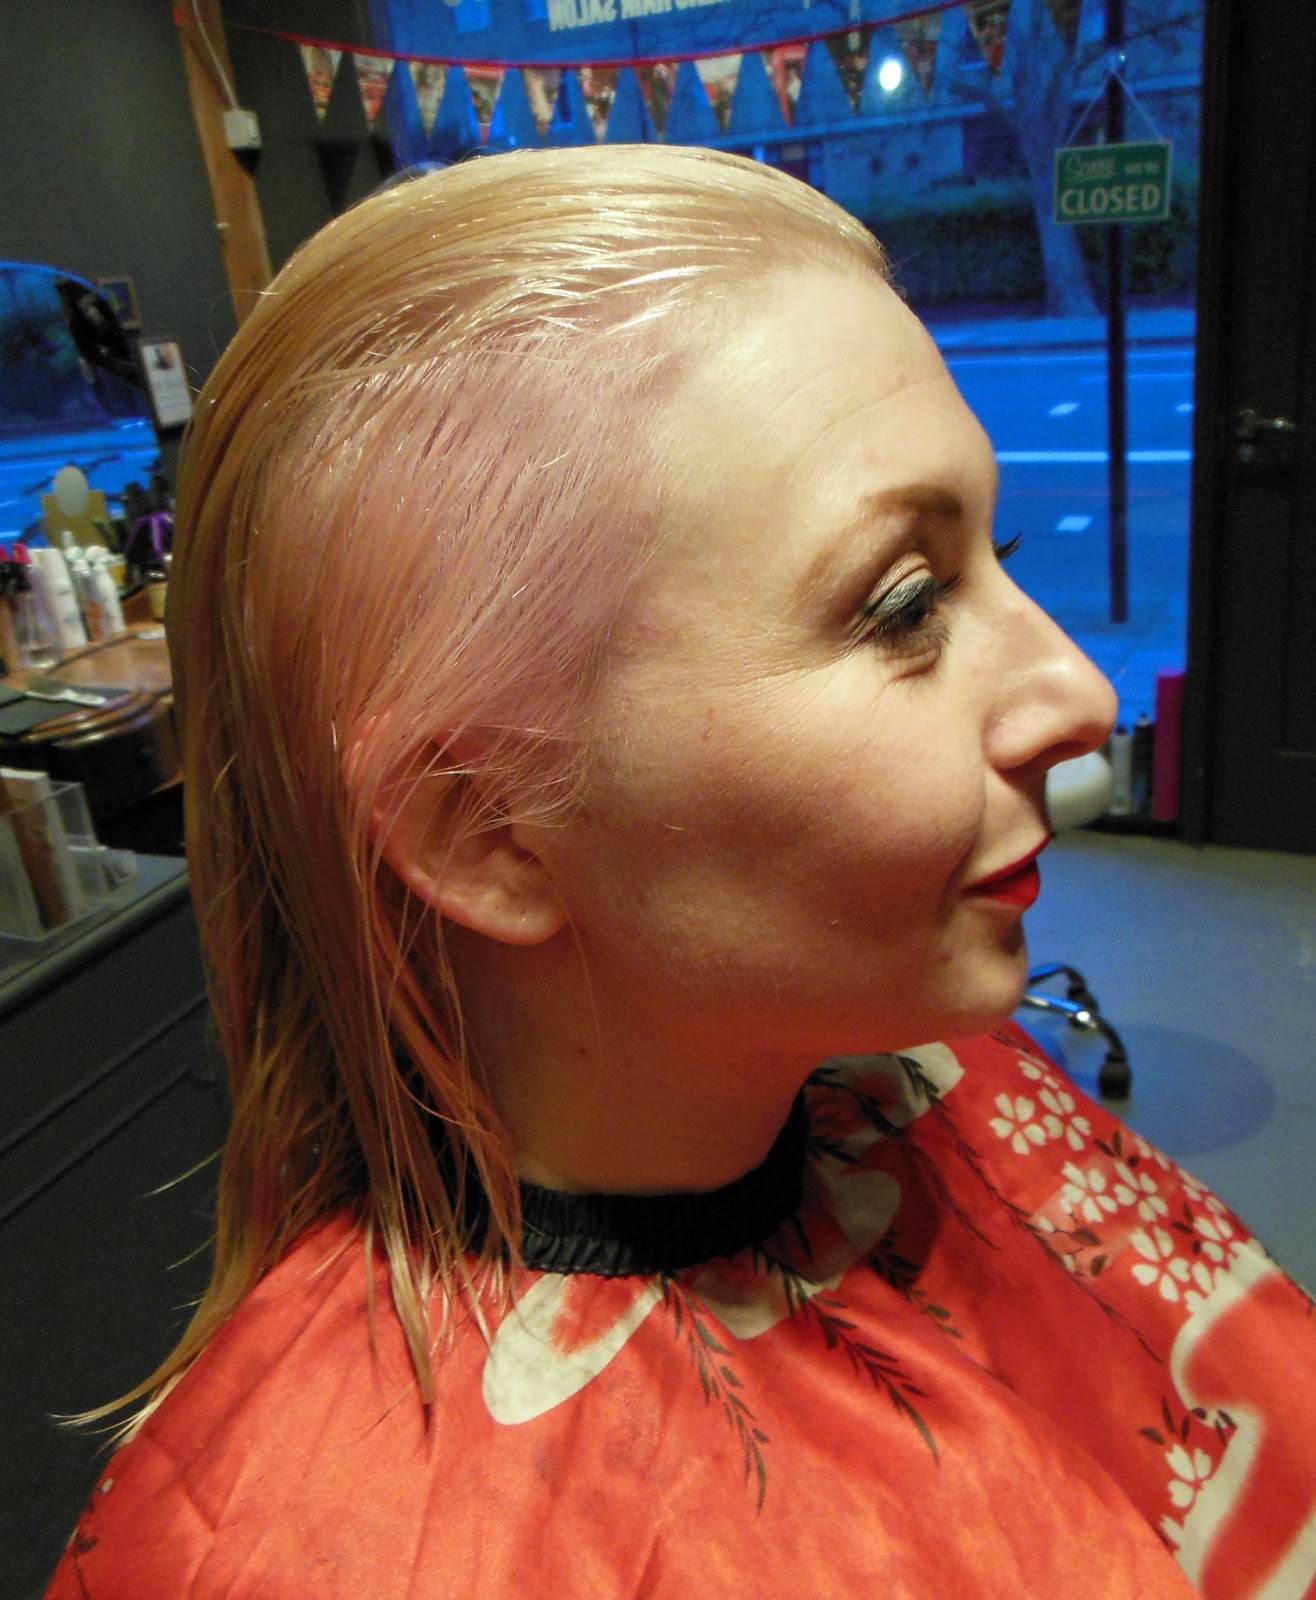
Lucie (stylist and creator of hair magic) ushered me into her chair and told me to whip off (oo-err) my headscarf. I did and revealed some of the longest roots known to man. To put it in perspective they were longer than some motorways; but then I haven't been for 16.. that's right, SIXTEEN WEEKS! This is definitely too long and I will try my hardest to go at least every 10-12 weeks in future. Lucie went on the attack and began mixing the colour to banish the roots; then she applied enhancer and I sat there cooking away like a cupcake.


Enhancer added

Whilst the colour was doing its thing Lucie and I chatted about having a pink flash on the underside of my hair. Now I have been talking about this for months and months but when it comes to hair I'm a bit of a wuss. Sounds daft doesn't it? I have a tattoo of a half naked pin up girl on my leggy and I'm worried about a lil' splash of pink in my hair... so I thought funk it and decided to go for a candy-floss pink!

Pink flash

So after half an hour in the oven it was time for my hair to be washed. It was a wash combined with a lovely head massage... very relaxing. Lucie then parted my hair ready to add my pink flashes! As she was applying the dye to my locks I started to panic a bit because out of the bottle the dye looked more like lobster colour! As soon as it went on I wanted it off but Lucie and Emma were superstars and helped put my mind at rest reassuring me it would all sort itself out. Of course they were right and it was candyfloss pink perfection. I felt very embarrassed for my flip out but was over the moon that it had all gone to plan; sorry ladies, I should never have doubted you!


After the colouring Lucie then carried on with my haircut. I have the utmost respect for her, she is clearly very talented and before long I was sporting a new doo. She dried, curled and then styled my hair in to two perfect victory rolls...... ta-dah, I was complete. My hair was immaculate - creamy blonde, candyfloss pink flashes, perfect cut and styled to full vintage glory. 

Rockalily Cuts is a unique salon in East London - I don't think there is anywhere else quite like it. It is not just a hair salon, it is a place where you go to relax, make friends, chat and when you leave you are guaranteed a truly magnificent cut, colour and style. I actually look forward to my hair growing so you can go back again. I only found out about Rockalily Cuts by chance. I was on the train to Manchester last year and I got chatting to a girl who told me all about it. If we haven't started talking I may never have known about it. 

Thanks to Ree Ree, Lucie and the team for a great day...see you soon x


Vintage magic