Showing posts with label sewing. Show all posts

Sunday, 16 March 2014

The Spring Knitting and Stitching Show - March 2014

Hello Ladies and Gents and how are you on this glorious March day! The sun is shining, the sky is blue... maybe spring is finally on its way :)

Last week, Husbandy and I were on vacation and we planned the days to make the most out of the March sunshine. On Friday we wanted to stay in London, so I decided to head to the Spring Knitting and Stitching Show in Olympia. It's an event held for the keen knitters and sewers over four days with numerous stands as well as free courses and other courses and workshops. I wanted to go last year as that is when my passion for sewing started, but sadly couldn't make it. However, all change for this year, so armed with my crochet hook, yarn and money I got on the bus and travelled to Olympia, West London.


On arrival I asked where to purchase a ticket. The man ushered me to the queue and I waited patiently with all the other excited people wondering what treats were in store. Before I got to the front this lovely lady gave me a complimentary ticket! This made my day and also meant I had more spending money inside! I thanked her numerous times and went on into the event.

The first thing I did was buy a programme so I could suss out where the knitting stands were. I know I'm into sewing but I'm currently undertaking a top secret crochet project so before I embark on sewing again, I thought I best stick to the current project in hand. With the stands identified I wondered around - glancing at the stands and
Goodies!
talking to the people running them. After a first walk through, I spotted the Quilters Guild - I chatted to them for a while and bought a raffle ticket as there was a stunning quilt as the first prize (sadly I didn't win). They were also letting people try machine quilting and the piece you made went to the Project Linus UK. I stitched some pieces together and now know my next project will be a quilt for my bed :)


After wondering around again, I went back to one stand called Woolie Batt that sold British made wool. I loved the fact this wool is sheared, woven and spun in Britain - a truly British made item from start to finish. I also loved the fact it showed the breed of sheep next to the yarn. It was a delight to see undyed yarn showing the wools natural beauty. I'm currently using Debbie Bliss blue faced leicester double knit for my top secret project and now pleased to be using Double Knit Organic Hampshire Down Wool too - delightful :)


British Wool!
After my purchase I went to a crochet group and made granny squares! It was pleasing to see people of all ages sitting together making granny squares. I also picked up a really handy guide on how to crochet - although I will need to teach myself the English abbreviations on how to crochet as I've been learning the American way! I couldn't resist the offer to sign up to the Simply Crochet magazine... I can't wait for the next issue to give me some great hints and tips!

All in all I had a great day just looking at all the yummy fabrics and delicious yarns. There was also displays of people's work - all very creative and inspirational. I'm glad I went and to all those novices I would recommend going to future events!

Happy Knitting and Stitching x

Sunday, 2 February 2014

As if learning to sew wasn't taxing enough... now crochet too!!

Hello Ladies and Gents,

As if learning to sew wasn't taxing enough, I decided I wanted to teach myself
'Roseanne'
crochet as well. I know I should concentrate on one before moving onto another, but after watching 'Roseanne' (with the lovely Dan Goodman) I just could not stop thinking about the afghan blanket (and Dan Goodman) that was hanging on the back of the sofa in the living room. With this idea fresh in my mind I purchased a fabulous pattern I could follow... but then thought 'I can't even crochet, let alone make a blanket'. 


Crochet Equipment
With my reigns now back on, I trawled the internet on how to get started in crochet. I found lots of good websites and tutorials on You Tube, but it was the lovely people of twitter who came to my aid on the tools I should use to get started. I was advised to buy a size 4 hook and 4-ply yarn. Armed with the basic knowledge of what I would need, I bought a Clover size 4 hook and some 4 ply acrylic yarn. Top Tip: I bought my first bits from eBay and it cost me less than £8 - a cheap lay out cost to test drive the new hobby in my opinion.

The hook and yarn arrived and following the tutorial on You Tube I wanted to follow (link below) I set out learning a few basic steps. The hardest bit was actually holding the yarn and making sure the tension was right. This did not come naturally, but after persevering I had learned how to do chaining. A chain in the crochet world is a when you have a slip knot already on the crochet hook and pull the yarn through to make a chain. After doing this for a good half an hour, I moved onto what is known as 'fourth from the hook' in patterns or 'double crochet'. This I found challenging, so will stop here as I need to go and practice the double crochet as apparently it is the most used stitch in crochet!

Happy Crocheting x

P.S. I need to make a storage case for crochet kit so will be doing a blog on that soon :)

Top Tips:
  • I bought my first bits from eBay and it cost me less than £8 - a cheap lay out cost to test drive the new hobby.

Useful Website:
  • Goodknitkisses. Beginner How to Crochet - Lesson 1. 
    • http://www.youtube.com/watch?v=mXmRm1ryXUQ
  • Crochet Hooks You 
    • http://www.crochethooksyou.com/
  • I Knit
    • http://www.iknit.org.uk/

Sunday, 19 January 2014

Finishing Off and Catching Up... oh and Happy New Year!!

Happy New Year Ladies and Gents...

Firstly apologies for the lack of love I've been giving my blog... life has been getting in the way... so I'll do my best to update you with what projects I've been up to and other adventures along the way :)

My last blog was about cutting out the fabric and practicing button holes for the Tofino Lounge Trousers. Now with all the pieces cut out ready, I needed to tidy the edges of the fabric so they didn't fray. I've mentioned before I don't have an Overlocker so I use a zig-zag stitch to stop the edges from fraying. To do this, you put one part of the zig-zag stitch into the fabric and the other over the edge. A great blog which shows this is Tilly and the Buttons - Finishing Seams - Zig-Zag Stitch. Once I had gone around all the pieces of fabric, I pinned the fabric (right sides together) aligning the notches. Once pinned, I took the first leg to the sewing machine, sewing 1.5cm along the seam. I did this to both legs. With legs had been sewn now came the tricky part of sewing them together!

So with this in mind, I re-read the pattern. I inserted one leg inside the other (with one leg right side out and the other inside out), lined up the notches, pinned and sewed following the 1.5cm allowances and as per the pattern. Top Tip: Please make sure you follow the 1.5cm allowance... I think mine varied so when finished the trousers were a little snug. Once sewn together, I pulled the leg out and they actually looked they the beginnings of some trousers... smiles all round :)

The next steps was to make the waistband. As my fabric was light-weight I bought some interface to give the fabric more strength - specifically around the the button holes. I purchased some interface that would be ironed on. Top Tip: Practice ironing the interface on a bit of scrap fabric. This will ensure you iron the right side to the fabric and also check out much heat needs to be applied to make it a success. Once I had done a test run, I cut the interface to fit over the buttonholes and ironed accordingly. Once completed, I made the buttonholes (more information on buttonholes on my previous blog Preparing for Tofino Lounge Trousers) and followed the pattern on attaching the waistband to the legs. 

Waistbands and I don't seem to get along very well. It took me over an hour to understand what the pattern meant. What I worked out was that the waistband goes over legs and not just attached to the top. This is hard to explain, but from the pattern I thought it was pinned to the top - not that the waistband was actually attached up-side-down, wrong side out and over the legs - I hope I've explained it ok! Top Tip: When sewing the waistband don't forget to leave a big enough hole at the back to allow the tie belt and elastic through. Ok, so waistband and legs all attached and nearly finished - hurrah!

Here is when I had a change of heart and made the tie belt. I was lucky enough to have red fabric left over from when I made the red circle skirt so cut out the pattern and fabric and started to make the belt. Once sewn, turn the fabric inside out - please allow some patience for this - it made my hands have cramp but it is worth it. Top Tip: To make sharp points gently push the ends with some fabric scissors but don't push to hard or you'll go through the fabric! Once the belt was complete, I inserted the elastic through the opening in the back of the waistband. Top Tip: When threading the elastic pin one end with a nappy pin to the fabric and put a good size nappy pin on the other end. This makes it easier to thread around the waistband. Once threaded, hand sew the ends of the elastic together - make sure you do this securely. Now thread the tie belt around and hand sew the hole at the back of the waistband. The only thing left to do is hem the trousers and ta-dah - I had finished my Tofino Lounge Trousers all ready for Rhythm Riot!

All in all I would say the trousers took me about 10 hours or so. I found the pattern quite taxing but as a beginner I thought I did quite well. The most challenging part I found was connecting the waistband to the trousers and making the waistband align when stitching in the ditch (stitching in the ditch being sewing in the seam line). I failed badly on this part and had to hand sew the inside part of the waistband as I had sewn this when using the sewing machine. Again, this will take practice and as the trousers are so comfortable I will be making another pair!

Top Tips:
  • Equipment: Fabric, pins, pattern, scissors, sewing machine, button hole presser foot and thread - oh and patience!
  • Please make sure you follow the 1.5cm allowance... I think mine varied so when finished the trousers were a little snug.
  • Practice ironing the interface on a bit of scrap fabric. This will ensure you iron the right side and check out much heat needs to be applied to make it a success
  • When sewing the waistband don't forget to leave a big enough hole at the back to allow the tie belt and elastic through
  • To make sharp points gently push the ends with some fabric scissors but don't push to hard or you'll go through the fabric!
  • When threading the elastic pin (using a nappy pin) one end to the fabric and put a good size pin (again, using a nappy pin) on the other end. This makes it easier to thread around the waistband
Useful websites:
  • Tilly and the Buttons:  http://www.tillyandthebuttons.com/2013/03/finishing-seams-zigzag-stitch.html
  • 'All you need to know about machine and hand sewing - Sewing Basics' by Sandra Bardwell
Happy Sewing x

Sunday, 6 October 2013

Preparing for the Tofino Lounge Trousers by Sewaholic... including Button Holes

Tofino Pattern by Sewaholic
Hello Ladies and Gents...

With my sewing machine clean, I could start to prepare the fabric for the Tofino Lounge Trouser pattern. I had been out to my local fabric shop (see link below) to select some gorgeous fabric for this pattern. I hunted through the racks - through gingham and flannel and cottons and spots. I wanted to used gingham for the project and spoke to the lovely shop lady who gave me some great advice. She said that gingham would look good but as I was a novice she thought a repetitive pattern would be best and move on to gingham after a bit of practice. With the hunt still
Tools for the job
on, I spotted a lovely pale blue with pink flowers on - perfect. I purchased the fabric along with a hem gauge and elastic. Happy with my purchases I headed straight home to wash the fabric ready for cutting!


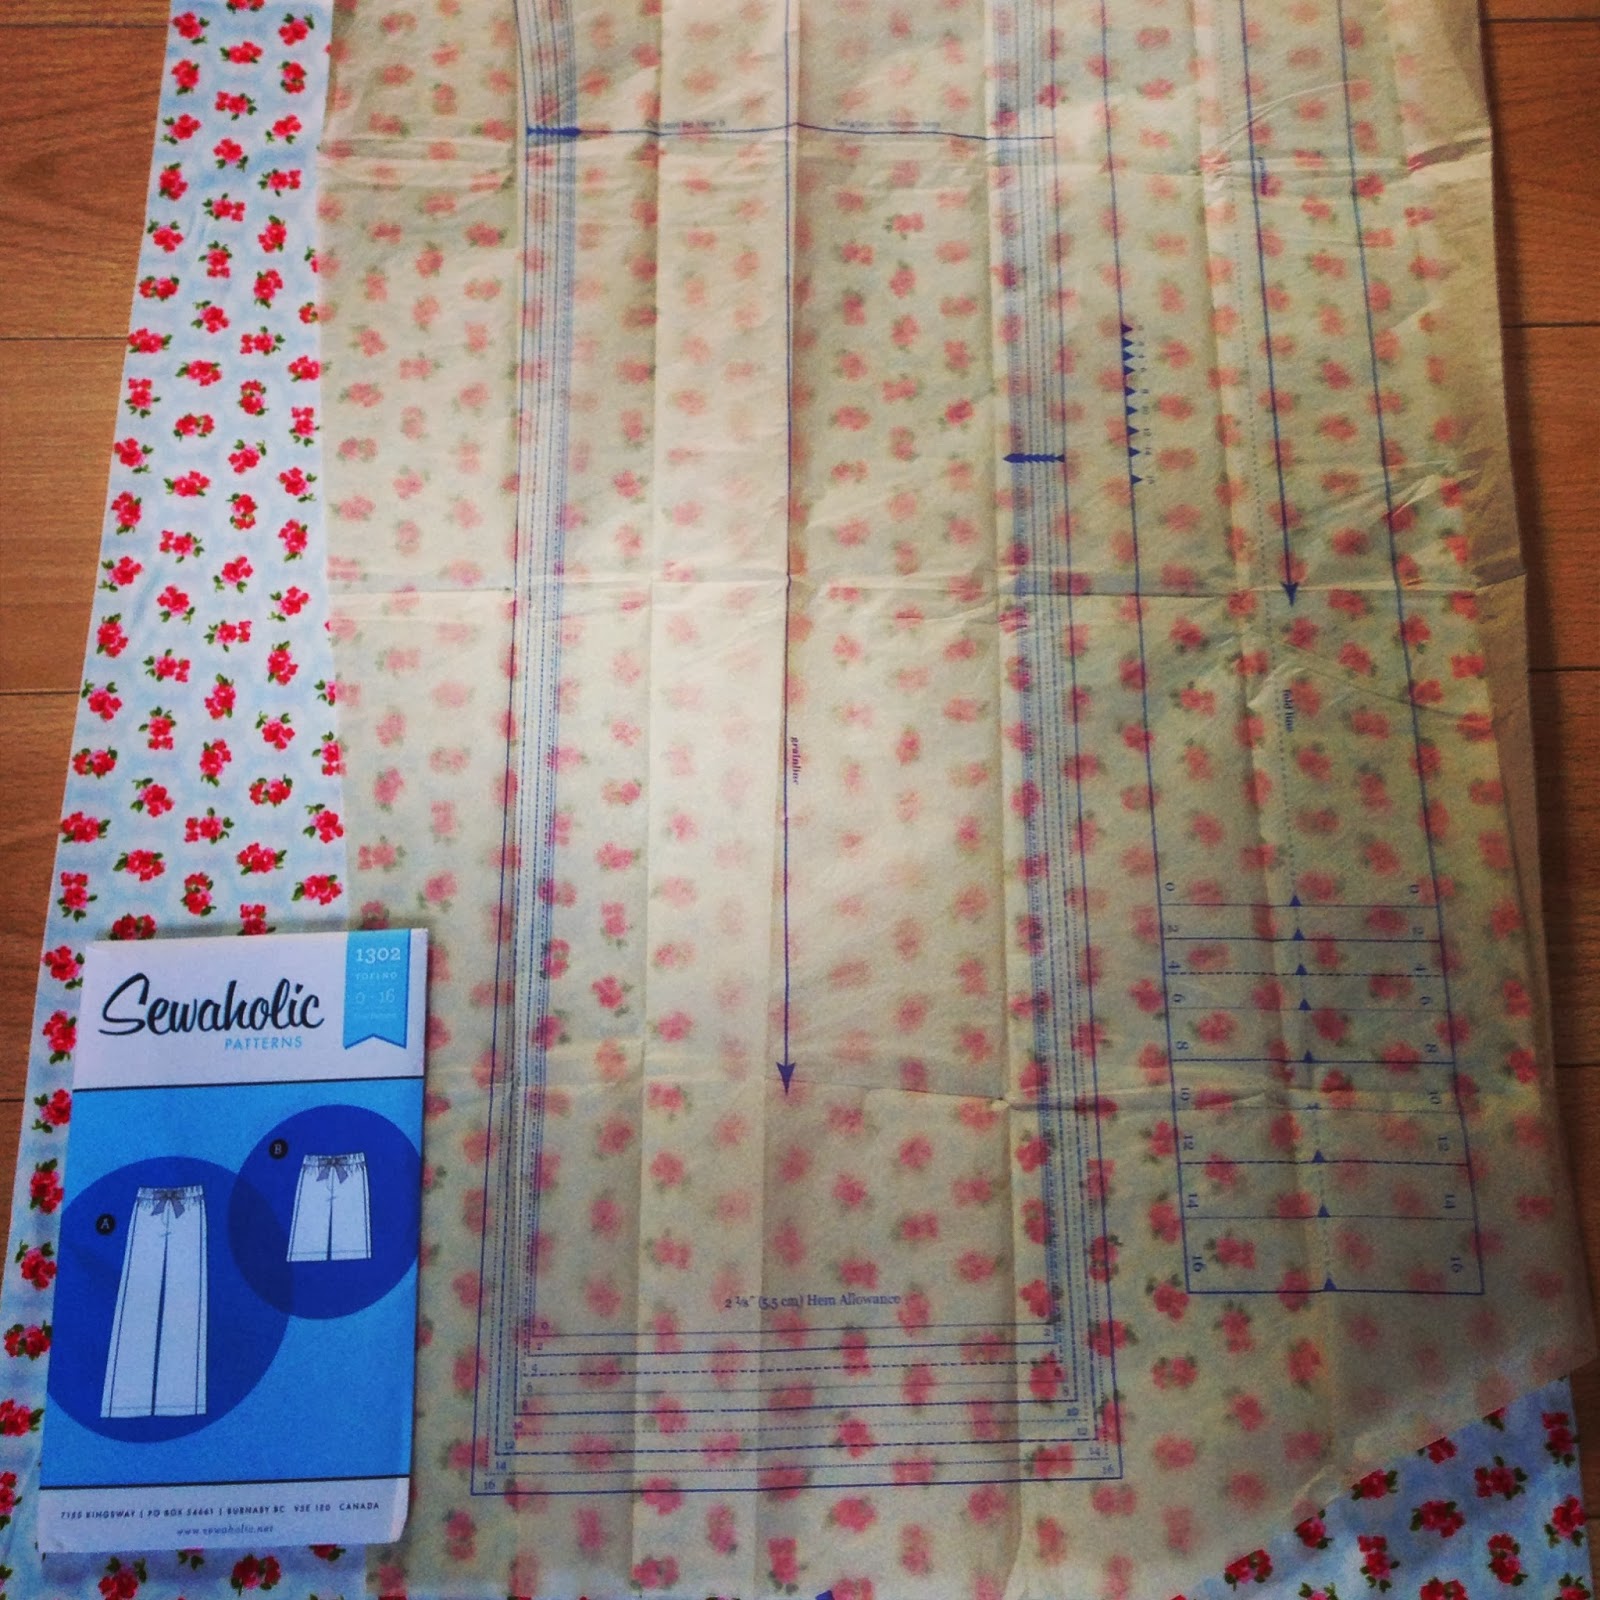
After looking at the instructions on how to lay the fabric with the pattern on it, I had a dilemma on what size to cut. As mentioned in an earlier blog, this pattern is specifically made with pear shape women in mind. I looked at the size chart and could see I fluctuated between an 8 and a 10 and then to confuse me even more I looked at the finished measurements and couldn't fathom out how a 40inch hip would need a 47.5inch when finished. With me starting to worry I hadn't bought enough fabric I remembered that 'Tilly and the Buttons' had a great blog on this (see link below). After reading this (and
Checking the pattern fits!
understanding that although you are a certain measurement you wouldn't want your clothes the same size as otherwise it may stop  you breathing), I opted for a size 10, although this did not stop my dilemma as I bought fabric for a size 8! I lay the fabric on the floor and roughly lay the uncut pattern on the fabric, and phew I had enough! Top Tip: Check sizes before purchasing and also look at how long the finished item is - I was so focused on the bust/waist/hip measurement that this slipped my mind. I was lucky that the finished garment is 33 inches so just long enough for my 32inch pins.


With size selected I got snipping! I snipped all the pattern pieces out (I'm not using the contrast bits this time...I've not made a pair of trousers before and I checked it can be left out but there is always next time) and ironed it on a gentle heat. With my fabric and pattern ready, I pinned the pattern to the fabric and cut out the pieces including the notches. With the pieces all ready to go I referred back to the pattern to see how to put it all together. One of the pieces requires a button holes to thread a belt through (ok, I may do this, but piping is definitely out) and haven't done button holes before so instead of starting out sewing the pieces together, I thought I would practice button holes.

Button Hole Presser Foot
Before I started to sew I checked the manual to see if I had the right presser foot along with how to do it. I was in luck that I had the presser foot but the manual seemed a little unclear so I dug out my sewing book which it explained in better detail. The button hole foot acts as your guide and has a nifty measure lines on it. I don't actually need it for buttons, but if you do measure your buttons and add 0.3mm to ensure the button will slip in and out with ease. With the button hole foot on and fabric ready (using scraps of what I had cut out) I set the stitching in motion. My first attempt, well, was ok but it would be for a massive button. Also as my fabric is thin it made the button hole quite weak. Top Tip: If using a light weight fabric you may need some facing to strengthen it. I don't have any so used a bit of left over
Success!
wadding from my quilting project. I made a wadding sandwich and tried again, and again and again and finally the third time was a success. The second time when I went to cut the gap to make the button hole I caught the thread so weakened the button hole. The size of the hole was 1inch x 3 stitches - this was the size specified and now I've practiced I think I will be good for the real thing... best order some facing ASAP!


I can't stress enough how importing preparation is on sewing projects. If you're like me you just want to get on your machine and start stitching away. Sadly though, if you don't prep properly then the actual stitching will become more tricky. I feel now that with my fabric cut and by practicing button holes I'm now ready to move on to stitching the trousers together! Until next time...

Top Tips:

  • Equipment: Fabric, pins, pattern, scissors, sewing machine, button hole presser foot and thread
  • Check sizes before purchasing - this will ensure you buy the right amount of fabric! If in doubt, ask the shop assistant or double check!
  • Look at how long the finished item is - I was so focused on the bust/waist/hip measurement that this slipped my mind. I was lucky that the finished garment is 33 inches so just long enough for my 32inch pins
  • Button holes: If using a light weight fabric you may need some facing to strengthen it. 

Useful Websites/ books:


Happy Prepping x

Saturday, 5 October 2013

The Big Clean Up.... Sewing Machine Style

Hello Ladies and Gents...

Sewaholic Pattern
Today was going to be the day I started on my new sewing project - my Tofino Lounge Trousers (aka pyjamas) by Sewaholic. I found this pattern a little while ago and with Sewaholic specifically aiming their patterns at pear shape ladies I bought it and I've been looking forward to making it since then. I finally found some time so dug out the sewing machine. To my disgust I had put away my Singer covered in red fluff and dust (from making my red skirt...Seeing Red... Red Circles of Fabric)... the poor thing. So before I did anything I got the manual out to see how to maintain my machine.

I've cleaned it before, but it was a good four months ago and with the
Before....
thought of embarking on a new sewing project I wanted the machine to be lint and dust free and stitching like a pro. Top Tip: please check your manual on how to clean your machine as they are probably all a little different. I got manual, read through it, got all the necessary tools and I was ready to go!

The first thing is not to have the power on just in case - you don't want to electrocute yourself. With the power off, I took off the presser foot and the needle. Once removed, I started to unscrew the needle plate. When I took off the needle plate it was full of lint and grease - yuk. I took the little brush that came with my machine and with a lot of brushing and a few big breathes this part of my machine was clean.

Bobbin House
Now came the tricky part - to clean the bobbin house or hook. Remove the bobbin and flip back the retaining arms. Remove the hook race cover and hook and clean with a damp soft cloth. Top tip: Use one you don't mind getting greasy and also remember to use one that is soft and damp. Once cleaned, place to one side. Gently wipe the inside of the machine to remove any dust or excess grease. To lubricate your machine I use the Singer Super Oil which is specifically for sewing machines. Drop a couple of drops onto the hook race and move handwheel a few times. Once happy insert the hook and the hook race cover. Snap back the two hooks to hold the bits in place. Insert your bobbin, replace the needle plate, re-connect the presser foot and
Hook Race Cover & Hook
needle (it makes sense to replace it with a new needle as you've done all the hard work) and wipe down the whole machine and you are done. 
I couldn't wait to use it so I gave it a test run... it stitched like a dream! 

After...
I'm so pleased I did it because now I know that when I go to use my sewing machine, it is ready to go with a fresh needle and dust free. It literally takes about 15 minutes - 15 minutes well spent in my opinion - so what are you waiting for - get out your sewing machine and manual and get cleaning!

Happy Cleaning x


Sunday, 22 September 2013

Twenty Counties of August... Week 2

Hello Ladies and Gents,

With Week 1 of our vacation being a truly wonderful week (see link here for the
View from Twinwood
blog: Twenty Counties of August... Week 1), Week 2 began in earnest however we weren't so fortunate with the weather. It was the bank holiday weekend and as usual the rains were back. However, we had planned to go to Lindy Lou's in Rayleigh and we weren't going to let the weather change this. With umbrellas packed we drove to Rayleigh passing through Hertfordshire and Essex to get there. The weather hadn't eased up so to cheer ourselves up we went to Coles Vintage Tea Room for tea and cakes. Now, I've previously written a blog on this delightful place (Link: 'Coles Vintage Tea Room') but I'm going to re-iterate how wonderful this place is. It's a small little cafe with friendly staff and delicious food. The scones are the best we have ever had - even after being in Devon!
Husbandy at Twinwood
Jacket: Lindy Lou's
After indulging in a hearty feast, we braved the storm that was blowing across Essex and went to Lindy Lou's. Again, I've mentioned this hidden gem before (Link: 'Lindy Lou's') but we had to collect a jacket they had specially made for Husbandy. We arrived and after speaking to the owners (who are friendly and nothing is too much trouble), Husbandy tried on some trousers and the jacket - the jacket was a perfect fit! Having a garment made to measure at Lindy Lou's does not cost any different to those straight off the peg and with this fitting perfectly it was well worth it! We were in Lindy Lou's for  a good couple of hours and we walked away with a jacket, shirt and trousers and I've ordered a gorgeous 1940s cardi - I can't wait to get it! 


Sunday had arrived and it was Twinwood day! Twinwood is a vintage event
Twinwood: Kai's Cats
with over 60 bands, all manner of vintage stalls, dance lessons, burlesque, dancing, tearoom, vintage beauty salon - a truly vintage experience that lasts three days. Husbandy and I only went on the Sunday so we got ready (I would like to note the hair and make up worked well), bought a spare umbrella and traveled to Bedford (this adding the county of Bedfordshire to the list). The place was really easy to find and well signed posted. We pulled up, parked, collected our wrist bands and went and found our friends who were staying there for the whole event. After a quick
Dancing at Twinwood
cuppa, we went down to the main arena. There was a big stage with a dance floor and areas to set up chairs. Stalls were all around the edge of the arena with repro and original vintage clothes. Husbandy bought a great suit from 'Some like it Holy' and I tried on some 'Freddies of Pinewood' and 'Terry Smith Saddle Shoes' (which I'm pleased to let you know I now own). A note to anyone who goes... take lots of cash if you can as there is plenty of treasures to be bought! We watched a couple of bands (one of my favourites being Kai Cats) and after some tea and cake and BBQ we went back to the Hanger for some dancing. We lindy-hopped for a good hour or so but sadly as we were not staying we ventured back to the car and drove home. Twinwood was fantastic and I'd definitely go again...lets just hope we are as blessed with the weather!


Moi at Twinwood
The next few days we stayed in London (we ventured to Richmond so Surrey was now on the list as well as the City of London) just enjoying the sunshine and relaxing. On the Wednesday we went to Islington to see a burlesque show in aid of Dixie Evans week. I had always wanted to see Banbury Cross and I wasn't disappointed - her act as Marilyn Monroe was glamorous and had oozed sex appeal plus she does have the best bum ;). The Host was hilarious with his jokes and mannerisms and all the burlesque acts were captivating and filled the air with exotica and imagination :). It was a last minute call to go and a good one!


Clifton Suspension Bridge
Our last big adventure was to Bristol (and I forgot to add Buckinghamshire from last time). If you've never been to Bristol I would highly recommend it. As this is where we are from (and where we met) we know the City like the back of our hands. After visiting a few old haunts we went and sat up by Clifton Suspension Bridge. The sun shone and it made the bridge, estuary and Bristol look spectacular. After wondering around we then went into the town for a mooch and then decided to make a move home.


Moi and Gromit in Bristol
So there you have it... 20 counties in 2 weeks (we also went to Warwickshire but this was a swift visit)... a lot of happy memories created and a time when I truly relaxed and forgot all about work...it all seems like a long time ago now... but writing this has reminded me of the great time Husbandy and I shared together and how lucky we are. With Autumn now looming its time to get the sewing machine out and make some pyjama bottoms! 


Links to places/ good websites:
List of Counties:
  1. Middlesex
  2. Buckinghamshire
  3. Wiltshire
  4. Somerset
  5. South Gloucestershire
  6. Gloucestershire
  7. City and County of Bristol
  8. Bath and North East Somerset
  9. Devon
  10. Monmouthshire
  11. Shropshire
  12. Herefordshire
  13. Worcestershire
  14. Surrey
  15. City of London
  16. Bedfordshire
  17. Warwickshire
  18. Essex
  19. Hertfordshire
  20. Berkshire
Happy Holidaying x

Sunday, 8 September 2013

Twenty Counties of August... Week 1

Hello Ladies and Gents,

Yet another gorgeous September day...with this sunny weather it reminds
Dartmouth
me of my glorious vacation I had during the last two weeks in August. I went back to work last week and a few people commented on my tan and said 'Where did I go on holiday?' I said 'England...and I either visited or drove through twenty counties of it!' Yes, you read right, I went to twenty counties in two weeks and had a blast! Let me tell you about some of my adventures....


Southern Valley Railway
During July when the weather was so fabulous, Husbandy and I booked to go to Devon...now the day had come so we packed up the Mini and set off...! The sun was shining and the skies were blue - even an overturned lorry on the M5 was not going to dampen my mood...we were off to Devon to start our holiday - first stop, the Southern Valley Railway. We soon ate the miles and passed through Middlesex, Berkshire, Wiltshire, Somerset and arrived in the beautiful county of Devon in time for the 3pm train from Buckfastleigh to Totnes. This beautiful restored railway is seven miles long and passes through some quintessentially British countryside following the River Dart and rolling hills. Husbandy and I were lucky enough to get a carriage all to ourselves so we
On the ferry to Kingswear
relaxed and enjoyed the ride in 193
0s style. Soon the rail ride was over and after eating some scrummy clotted cream ice cream we traveled on to our B&B in the picturesque town of Dartmouth. The B&B was called 'The Captain's House' and it was such a quaint B&B. The room was large with a double bed and en-suite shower room. After a fish and chip supper from the Frying Pan (best chip shop in Dartmouth) we went back to the B&B to dream of Devonshire cream teas and sunshine! 


Goodrington Sands
Morning came and after a hearty breakfast we went down to catch the ferry from Dartmouth to Kingswear to go on another train... this time the Paignton and Dartmouth Steam Railway. This line follows the cost from Kingswear to Paignton and again goes through some majestic countryside. It passes the lovely sea side town of Goodrington Sands which was so colourful with all its beach huts. It also stops at Greenway Halt which is where Poirot was filmed as Agatha Christie did live and write some of her books in Devon! Again we were fortunate to get a carriage all to ourselves and loved the style of
Husbandy at Blackpool Sands
the 1950s decor. On arrival back to Kingswear we got the ferry back across and made our way to Blackpool sands for an afternoon of relaxing and sunbathing.


After another night and breakfast in The Captain's House we had to say goodbye to the lovely little place...we packed up the Mini but before we moved on we had a morning in Dartmouth. There was a band playing in the bandstand and a lovely little market where we indulged in some yummy scotch eggs and hot dogs. After having a mooch
Dartmouth looking over to Kingswear
around we decided to move on to Totnes. Totnes is a little town on the River Dart - a paradise for charity shop hunters, tearooms lovers and sewing bees. Husbandy and I had a yummy Devonshire Cream Tea at the Anne of Cleves tearoom.....my, it was tasty. I also purchased a lovely bedspread from a charity shop. With full bellies we left Totnes to travel to Dartmoor to our next place to stay. 


It was now Thursday and the sun was still shining and reaching temperatures of
Dartmoor Ponies
25 degrees. Husbandy and I decided to have a day on Dartmoor so traveled to Princetown. Princetown is a town right in the centre of the Moor with a prison dating back to the seventeen hundreds. The town itself has a few little shops (a great jewellery shop) and a couple of museums with the prison museum being a must visit. After a short while we drove up further into the Moor parked the car and walked onto the Moor for a relaxing afternoon - seeing no-one but sheep for hours - it was magical! Sadly time
On the Moor
rushed by and we went back to the car to travel all the way to Ludlow to stay with my in-laws and see our little guinea pig who had been there for his holidays. Now to get to Ludlow we travelled through B&NES, South Gloucestershire, City and County of Bristol, Monmouthshire, Herefordshire and Shropshire... making a total of eleven counties so far... wow.


On the Friday we went to Ludlow to visit Pepper Lane Vintage which is a great vintage shop (I've mentioned on a previous blog). I tried on some beautiful items but they were either to big or a little snug so left empty handed this time...but I know I will back again soon. We both started to feel a little peckish so we went to De Greys Tea Room for a spot of lunch. The food in their was scrumptious and the best flapjack I had ever tasted! On leaving Ludlow we went to Malvern (Worcestershire). If you've not been to Malvern there is so much to
Hairdressers in Malvern 
see and do...we wanted to walk to the top but sadly the sun had hidden itself for the day (our only grey day) so we headed for Brays instead. Brays is a shop that has not changed inside since it was opened so is a magnificent store to go to. It has some lovely bits as well as some unusual items of clothing...I picked up a handmade Japanese Kimono...its fabulous and so comfy.


Burgh Island 2008
With the weather not improving we decided to head back from Ludlow to London late on the Friday night so managed to sneak in another county (Gloucestershire) before reaching London in the small hours of Saturday morning. With one week done and with plenty of sunshine we felt we had been truly blessed....Devon is a special place for us...one reason being as its where my gorgeous Husbandy and I went to Burgh Island for our honeymoon in 2008. I hate to say the old cliche but there is nothing like holidaying in England when you have the weather.... I shall leave this blog here and share with you the other counties and delights in a second installment of the Twenty Counties of August...Week 2.

Links to places we visited:


Happy Summertime xx

Sunday, 30 June 2013

Quilting... the Rockabilly Stitch Way

Hello Ladies and Gents,

Well I thought I would update you on one of my stitching projects as it has been a while. A little while a go I shared with you I was starting a stitching project for a good friend and now it is successfully completed! For my birthday my good friend and sewing advisor bought me a sewing book called 'Cute and Easy Quilting and Stitching: 35 step-by-step projects for you and your home' by Charlotte Liddle. I browsed through the pages and found the perfect gift to make for my friend - a baby quilt. After reading the pattern I knew I could make it - especially as it seemed quite simple and you can customise it as much or as little as you want - perfect for me!

Option 1 - Template
So the first thing I did was raid the fabric stash that has been growing over recent months. I looked through what I had and decided that I had enough fabric to follow the pattern so I went for it. My fabric was all ready washed so the next thing I did was iron everything...this ensures the fabric is smooth and easy to manage. I then had to make 30 squares of 4"x4" in order to make the quilt element. Now to do this I started off by cutting out square templates out of paper (option 1), pinning them to the fabric and cutting around them. After a few attempts of this I was concerned the squares would not be even so I thought of another way (option 2) - to use a
Option 2 
metal ruler, a 
rotary cutter and the markings on my cutting board. This method made the squares more even, less fiddly and a lot quicker to do. I cut out 7 plain fabric, 5 spotty fabric and 18 flowery fabric (4 different flowery patterns). With the squares I went on to design the lay out the quilt. Once I was happy with it, I then started sewing with my faithful singer machine (not hand sewing I hear some of you cry!). One day I will hand sew a quilt but this pattern can be done either way but I really wanted to use my
Quilt Pattern
machine as I hadn't used it since I cleaned it and put a new needle in. On using the machine I couldn't believe what a difference it made, so top tip, do maintain your machine and change the needle frequently! My machine has only had light use but even I, a beginner, could tell the difference.


This is where I became lazy and in hindsight I should have done this a bit differently. Instead of pinning a row of squares together, I just took two squares and sewed them using the pressure foot as the guide. I did this for each square and ended up with five rows of six. A thing I'm not lazy about (which I'm sure my husbandy will disagree on) is ironing the fabric as you go. Once I had five rows of six squares I ironed the
The lazy way...
seam to make it lie flat and keep the material in shape. When joining the rows together I did pin the edges and again followed the pressure foot as the guide. With all rows now joined it was starting to look more like a quilt! Again don't forget to iron the seams open. The next trick was to cut out the boarders....


Pinning the boarders
Now this is when I had to use maths to solve my problem. The two shorter pieces were the same width as the length of the quilted pieces (5x4"=20). I cut out two pieces of 20"x2" in the plain fabric. I then cut the long side pieces which had to be the same length as the quilt, plus the boarder - the total measurement being 28".  I cut out two pieces of 28"x2" in flowery fabric. I pinned the shorter boarder to the quilt and sewed with the sewing machine. I then pinned the long boarder and again sewed this on.... I was very pleased with myself at this stage and was having loads of fun doing it! 

My quilt was almost complete and all I had to do was attach the backing piece. For this you use one piece of material in what ever design you like. Again, I used a floral design and cut the fabric 24"x28". I pinned the fabric (right sides facing) and stitched around the edge leaving a four inch gap at one end so the wadding can be inserted. Once stitched I turned the quilt inside out and ta dah... I was finished! And I truly was finished as there has been a change of plan since its original use. Once completed I wanted to show off my work so I put it over a little table we have. My husbandy saw it and loved it so much we now use it as a table cloth! So I best get cutting more squares and making another one for my friend as the baby is due very soon! It just shows how versatile this simple pattern is. Without the wadding it is not a table cloth and with the wadding it could be used as a quilt. Sewing is a great way to express yourself... take a pattern and put your own stamp on it... and you'll have loads of fun doing it!

Top tips:
  • Equipment: Fabric (30 x 4" squares, 2 x 20"x2", 2 x 28" x 2" and 1 x 28" x 24"), Cutting Mat, Rotary Cutters, Fabric Scissors, Pins, Iron, Ruler and Sewing Machine.
  • Use what ever fabric you like - it's your quilt!
  • Do pin the squares together...it may seem tedious but you'll have a much neater outcome - trust me :)
  • Do maintain your machine and change the needle frequently! My machine has only had light use but even I, a beginner, could tell the difference.

Happy Quilting x

Friday, 14 June 2013

Sewing, Facing and Invisible Zips.... The Finale

Dear Ladies and Gents....

Let me firstly apologies for the delay in getting the final installment to you on completing the 'A' line skirt - mostly to 'The Thrifty Stitcher', Claire-Louise - life has got in the way and now I will finish what I started.

So with all the sides overlocked it was now time to join all the pieces together. With the pieces pinned together and the sewing machine set to a straight stitch, follow the tailors chalk line to join the two back pieces to the front piece - taking the pins out as you go. Now its time to insert the invisible zip! Take the 10 inch invisible zip and line the top of the zip with the top of the skirt and mark with tailors chalk where the bottom of the zip is to go on the fabric. The zip goes right side down onto the right side of the fabric - this is then pinned into place (remembering to be 15mm away from the fabric edge). On the sewing machine change the zipper foot to an invisible zipper foot. Align the foot over the zip. To align the zip, it should go down the small hole to the left as you look at the sewing machine and stitch as close to the zip teeth as you can remember not to backstitch as it may damage the fabric and needle. Sew down the side of the zip until the place where you marked the fabric. Top Tip: You need to go as far down as you can so its secure but not too far down otherwise you will catch the zip lever and snap the needle. Also remember as there is not back stitch at either end don't forget to unpick the last loop and manually tie a knot. Now, do the same the otherside. Un-zip the zip and pin the zip to the right side of the fabric remembering to keep the same distance from the fabric edge. Top Tip: do not panic at this point! My brain could not work out how it would work, but trust me and the experts - it does! Do the same as the other side and slip the zip teeth into the right hand hole on the invisible zipper foot. You're almost there! Now swap the invisible zipper foot to a general-purpose foot. Start at the top of the zip and stitch as close as you can get and then all the way to the bottom of your skirt and ta-dah you have a skirt-ish!! I appreciate this is complex but do persevere... once done it is so satisfying! A great tutorial to help you out is 'How to sew an invisible zip' by ctquiltingvideos - link below.

Joining the facing
Now there is only a couple more part to do and one of them is fixing your facing. A facing is not required all the time but for this skirt one was inserted. To create the facings trace the pattern onto dressmakers square patterned paper using the pattern from the skirt. Before tracing remember to take out the darts and measure down approximately 3.5inches - do this for both the front piece and back two pieces. This then needs to be pinned to the fabric and cut out using fabric scissors - remember to place the front facing on the edge of folded fabric to make one long piece and cut out two back pieces. Once cut out pin the back pieces to the front pieces remember the 15mm hem line. Once the three pieces are joined together, overlock the sides and the bottom. Once overlocked, pin the right sides together at the top of the skirt. Now to ensure you don't go over you zip, mark each side with a pin - this will be your start and end point. Go back to the sewing machine and sew the facing to the skirt. Turn the facing into the skirt and its almost done!


The hem ready to the hand-stitched
The final part of the skirt is the bottom hem. As I wanted my skirt to have a more vintage feel I hand sewed this by using a herringbone stitch. I would describe this as hand sewn zig-zag stitch; only catching a tiny thread on the outer fabric and catching the hem as you go - this should also appear invisible on the outside. I decided to do this bit at home as the day was all ready drawing to a close - but one thing was for sure...I had made a skirt :)

Top tips:
  • Equipment: Hemming ruler, fabric scissors, fabric, dressmakers square patterned paper, pins, sewing machine, invisible zipper foot, invisible zip and patience!
Useful websites/ blogs:
  • 'How to sew an invisible zip' by ctquiltingvideos - http://www.youtube.com/watch?v=V2Dz6tk_fW4

Blurred photo of finished item!
I wear the stunning blue skirt regularly and its been complimented a great deal. I never appreciated the time and effort it takes to make a garment and I now have first hand stitching experience. Before I made a skirt I used to think about where my clothes were made and now this is more important than ever. I do try and buy British made where I can and that is why businesses like Vivien of Holloway and other independent shops are so important to me and to keep the British textile industry alive.

For anyone learning to sew I would highly recommend 'The Thrifty Stitcher'. The course is relaxed with clear guidance and support. The day goes so quickly and you will learn a great deal of skills in a short amount of time and retain them for years to come! Again, I'd would like to say a massive thank you to Claire-Louise and to all at The Thrifty Stitcher for a wonderful creative day - I will use all these wonderful skills to make another skirt and other clothes! 

Happy Stitching x

Wednesday, 5 June 2013

Me? Nominated for a Liebster Award? Read on....


Today's topic is a little different to the norm. Recently I was nominated for a Liebster Award by the lovely Claire Szabo (aka http://sewdixielou.blogspot.co.uk/).  I was so touched at this that I had to enter as it would be rude not too after being nominated and I hope I've not left it too late! This is also great for new bloggers like myself to try and put them on the blogging map! 

So to accept the award there are a few rules:
  • Each blogger should answer the questions the tagger has set for you.
  • Choose eleven new bloggers (with less than 200 followers) to pass the award on to and link them in your post.
  • Create eleven new questions for the chosen bloggers.
  • Comment on their page to tell them about the award.
  • Each blogger should post eleven random facts about themselves.
  • No Tag Backs!!!
So the questions I got asked are below...I thought these were great questions... 


1) If could sew an outfit for someone famous who would it be?

I think it would have to be Will Ferrell. I totally adore this man and think I am his number one fan! He is so flamboyant in all his films, I actually think he would be like that in real life. I would make him an orange and green stripped zoot suit with a cream frilly shirt – a bit like Tom is modelling below!


2) If your sewing machine could talk, what's the first thing you would ask it?

“Why do you work  smoothly one minute, then jam the next?"

3) Where is your most favourite place in the world?


London town... I love it so much! It has so much to offer and as the saying goes:


"Why, Sir, you find no man, at all intellectual, who is willing to leave London. No, Sir, when a man is tired of London, he is tired of life; for there is in London all that life can afford."
Samuel Johnson


Every time I go into town I see something new and it excites me so. The buildings, the people, the atmosphere, the smells, the hustle and bustle.... you can't experience this anywhere else in the World.

4) What's that one song that can make you feel better about a bad day?

'Frustration' by Soft Cell

5) How would your friends/loved ones describe you in five words?


Giving; Considerate; Truthful; Loyal; Stubborn

6) If you could go back to college what would you study?

Maths! I thought this as early on as the end of my first term at University…but stuck with what I was doing. I really enjoy maths and when I do maths in my current job it really makes me happy :)


7) The one thing you can't live without?


Tea...I'm totally addicted to tea. Betty's tearoom teabags are the best...I now don't take sugar anymore which is a big thing for me but now wonder why I had it in the first place.


8) It’s date night and 1985, who do you pick to go out with and why? Andrew McCarthy, Emilio Estevez or Judd Nelson?


Andrew McCarthy...I was a massive St Elmo’s Fire fan and I used to swoon over him and Rob Lowe…. what a combination… I best stop or I may get arrested!


9) Who is your style icon?

I don’t have one! I’ve never really followed the crowd when it comes to styles… I went my own way and made lots of mistakes but looking back the mistakes are funny now. I love women who are confident in what they wear and more importantly enjoy wearing it!

10) You just got detention? What's the thing you most likely did to get in trouble?


Talking! This is a family trait and I could talk the hinds leg off a donkey! I was always at the back chit-chatting about something or other (usually boys) and was often sent out for being disruptive!

11) You're playing spin the bottle. Who DON'T you want it to land on? 

Chris de Burgh


So my questions my chosen blogger nominees are...

1) If you held a fancy dress party what would it be?
2) Swimming costume or bikini?
3) Tea or coffee?
4) Tattoos or no tattoos?
5) What was/ is your favourite toy and why?
6) What is your favourite sewing tool (excluding sewing machines and overlockers)?
7) Thong or knickers?
8) If you were to do a burlesque act what would be your song to dance to and why?
9) Which series is the best series of Star Trek?
10) Flats or heels?
11)You can star in any movie you choose… who and why?

Now the bit you've all been waiting for... the 11 facts about moi!

In 1997, I went on the Kilroy show with my Mum. At the time I thought a perm and a see-through lace top and black bra was a good idea….looking back this was not a wise choice!
I love Will Ferrell! I just love everything about him – especially as he always strips and sings in his movies :)

I’ve always wanted to work in a pet shop! It sounds random but I’d love it! I love all animals and I’d have the added bonus of looking after them and get paid for the privilege!

I had only been to London four times before I moved here… once as Brownie in 1989, once to visit friends in 2003, as a birthday surprise in 2005 and the final time to find a flat in 2005! I now can’t imagine living anywhere else!
I’m a secret trekkie…well not so secret now! Original Series and Next Gen are definitely the best… I do like Riker (only with the beard)….


I’m nuts… no as in allergic to nuts. I’m allergic to all tree nuts! That doesn’t include peanuts as they’re legumes.

I failed GCSE textiles….and now I’m a stitching enthusiast who has totally caught the sewing bug! I hated textiles at school… I think it had something to do with the teacher… such a shame as I would have a few years of experience under by sewing machine now.


I’m obsessed with the weather… I have five apps on my phone and always go with the best prediction – however this year is proving hard to find decent weather on any app!
I have a pet guinea pig! His name is Mr Black and he has a double bedroom as his house. He is so adorable and his favourite food is cucumber. He was in the monthly guinea-pig magazine….claim to fame.


I detest horror movies... all things horror... especially zombies. '28 days later' totally freaked me out and it just gives me the creeps. 


I epilate... stuff waxing and shaving... epilate all the way. I ain't gonna lie, it does hurt, but now all the pain has been worth it!

And now my nominees...
1) Betty Blues Loungerie http://bettybluesloungerie.blogspot.co.uk - a super sexy blog! This lady makes amazing 1950s lounge wear! It's gorgeous and I'm saving up for some. I hope she visits London again soon.

2) Handmade Jane http://handmadejane.blogspot.co.uk/ - this blog is excellent for sewing beginners and have followed the wash bag tutorial. A great blog to help on your sewing journey.

3) We'll Meet Again http://thewarbride.blogspot.co.uk/ - Great read on all things vintage!

4) Countdown to a Vintage Wedding http://80schickx.blogspot.co.uk/2013/05/i-vow-to-thee.html - I love reading this blog about how she is organising her wedding! I can't wait for the next installment. I also think she is fabulous x

5) Incendiary Blonde http://incendiaryblonde.blogspot.co.uk - The passion in this blog just oozes out of the page - great read from a very talented lady!

6) 101 Reasons why I'm single http://reasonswhyimstillsingle.blogspot.co.uk/   - This girl is super and her tweets and blogs brighten up my day!

7) Pintucks and Peplums http://www.pintucksandpeplums.blogspot.co.uk/ - Although this blog is a little out of date, I still love the photos and what it has to say.

8) A Brighton Belle http://abrightonbelle.blogspot.co.uk/ - A fabulous vintage read

9) Sparkly SuperNova http://sparklysupernova.wordpress.com/ - A blog on a mixture of things - well written and well presented. Great twitterer too!

10) Sew Retro Rose http://sewretrorose.blogspot.co.uk/ - A lovely blog on all things vintage and sewing... what a great combo!

11) Quiet Vintage Sewing http://quietvintagesewing.wordpress.com/ - Again, another great read for all things sewing and vintage!
So that's it! I hope you've enjoyed this little trip into my world. I look forward in anticipation to what my nominees have to say and hopefully I could be a winner!

Happy Liebster Awards x