Showing posts with label overlocker. Show all posts

Monday, 12 August 2013

Seeing Red? Red Circles of Fabric that is!

Hello Ladies and Gent,


Tools for the job
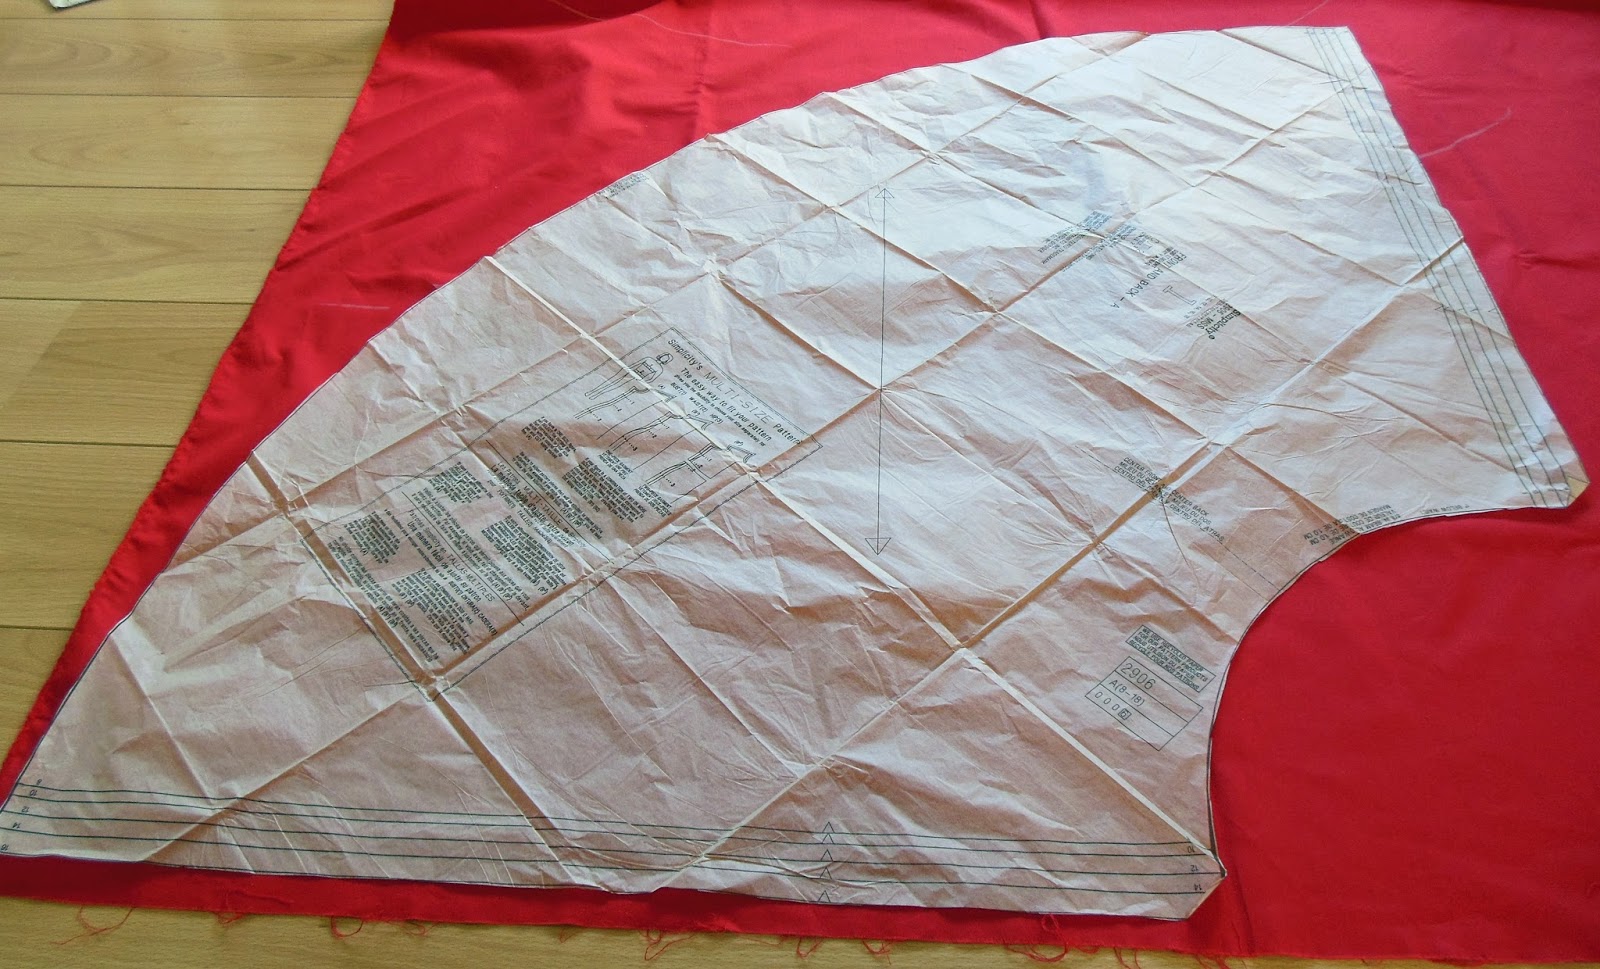
So I thought I would share with my latest sewing project... which is to attempt to make a circle skirt from a new pattern! When I went to my sewing class earlier this year, Claire-Louise aka The Thrifty Stitcher was kind enough to give me another pattern to try out at home. The pattern she gave me was the Simplicity 2906 which has two skirt patterns to follow but as I had all ready got a pattern for an 'A' line skirt I thought I ought to give the circle skirt a whirl. 

Now the dilemma of what fabric to use! I wanted to get some nice tartan fabric,
Useful hints from Sandra Bardwell
but I thought I would find matching the fabric up rather treaky so thought I better stick within my limits for now so chose a lovely crimson colour. I bought my fabric from Ray Stitch and I can't tell you how impressed I was with my visit. I called the shop the day before to see if they had the crimson fabric in stock along with a red 25cm invisible zip. I was thrilled when they said yes and told them I will see them the next day. When I arrived at 9.05am on Saturday morning they were open and had remembered my call and my goodies were all out ready for me! I was over-joyed that they had remembered and made my trip seamless (no pun intended). Now armed with my fabric (which was washed and pressed) I was ready to start creating!


Cutting lines
The first thing I did was measure myself - sadly my waist was still the same as when I made my skirt in April, but at least I've not grown in size. I took my measurement and I was a size 16 for this pattern. I cut the pattern piece out following the lines carefully and slowly. It was quite tricky as the pattern is large but I persevered  Top Tip: Gently press the pattern to ensure it is at its smoothest. I pressed the pattern when I ironed the fabric or iron it direct on a cool setting. Once cut out I then lined up the pattern on the fabric. This is when I had to remember grainlines and all that good stuff...which at first I had forgotten. I turned to my blog, Tilly and the Buttons blog as well as my good book called 'All you need to know about machine and hand sewing - Sewing Basics' by Sandra Bardwell. Although the pattern came with instructions its written in code for a novice so another Top Tip is always look up something if you are unsure of what it means. Like me I had to remind myself of the selfredge and the grain and I'm pleased I did as I originally pinned the pattern on wrong! 

I prepared my fabric (remembering to put strips of tailors chalk on the wrong
Mark the wrong side of the fabric
side of the fabric) and smoothed it by running my hand over it. Top Tip: Remember that the edge that is cut is not always 100% so don't pin the pattern against the edge. I had to look at this a few times and on the pattern you will have a long arrow which shows the grain line. In this instance the grain line was perpendicular to the selfredge. With my pattern securely pinned to the fabric, I took my fabric scissors and cut around the pattern and snipping a triangle where there were notches. The notches are there to help you line up the fabric pieces. I had to do this twice to make the front and the back piece of my skirt. Top Tip: If possible, this would be easier on a large table. I don't have this luxury but I cleared a large space on my wooden floor and cut carefully around the pattern.


Lining up the grain
Now with my fabric cut I wished I had an overlocker to stop the edges from fraying. However you can make a make-shift overlocker type thing on any sewing machine by using the zig-zag stitch. I set the machine to the longest stitch set on zig-zag and with one side sewn into the fabric and the other side just falling off the edge to catch the thread it secures the edge and helps reduce fraying. I did this to the sides and the bottom of my skirt. Tilly and the Buttons also recommends this but she does it when the hem is complete but I did it before hand - not sure if it makes a difference - time will tell.

I then double checked the instructions and realised I needed to put a 'stay stitch' in the top of the fabric to stop it from stretching. I didn't know what it was so I googled it - it is a long basting stitch that stays in - simple. So for this I set the sewing machine to a straight stitch on the longest setting and ran the stitch 1cm away from the top. Again, following the instructions I marked a 1.5cm hem down the sides with tailoring chalk in preparation for joining the pieces together and that all important invisible zip!

This is where I shall leave it today and tell you in another blog how I get on with the rest of my task! The one thing I will share is that I really enjoy the challenge this pattern is giving me! Its using the skills I have done previously plus being brave enough to try out new ones - lets hope the invisible zip comes as naturally!

Top Tips:

  • Equipment: Fabric (2m) with matching zip and thread, fabric scissors, paper scissors, tailors chalk, pins, sewing pattern, sewing machine, invisible zipper foot, general purpose zipper foot and time!
  • Gently press the pattern to ensure it is at its smoothest. I pressed the pattern when I ironed the fabric or iron it direct on a cool setting.
  • Always look up something if you are unsure of what it means. 
  • Remember that the edge that is cut is not always 100% so don't pin the pattern against the edge.
  • If possible, work on a large table. I don't have this luxury but I cleared a large space on my wooden floor and cut carefully around the pattern.

Useful Websites:


Happy Sewing xx 

Friday, 14 June 2013

Sewing, Facing and Invisible Zips.... The Finale

Dear Ladies and Gents....

Let me firstly apologies for the delay in getting the final installment to you on completing the 'A' line skirt - mostly to 'The Thrifty Stitcher', Claire-Louise - life has got in the way and now I will finish what I started.

So with all the sides overlocked it was now time to join all the pieces together. With the pieces pinned together and the sewing machine set to a straight stitch, follow the tailors chalk line to join the two back pieces to the front piece - taking the pins out as you go. Now its time to insert the invisible zip! Take the 10 inch invisible zip and line the top of the zip with the top of the skirt and mark with tailors chalk where the bottom of the zip is to go on the fabric. The zip goes right side down onto the right side of the fabric - this is then pinned into place (remembering to be 15mm away from the fabric edge). On the sewing machine change the zipper foot to an invisible zipper foot. Align the foot over the zip. To align the zip, it should go down the small hole to the left as you look at the sewing machine and stitch as close to the zip teeth as you can remember not to backstitch as it may damage the fabric and needle. Sew down the side of the zip until the place where you marked the fabric. Top Tip: You need to go as far down as you can so its secure but not too far down otherwise you will catch the zip lever and snap the needle. Also remember as there is not back stitch at either end don't forget to unpick the last loop and manually tie a knot. Now, do the same the otherside. Un-zip the zip and pin the zip to the right side of the fabric remembering to keep the same distance from the fabric edge. Top Tip: do not panic at this point! My brain could not work out how it would work, but trust me and the experts - it does! Do the same as the other side and slip the zip teeth into the right hand hole on the invisible zipper foot. You're almost there! Now swap the invisible zipper foot to a general-purpose foot. Start at the top of the zip and stitch as close as you can get and then all the way to the bottom of your skirt and ta-dah you have a skirt-ish!! I appreciate this is complex but do persevere... once done it is so satisfying! A great tutorial to help you out is 'How to sew an invisible zip' by ctquiltingvideos - link below.

Joining the facing
Now there is only a couple more part to do and one of them is fixing your facing. A facing is not required all the time but for this skirt one was inserted. To create the facings trace the pattern onto dressmakers square patterned paper using the pattern from the skirt. Before tracing remember to take out the darts and measure down approximately 3.5inches - do this for both the front piece and back two pieces. This then needs to be pinned to the fabric and cut out using fabric scissors - remember to place the front facing on the edge of folded fabric to make one long piece and cut out two back pieces. Once cut out pin the back pieces to the front pieces remember the 15mm hem line. Once the three pieces are joined together, overlock the sides and the bottom. Once overlocked, pin the right sides together at the top of the skirt. Now to ensure you don't go over you zip, mark each side with a pin - this will be your start and end point. Go back to the sewing machine and sew the facing to the skirt. Turn the facing into the skirt and its almost done!


The hem ready to the hand-stitched
The final part of the skirt is the bottom hem. As I wanted my skirt to have a more vintage feel I hand sewed this by using a herringbone stitch. I would describe this as hand sewn zig-zag stitch; only catching a tiny thread on the outer fabric and catching the hem as you go - this should also appear invisible on the outside. I decided to do this bit at home as the day was all ready drawing to a close - but one thing was for sure...I had made a skirt :)

Top tips:
  • Equipment: Hemming ruler, fabric scissors, fabric, dressmakers square patterned paper, pins, sewing machine, invisible zipper foot, invisible zip and patience!
Useful websites/ blogs:
  • 'How to sew an invisible zip' by ctquiltingvideos - http://www.youtube.com/watch?v=V2Dz6tk_fW4

Blurred photo of finished item!
I wear the stunning blue skirt regularly and its been complimented a great deal. I never appreciated the time and effort it takes to make a garment and I now have first hand stitching experience. Before I made a skirt I used to think about where my clothes were made and now this is more important than ever. I do try and buy British made where I can and that is why businesses like Vivien of Holloway and other independent shops are so important to me and to keep the British textile industry alive.

For anyone learning to sew I would highly recommend 'The Thrifty Stitcher'. The course is relaxed with clear guidance and support. The day goes so quickly and you will learn a great deal of skills in a short amount of time and retain them for years to come! Again, I'd would like to say a massive thank you to Claire-Louise and to all at The Thrifty Stitcher for a wonderful creative day - I will use all these wonderful skills to make another skirt and other clothes! 

Happy Stitching x

Saturday, 4 May 2013

Cutting, Pinning and Overlocking...

Hello Ladies and Gentlemen....

With another sunny day in London I cracked on with my next sewing project and am well pleased with my progress... I'll blog on this soon but as it is a gift for a good friend it'll have to be kept under wraps for a little while longer! 

In my last bloggie I got to the point of pinning the pattern to the fabric. So, armed with fabric scissors I snipped out the pattern - slowly and carefully to make sure it was as accurate as possible. With the pattern still attached the fabric the darts needed to the drawn on. As I wanted a more vintage skirt, I put all the darts on the skirt - this gives it more shape and shows off those dangerous curves. This part is a little fiddly and takes patience - the best way to do this is to put a pin through the dart pattern (where the little circles are) all the way through to the pattern from the wrong side of the fabric. By putting the pin through you will be able to see where the dart goes and be able to mark with tailors chalk on the wrong side of the fabric. Once marked, remove the pins and join the tailors chalk together to make a 'V' shape. A great link to show this is called Accurate Darts without Permanent Mark posted on Thread Magazine website - link below. Do this for all darts.

 
Trying on for size
With my pattern pieces successfully cut out I was eager just to pin the pieces together, but this wasn't the case - the seam needed to marked on the wrong side of the fabric. When marking the seam, I used a hemming ruler to measure 1.5cm along the edge to ensure the seam would be equal on the inside. A great blog on marking fabric is by Tilly and the Buttons called Marking and Cutting Fabric - link below. Once marked with tailors chalked I pinned the pieces together, also not forgetting to pin the darts (when pinning the darts, align where the tailors chalk is and pin it - it'll make a mini 3D triangle) and for the first time I could actually visualise the skirt.  Top tip: Before going on, do try on what you have pinned. Be careful not to stab yourself when doing this but this will help to see how the skirt will fit and check the length. With some assistance, the waist of my skirt had to be taken in a bit to make it more snug. This was simply pinned on both sides. As the waist was altered the darts needed to be checked but I was lucky as the alignment was still good. With the skirt ajusted I gently wiggled out of it and went and make the slight alterations. To ensure this was accurate, where the new pins
Marking with chalk
were I marked with tailors chalk on the wrong side of the fabric before removing them. This shows a line which will need to be drawn and again measured 1.5cm to get the seam correct.
Top tip: If any alterations are made at this stage it is good to pin the pattern back on the fabric when cutting out the alterations. This will save time when you make the skirt next time as the measurements will all ready have been done!

Overlocking bliss!
With the fabric cut the edges needed to be tidied in order not to fray or damage the fabric. There are numerous ways this can be done however we were fortunate enough to have overlockers. I've never used an overlocker before so Claire-Louise showed me how to use it and I was amazed by this machine. It first cuts the fabric then encapsulates the edges by weaving four threads around them - it was flippin' fantastic and now on the wants list! Top tip: If you don't have an overlocker another way to tidy the edges is with a zig-zag stitch. Let one stitch go into the fabric and the other fall out of it so it catches the loose threads. This is good but won't work on all fabrics, so please check before trying! The pieces of fabric were overlocked on three sides (leaving the top) and I was ready to join the pieces together.... but that is for another day and another blog.

Again, I learnt so much in a short amount of time. From cutting the fabric, marking darts, using overlockers and again that patience is crucial when learning something new. Next time I will look at sewing, facings and invisible zips!


Top tips:
  • Equipment: Pattern, dress makers ruler (or a long ruler), hemming ruler, tape measure, scissors, tailors chalk, pins, overlocker (or a zig zag stitch) and a mirror to look at your garment under construction.
  • Before going on, do try on what you have pinned. Be careful not to stab yourself when doing this but this will help to see how the skirt will fit and check the length
  • If any alterations are made at this stage it is good to pin the pattern back on the fabric when cutting out the alterations. This will save time when you make the skirt next time as the measurements will all ready have been done!
  • If you don't have an overlocker another way to tidy the edges is with a zig-zag stitch. Let on stitch go in the fabric and the other fall out of it so it catches the loose threads. This is good but won't work on all fabrics, so please check before trying! 
  • Patience!!!!!!!!!!

Happy Overlocking x