Showing posts with label sewing machine. Show all posts

Sunday, 6 October 2013

Preparing for the Tofino Lounge Trousers by Sewaholic... including Button Holes

Tofino Pattern by Sewaholic
Hello Ladies and Gents...

With my sewing machine clean, I could start to prepare the fabric for the Tofino Lounge Trouser pattern. I had been out to my local fabric shop (see link below) to select some gorgeous fabric for this pattern. I hunted through the racks - through gingham and flannel and cottons and spots. I wanted to used gingham for the project and spoke to the lovely shop lady who gave me some great advice. She said that gingham would look good but as I was a novice she thought a repetitive pattern would be best and move on to gingham after a bit of practice. With the hunt still
Tools for the job
on, I spotted a lovely pale blue with pink flowers on - perfect. I purchased the fabric along with a hem gauge and elastic. Happy with my purchases I headed straight home to wash the fabric ready for cutting!


After looking at the instructions on how to lay the fabric with the pattern on it, I had a dilemma on what size to cut. As mentioned in an earlier blog, this pattern is specifically made with pear shape women in mind. I looked at the size chart and could see I fluctuated between an 8 and a 10 and then to confuse me even more I looked at the finished measurements and couldn't fathom out how a 40inch hip would need a 47.5inch when finished. With me starting to worry I hadn't bought enough fabric I remembered that 'Tilly and the Buttons' had a great blog on this (see link below). After reading this (and
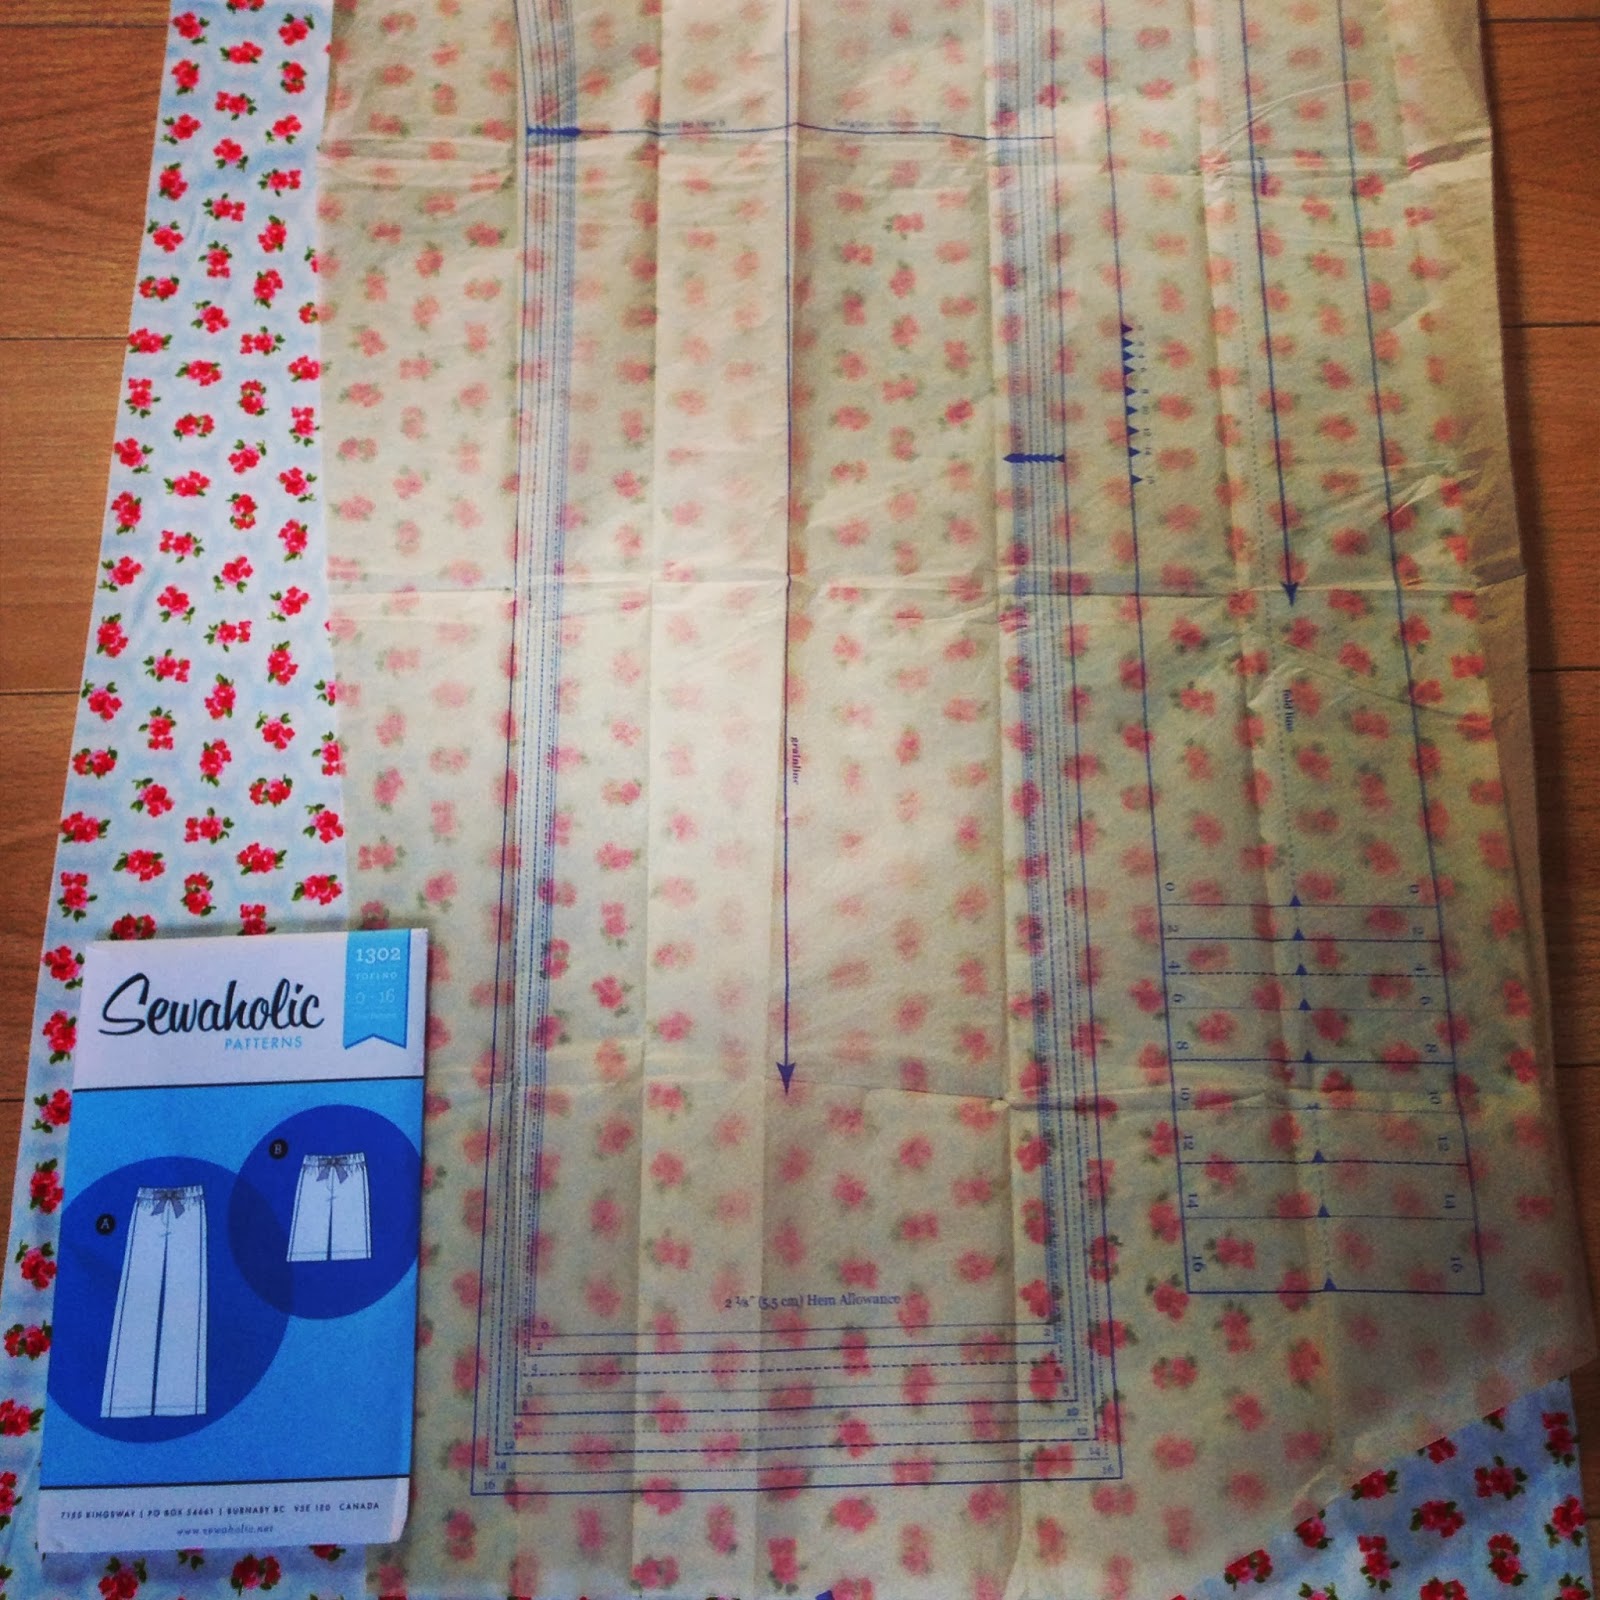
Checking the pattern fits!
understanding that although you are a certain measurement you wouldn't want your clothes the same size as otherwise it may stop  you breathing), I opted for a size 10, although this did not stop my dilemma as I bought fabric for a size 8! I lay the fabric on the floor and roughly lay the uncut pattern on the fabric, and phew I had enough! Top Tip: Check sizes before purchasing and also look at how long the finished item is - I was so focused on the bust/waist/hip measurement that this slipped my mind. I was lucky that the finished garment is 33 inches so just long enough for my 32inch pins.


With size selected I got snipping! I snipped all the pattern pieces out (I'm not using the contrast bits this time...I've not made a pair of trousers before and I checked it can be left out but there is always next time) and ironed it on a gentle heat. With my fabric and pattern ready, I pinned the pattern to the fabric and cut out the pieces including the notches. With the pieces all ready to go I referred back to the pattern to see how to put it all together. One of the pieces requires a button holes to thread a belt through (ok, I may do this, but piping is definitely out) and haven't done button holes before so instead of starting out sewing the pieces together, I thought I would practice button holes.

Button Hole Presser Foot
Before I started to sew I checked the manual to see if I had the right presser foot along with how to do it. I was in luck that I had the presser foot but the manual seemed a little unclear so I dug out my sewing book which it explained in better detail. The button hole foot acts as your guide and has a nifty measure lines on it. I don't actually need it for buttons, but if you do measure your buttons and add 0.3mm to ensure the button will slip in and out with ease. With the button hole foot on and fabric ready (using scraps of what I had cut out) I set the stitching in motion. My first attempt, well, was ok but it would be for a massive button. Also as my fabric is thin it made the button hole quite weak. Top Tip: If using a light weight fabric you may need some facing to strengthen it. I don't have any so used a bit of left over
Success!
wadding from my quilting project. I made a wadding sandwich and tried again, and again and again and finally the third time was a success. The second time when I went to cut the gap to make the button hole I caught the thread so weakened the button hole. The size of the hole was 1inch x 3 stitches - this was the size specified and now I've practiced I think I will be good for the real thing... best order some facing ASAP!


I can't stress enough how importing preparation is on sewing projects. If you're like me you just want to get on your machine and start stitching away. Sadly though, if you don't prep properly then the actual stitching will become more tricky. I feel now that with my fabric cut and by practicing button holes I'm now ready to move on to stitching the trousers together! Until next time...

Top Tips:

  • Equipment: Fabric, pins, pattern, scissors, sewing machine, button hole presser foot and thread
  • Check sizes before purchasing - this will ensure you buy the right amount of fabric! If in doubt, ask the shop assistant or double check!
  • Look at how long the finished item is - I was so focused on the bust/waist/hip measurement that this slipped my mind. I was lucky that the finished garment is 33 inches so just long enough for my 32inch pins
  • Button holes: If using a light weight fabric you may need some facing to strengthen it. 

Useful Websites/ books:


Happy Prepping x

Saturday, 5 October 2013

The Big Clean Up.... Sewing Machine Style

Hello Ladies and Gents...

Sewaholic Pattern
Today was going to be the day I started on my new sewing project - my Tofino Lounge Trousers (aka pyjamas) by Sewaholic. I found this pattern a little while ago and with Sewaholic specifically aiming their patterns at pear shape ladies I bought it and I've been looking forward to making it since then. I finally found some time so dug out the sewing machine. To my disgust I had put away my Singer covered in red fluff and dust (from making my red skirt...Seeing Red... Red Circles of Fabric)... the poor thing. So before I did anything I got the manual out to see how to maintain my machine.

I've cleaned it before, but it was a good four months ago and with the
Before....
thought of embarking on a new sewing project I wanted the machine to be lint and dust free and stitching like a pro. Top Tip: please check your manual on how to clean your machine as they are probably all a little different. I got manual, read through it, got all the necessary tools and I was ready to go!

The first thing is not to have the power on just in case - you don't want to electrocute yourself. With the power off, I took off the presser foot and the needle. Once removed, I started to unscrew the needle plate. When I took off the needle plate it was full of lint and grease - yuk. I took the little brush that came with my machine and with a lot of brushing and a few big breathes this part of my machine was clean.

Bobbin House
Now came the tricky part - to clean the bobbin house or hook. Remove the bobbin and flip back the retaining arms. Remove the hook race cover and hook and clean with a damp soft cloth. Top tip: Use one you don't mind getting greasy and also remember to use one that is soft and damp. Once cleaned, place to one side. Gently wipe the inside of the machine to remove any dust or excess grease. To lubricate your machine I use the Singer Super Oil which is specifically for sewing machines. Drop a couple of drops onto the hook race and move handwheel a few times. Once happy insert the hook and the hook race cover. Snap back the two hooks to hold the bits in place. Insert your bobbin, replace the needle plate, re-connect the presser foot and
Hook Race Cover & Hook
needle (it makes sense to replace it with a new needle as you've done all the hard work) and wipe down the whole machine and you are done. 
I couldn't wait to use it so I gave it a test run... it stitched like a dream! 

After...
I'm so pleased I did it because now I know that when I go to use my sewing machine, it is ready to go with a fresh needle and dust free. It literally takes about 15 minutes - 15 minutes well spent in my opinion - so what are you waiting for - get out your sewing machine and manual and get cleaning!

Happy Cleaning x


Sunday, 30 June 2013

Quilting... the Rockabilly Stitch Way

Hello Ladies and Gents,

Well I thought I would update you on one of my stitching projects as it has been a while. A little while a go I shared with you I was starting a stitching project for a good friend and now it is successfully completed! For my birthday my good friend and sewing advisor bought me a sewing book called 'Cute and Easy Quilting and Stitching: 35 step-by-step projects for you and your home' by Charlotte Liddle. I browsed through the pages and found the perfect gift to make for my friend - a baby quilt. After reading the pattern I knew I could make it - especially as it seemed quite simple and you can customise it as much or as little as you want - perfect for me!

Option 1 - Template
So the first thing I did was raid the fabric stash that has been growing over recent months. I looked through what I had and decided that I had enough fabric to follow the pattern so I went for it. My fabric was all ready washed so the next thing I did was iron everything...this ensures the fabric is smooth and easy to manage. I then had to make 30 squares of 4"x4" in order to make the quilt element. Now to do this I started off by cutting out square templates out of paper (option 1), pinning them to the fabric and cutting around them. After a few attempts of this I was concerned the squares would not be even so I thought of another way (option 2) - to use a
Option 2 
metal ruler, a 
rotary cutter and the markings on my cutting board. This method made the squares more even, less fiddly and a lot quicker to do. I cut out 7 plain fabric, 5 spotty fabric and 18 flowery fabric (4 different flowery patterns). With the squares I went on to design the lay out the quilt. Once I was happy with it, I then started sewing with my faithful singer machine (not hand sewing I hear some of you cry!). One day I will hand sew a quilt but this pattern can be done either way but I really wanted to use my
Quilt Pattern
machine as I hadn't used it since I cleaned it and put a new needle in. On using the machine I couldn't believe what a difference it made, so top tip, do maintain your machine and change the needle frequently! My machine has only had light use but even I, a beginner, could tell the difference.


This is where I became lazy and in hindsight I should have done this a bit differently. Instead of pinning a row of squares together, I just took two squares and sewed them using the pressure foot as the guide. I did this for each square and ended up with five rows of six. A thing I'm not lazy about (which I'm sure my husbandy will disagree on) is ironing the fabric as you go. Once I had five rows of six squares I ironed the
The lazy way...
seam to make it lie flat and keep the material in shape. When joining the rows together I did pin the edges and again followed the pressure foot as the guide. With all rows now joined it was starting to look more like a quilt! Again don't forget to iron the seams open. The next trick was to cut out the boarders....


Pinning the boarders
Now this is when I had to use maths to solve my problem. The two shorter pieces were the same width as the length of the quilted pieces (5x4"=20). I cut out two pieces of 20"x2" in the plain fabric. I then cut the long side pieces which had to be the same length as the quilt, plus the boarder - the total measurement being 28".  I cut out two pieces of 28"x2" in flowery fabric. I pinned the shorter boarder to the quilt and sewed with the sewing machine. I then pinned the long boarder and again sewed this on.... I was very pleased with myself at this stage and was having loads of fun doing it! 

My quilt was almost complete and all I had to do was attach the backing piece. For this you use one piece of material in what ever design you like. Again, I used a floral design and cut the fabric 24"x28". I pinned the fabric (right sides facing) and stitched around the edge leaving a four inch gap at one end so the wadding can be inserted. Once stitched I turned the quilt inside out and ta dah... I was finished! And I truly was finished as there has been a change of plan since its original use. Once completed I wanted to show off my work so I put it over a little table we have. My husbandy saw it and loved it so much we now use it as a table cloth! So I best get cutting more squares and making another one for my friend as the baby is due very soon! It just shows how versatile this simple pattern is. Without the wadding it is not a table cloth and with the wadding it could be used as a quilt. Sewing is a great way to express yourself... take a pattern and put your own stamp on it... and you'll have loads of fun doing it!

Top tips:
  • Equipment: Fabric (30 x 4" squares, 2 x 20"x2", 2 x 28" x 2" and 1 x 28" x 24"), Cutting Mat, Rotary Cutters, Fabric Scissors, Pins, Iron, Ruler and Sewing Machine.
  • Use what ever fabric you like - it's your quilt!
  • Do pin the squares together...it may seem tedious but you'll have a much neater outcome - trust me :)
  • Do maintain your machine and change the needle frequently! My machine has only had light use but even I, a beginner, could tell the difference.

Happy Quilting x

Friday, 14 June 2013

Sewing, Facing and Invisible Zips.... The Finale

Dear Ladies and Gents....

Let me firstly apologies for the delay in getting the final installment to you on completing the 'A' line skirt - mostly to 'The Thrifty Stitcher', Claire-Louise - life has got in the way and now I will finish what I started.

So with all the sides overlocked it was now time to join all the pieces together. With the pieces pinned together and the sewing machine set to a straight stitch, follow the tailors chalk line to join the two back pieces to the front piece - taking the pins out as you go. Now its time to insert the invisible zip! Take the 10 inch invisible zip and line the top of the zip with the top of the skirt and mark with tailors chalk where the bottom of the zip is to go on the fabric. The zip goes right side down onto the right side of the fabric - this is then pinned into place (remembering to be 15mm away from the fabric edge). On the sewing machine change the zipper foot to an invisible zipper foot. Align the foot over the zip. To align the zip, it should go down the small hole to the left as you look at the sewing machine and stitch as close to the zip teeth as you can remember not to backstitch as it may damage the fabric and needle. Sew down the side of the zip until the place where you marked the fabric. Top Tip: You need to go as far down as you can so its secure but not too far down otherwise you will catch the zip lever and snap the needle. Also remember as there is not back stitch at either end don't forget to unpick the last loop and manually tie a knot. Now, do the same the otherside. Un-zip the zip and pin the zip to the right side of the fabric remembering to keep the same distance from the fabric edge. Top Tip: do not panic at this point! My brain could not work out how it would work, but trust me and the experts - it does! Do the same as the other side and slip the zip teeth into the right hand hole on the invisible zipper foot. You're almost there! Now swap the invisible zipper foot to a general-purpose foot. Start at the top of the zip and stitch as close as you can get and then all the way to the bottom of your skirt and ta-dah you have a skirt-ish!! I appreciate this is complex but do persevere... once done it is so satisfying! A great tutorial to help you out is 'How to sew an invisible zip' by ctquiltingvideos - link below.

Joining the facing
Now there is only a couple more part to do and one of them is fixing your facing. A facing is not required all the time but for this skirt one was inserted. To create the facings trace the pattern onto dressmakers square patterned paper using the pattern from the skirt. Before tracing remember to take out the darts and measure down approximately 3.5inches - do this for both the front piece and back two pieces. This then needs to be pinned to the fabric and cut out using fabric scissors - remember to place the front facing on the edge of folded fabric to make one long piece and cut out two back pieces. Once cut out pin the back pieces to the front pieces remember the 15mm hem line. Once the three pieces are joined together, overlock the sides and the bottom. Once overlocked, pin the right sides together at the top of the skirt. Now to ensure you don't go over you zip, mark each side with a pin - this will be your start and end point. Go back to the sewing machine and sew the facing to the skirt. Turn the facing into the skirt and its almost done!


The hem ready to the hand-stitched
The final part of the skirt is the bottom hem. As I wanted my skirt to have a more vintage feel I hand sewed this by using a herringbone stitch. I would describe this as hand sewn zig-zag stitch; only catching a tiny thread on the outer fabric and catching the hem as you go - this should also appear invisible on the outside. I decided to do this bit at home as the day was all ready drawing to a close - but one thing was for sure...I had made a skirt :)

Top tips:
  • Equipment: Hemming ruler, fabric scissors, fabric, dressmakers square patterned paper, pins, sewing machine, invisible zipper foot, invisible zip and patience!
Useful websites/ blogs:
  • 'How to sew an invisible zip' by ctquiltingvideos - http://www.youtube.com/watch?v=V2Dz6tk_fW4

Blurred photo of finished item!
I wear the stunning blue skirt regularly and its been complimented a great deal. I never appreciated the time and effort it takes to make a garment and I now have first hand stitching experience. Before I made a skirt I used to think about where my clothes were made and now this is more important than ever. I do try and buy British made where I can and that is why businesses like Vivien of Holloway and other independent shops are so important to me and to keep the British textile industry alive.

For anyone learning to sew I would highly recommend 'The Thrifty Stitcher'. The course is relaxed with clear guidance and support. The day goes so quickly and you will learn a great deal of skills in a short amount of time and retain them for years to come! Again, I'd would like to say a massive thank you to Claire-Louise and to all at The Thrifty Stitcher for a wonderful creative day - I will use all these wonderful skills to make another skirt and other clothes! 

Happy Stitching x

Sunday, 17 February 2013

Mother's Day Wash Bag

Hello Ladies and Gentlemen,

With Mothering Sunday fast approaching I thought I better pull out my stitching fingers and make her a wash bag (as mentioned in a previous post). So without delay I started the hunt for a good tutorial. I simply googled 'sewing wash bag' and lots of great tutorials came up. Again I searched for one that would be slightly challenging and decided on this one by Handmade Jane: Kid's Wash Bag Tutorial: 

http://handmadejane.blogspot.co.uk/2011/11/kids-wash-bag-tutorial.html

Although it said 'kid's' I knew the pattern size could be easily changed so all I needed to do now was search for some yummy fabric.

I decided to look for fabric that is nautical - well it is a wash bag after all. I headed straight over to my favourite fabric website Fabric Rehab and looked at their wonderful designs under the 'Nautical and Nice' section. In the end it came down to two - Coastal Houses Blue or Coastal Shells. It was a close call but I chose the Coastal Houses Blue because the pattern reminds me of a quaint coastal town in Cornwall, like St Ives, with all the lovely cottages and lighthouses all jostling for position - love it. Also as the wash bag required a waterproof lining (see link in tutorial for this as I sourced it from the same place) the best colour match I could get was for the Coastal Houses Blue. Here is a piccie of the fabulous fabric below:

Coastal Houses Blue Fabric
I patiently waited for the fabrics to arrive and as soon as it did I got stitching! Now, like the other posts, I won't go into detail on how to make the wash bag as this is clearly explained in the tutorial above. What I will do is help aid those who are beginners (like me) and to say how I overcame my hiccups. Below are the tools - plus my sewing machine - I will need for this exciting project.

The Essentials
I took my gorgeous fabric and measured it to 42cm long x 37cm wide. Now, this was my first challenge - to make sure that the fabric was cut straight and all the same size. I used my cutting board, rotary cutter, ruler, tape measure and chalk and got measuring up. I found this doubly hard as I don't have a wide surface, but please do not attempt this on the floor! I tried and it turned out to be a disaster so I took all my tools to the kitchen and used the side board where I had a lot more success. My cutting board has lines across it so provides a good guide to help cut the edges straight. After a lot of patience I cut the fabric the same size. Tip: Cut the fabric about one to two centimetres bigger just in case the lines aren't straight. This will allow you enough leeway so can make any alterations if necessary.

Pinning
I aligned the fabrics and pinned the wrong side of the cotton fabric to the wrong side of the waterproof fabric together. I then pinned the right sides of the waterproof fabric together so that the right side of the cotton fabric was on the outside. Tip: Remember to remove any pins you do not want. It is hard to explain, but when you pin the cotton and the waterproof fabric and then pin these pieces together you will know what I mean! I followed the tutorial to the letter...it was challenging but I enjoyed it! Again, I forgot to check my bobbin and thankfully it ran out when I had done around the edges but it could have been a disaster! Tip: Check your bobbin before sewing!

After cutting my fabric, it took me about 90 minutes to make the wash bag. I enjoyed running the fabric through the sewing machine and watching the pieces of fabric merge together to make a fancy finished item. All I have left to do is buy the cord and thread it through the whole that runs around the top (this maybe a trip to town next weekend - any excuse!). I am so pleased with this little wash bag and I know my mother-in-law will be too.

The Finished Wash Bag
Hint and tips
  • Equipment: Iron, cutting board, metal ruler, rotary cutter, fabric scissors, tape measure, fabric, pins, tailors chalk, thread and a sewing machine
  • Patience - Again, I mention this every time but as I'm setting out on this adventure I can't stress it enough!
  • Check the bobbin for thread - I was lucky this time, but do check it - especially stitching large amounts of fabric
  • Do not cut the fabric on the floor. Use a table, kitchen side, anything that would can look over.
  • When cutting fabric the same size I would recommend you cut the fabric a couple of centimetres larger just in case the fabric is cut wonky - you can always trim it down
  • Remove any excess pins as you go or they may end up inside your wash bag - ouch!

Enjoy and take your time!

Happy Stitching x

Saturday, 26 January 2013

Mitered Corners and Headscarf Success!


Good Evening Ladies and Gentlemen,

Today I thought I would attempt to make my perfect headscarf. As I have mentioned in one of my previous blogs, the main reason I want to make headscarves is because I find it difficult to find the perfect  dimension to fit my head comfortably and have enough material left over to do a bow or something on top. This is also a simple project for a novice to begin with so I got stitching.

So in order to make the headscarf I looked at how to do hemming and more importantly, mitered corners. These little corners make square and rectangular fabric so neat and tidy that I just had to learn how to do them. I went on to You Tube and found this great tutorial by TreadleLady - link below:

http://www.youtube.com/watch?v=rdOSLpZ37kU

...plus another great site was recommended to me by my Twitter sewing friends - see link below:

http://www.craftstylish.com/item/13024/how-to-make-cocktail-and-dinner-napkins/page/all

Both tutorials are great and looked easy to follow so I began on my stitching quest. BTY - I'm not going to give a blow by blow account as you can get this from the super tutorials above. I'm going to describe how I got on as a beginner and what additional pearls of wisdom I can share to all you new fellow stitching novices.

First attempt - the willie warmer
I thought I ought to practice first as although it looked simple from the tutorials, I had a sneaky suspicion that these little corners were more tricky than they seemed. I used some left over material from my tote back and ironed the edge to about an inch (sorry if I jump from inches to cm - I like to mix a bit of old and new together !). I then brought this back to the sewing machine and followed the tutorial. Well, my first attempt was a shambles! It ended up looking like a willy warmer gone wrong and the corners were so uneven that I could only sew the hem three out of the four sides!


So attempt two - I measured the fabric and cut it using my new Pyrm rotary cutter. With even corners and ironing back about a half an inch of fabric I took to the sewing machine again. This attempt was better although the corners were still not great and the hem was rather wonky.

My new motto has definitely got to be 'if at first you don't succeed; try, try again' as I gave these tricksy corners a final go. I measured and trimmed the fabric. I ironed about a third of an inch all the way round and tried out these corners again - and bingo - I was impressed. Third time lucky! Tip: although bigger is normally easier to practice on, I didn't find this.  With this third attempt being a triumph I thought I would give my headscarf a whirl.


Measuring up
Cutting up
This time I made sure all the measurements were completely accurate. I cut an 82cmx82cm piece of fabric using my Fissler scissors, Pyrm rotary cutter, metal ruler, tape measure and craft mat.  This was the first time I had cut fabric to size before and my tip on this is to buy a quilting ruler. I have not bought one yet but I think this help to achieve straight lines and be able to put enough pressure on the fabric to stop it from moving. Anyway, after much measuring, cutting and slicing I was ready to prepare my scarf for stitching. I ironed a hem a third of inch wide and constantly measure as I ironed to ensure that the hem was consistent all the way around. This may sound anal but by doing this you are more likely to get a straight hem and great mitered corners. After pressing I went and did my corners. I followed the tutorial to guarantee I did not make any slip ups. Tip: Do try to make sure the corners are the same length as this is crucial for final hemming.  I pinned the hem as there was almost a metre of material and would aid the sewing of the hem. I took the fabric back the machine and sewed my hem and ta-dah- one completed headscarf! This made me very happy and although it took about 3 hours to get the technique of the mitered corners right (plus bobbin winding, re-threading of the machine and other little dilemmas) I now have a headscarf that I made and will wear with pride!

Hint and tips
Pinned headscarf ready to stitch
  • Equipment: Iron, craft mat, metal ruler, rotary cutter or fabric scissors, tape measure, fabric, pins, thread and a sewing machine
  • Patience - oh my, I mention this every time but as I'm setting out on this adventure I can't stress it enough!
  • Check the bobbin for thread - luckily mine ran out on attempt three so was not a major disaster, but I had forgotten so please check  - especially when stitching large amounts of fabric
  • Make sure you measure the hem - this is will help when making the mitered corners
  • Measure the fabric correctly - I thought I had and instead of being an 80cmx80cm, it is actually 78cmx78cm so not quite perfect! I think I should have cut the fabric at 83cm or 84cm but I will know for next time
Enjoy and take your time!

Happy Stitching x


Sunday, 13 January 2013

My First Stitches


Hi Ladies and Gentlemen…

The essentials
With the anticipation of threading the machine all most making me burst with excitement I thought it was time to unleash the sewing machine. I prepared my working area by placing the table near the window for good light (although by the time I got around to sewing it was dark!), cleared all the clutter in the vicinity, made sure I had a power point and got all my sewing tool kit ready to go just in-case. This kit now includes a wonderful pin-cushion (Made in Britain) purchased from 'Random Button'. I got my Singer and whipped it out the box in all its glory - I was still so pleased with my choice of sewing machine. After reading the manual (again) and making a cup of tea I was good to start with threading the bobbin.

View from the top of Singer 2250
I took my Coats 100% cotton thread and inserted into the spool holder. Once inserted I took the thread and snapped it into the thread guide, around the bobbin thread guide and through the hole into the bobbin (making sure you go from the underneath). I then popped it on to the bobbin winder and slid it across to the right and pressed on the peddle. To watch the bobbin go round and round was very exciting. After a little while I stopped peddling and took the bobbin and ta-dah, it was done. (NB: On my first attempt it went wrong as I had not realised the thread had got caught on the handle of my machine. I had to unwind the bobbin and start again so top tip – check the thread carefully before pressing the peddle!). I inserted the bobbin into the bobbin case ensuring the cotton was through the top of the bobbin case with the thread falling to the right and inserted it into the machine. 

After my success I went onto to thread the machine. Firstly I made sure the needle was at the highest point by turning the handwheel and raising the pressure foot.  Again I took the cotton, passed it through the thread guide and the pre-tension spring, pass the thread down and up the channel, hook the thread behind the thin wire needle clamp guide and through the needle from front to back. I found locating the thin wire needle clamp guide a bit tricky and to begin with I thought it may have broken off but after a thorough examination it was there so all was well in my World!

Threaded machine!
‘What a success!’ I thought to myself and now to hook the two together by raising the bobbin thread. I put the presser foot up and turned the handwheel towards me lowering and raising the needle. The first time the needle went down it did not work, but a few more turns it was hooked and I gently pulled the bobbin thread up and pulled through the back of the machine! I now desperately wanted to get sewing but I had no scrap material so this is where the husbandy comes in handy. I took an old t-shirt and cut it up and started to stitch. It worked like a dream and started to practice a few stitches - it was so satisfying.

I am now waiting for my bundle to arrive from Fabric Rehab so I can get practicing and start on my project… hurry up Mr Postman!

Hints and tips
  • Patience! When I came to thread it again had a total nightmare but I persevered and it all came good in the end
  • Check the thread is not caught on any other part of the machine before winding the bobbin or starting on a project
  • Have a pair of scissors on hand - always useful
  • Do use the manual - it is like a Bible!
  • Don't wear red lipstick when threading - I licked the end and it went pink! 

Thursday, 10 January 2013

The Sewing Machine


Hi Ladies and Gentlemen…

To date I have bought my essential bits for my sewing tool kit and now my attention turns to the main item – the sewing machine. Sewing machines were first patented in the 1790s and Mr Singer commercialised the sewing machine in the 1850s giving everyone the opportunity to sew and stitch at home and now there are many different brands covering a wide range of functions and prices. This was my first hurdle as I did not appreciate there was such a variety - all targeted at different skill level and functionality – I thought it was one size fits all. In some ways I was pleased so I did not have to get an all singing all dancing machine that would leave me in a mess and not continue 
with my goal.

A good friend of mine, who is a stitching wizz, said as long as it has 10 or so stitches and can do some button holes it will be a good beginning machine. With this sound advice (and advice from my sewing book and the Thrifty Stitcher website) I looked extensively over the World Wide Web at Singer, Berina, Brother, Janome and other brands. I started to get overwhelmed at the possibility and found a few I thought would fit the stitch. But then I thought - how large are they and what do they actually feel like? So with list in hand I went to John Lewis on Oxford Street. Here they offer a great range of sewing machines (including their own brand) and I was able to touch and caress the machines there. I like square machines over rounded (this principle also applies to cars – especially old Fords – but I digress) and I liked the fact that the ones I viewed were not that heavy and also not too expensive. With this in mind I was a bit blinkered to the task at hand and not focusing on the functionality. Then the sewing machine which I had researched was there and in my grasp and it was the……

Singer 2250

It was like love at first glance – I knew this would suit my capabilities to the ground (which are basic in sewing), matched my price tag (always a good thing to keep the husbandy happy), did not weigh a tonne (so I did not incur an injury getting it home), small enough to fit in the space allocated at home (although now I have made my favourite shoes homeless).

When I got the Singer 2250 home I took it out of the box and made sure all the items were there (which they were plus an extra bobbin) and read the manual…. I wanted to thread it and get cracking but it was getting late, I had no scrap material to test on and other general life things needed to be done – boo.

So now I am all set to go… sewing tool box and sewing machine. I just need to cut up on old bed sheet and start practicing…. Oh I can’t wait!!