Sunday, 24 February 2013

Wall Tidy Dilemma!

Hello Ladies and Gentlemen,

With the weather lingering at freezing temperatures I could not face going out so I thought I would make a much needed wall tidy. In my bedroom I have a shelf which is crammed full of hair products, hair brushes, hair grips - basically the hair offering from Boots on a shelf that is about a a foot long by a quarter foot wide. This drives both my husbandy and I nuts so thought a wall tidy would do the trick.


Tools for the job
So with a fabric delivery of a whole host of yummy material on Friday  I selected one to be the background (being green with cream spots) and popped to Ray Stitch (love this shop) to get a half a metre of plain cream  cotton to be the pockets. With all the ingredients ready I was good to get stitching.

I didn't follow any pattern.... I just measured where I wanted it to go (being 12inch x 25inch) and added an extra couple of inches and cut the spotty fabric. The reason I added the inches is because you will need to hem and mitre the fabric and as I've learnt by doing corners this way it will use more fabric. I decided I needed one large pocket at the top for my hairbrushes and a smaller one for my grips and bits. I measured the cream fabric to 10inch x 14inch for the large pocket and 10inch x 9 inch for the smaller one.


Hemming
I hemmed and mitred all three pieces of fabric (check out my blog Mitered Corners and Headscarf Success! to show how this is done) and then went to pin the pockets onto the fabric. This is when my idea went wrong.... I had made the pockets too big and could not work out how to attach them. This is really hard to explain but tip: always research what you are going to make! I have only been stitching for two months and although I was pleased I felt confident enough to venture forth on my own, I was sadly mistaken and my stitching heaven soon turned into an unpicking hell. I just could not fathom out how to do this so I went onto 'You Tube' and searched 'wall tidy sewing'. After a couple of attempts of following other tutorials I stumbled across one by Sewing Republic called 'Closet Organizer' (link below):


http://www.youtube.com/watch?v=zLKu-ukprgA&list=PLG-EZUMWlx6fdibG2Hm2GfnmUC6t9VBNF&index=4


This link basically saved my bacon and after a few minor alterations to the pocket pieces, I pinned the pocket fabric onto the backing piece and sewed together to make my finished wall tidy! All I need to do now is purchase the Prym eyelets and washers plus a couple of suction hooks and this little beauty will be good to go!


Finished wall tidy
All in all I have learnt a few lessons today. I never realised I had so much patience and my new journey of sewing is finding out new things about me. I wonder what other talents and traits it will unearth....

Hint and tips

  • Equipment: Iron, cutting board, metal ruler, rotary cutter, fabric scissors, tape measure, fabric, pins, tailors chalk, thread and a sewing machine
  • Sewing pattern or tutorial - this will save you a lot of stress - especially as you are new to the sewing world. I will not venture forth without one again - or definitely not in the near future
  • Patience - Again, I mention this every time but as I'm setting out on this adventure I can't stress it enough!
  • When doing mitred corners don't forget to make your project slightly larger to allow for the  hem.
Enjoy and take your time!

Happy Stitching x

Saturday, 23 February 2013

Hair Rats and Faux Bangs

Howdy Ladies and Gents,

Suicide roll
A few of you lovely people have been asking how I do my faux bang so thought I would share my hints and tips with you all.

I have been trying to do a faux bang for ages and always with little success. It ended up all messy and notty so I used to give up and put a roller or a suicide roll in the front - see piccies. Now, I kept thinking to myself that this is lazy so I treated myself to an evening at Rockalily Cuts. Rockalily Cuts holds a 'Retro Hair Styling Workshop' - so I had to attend! ReeRee and Pippa show you all sorts of different vintage hair styles -it's a perfect way to spend an evening talking hair and making some new friends! To my delight one of the styles was a faux bang. The lovely ladies showed us two methods to create the perfect faux bang: a) oh natural with back combing, pins and patience; and 2) a hair rat. As my hair is fine and quite long a hair rat is a definite must have!
Roller
Now hair rats come in different shapes and styles ranging from the traditional ones (which basically means stuffing an old stocking with hair from your hair brush) to cutting a ring doughnut in half (not a real one - that would be messy and a waste!). The hair rat I use is a ring doughnut cut in half and then tweaked until the perfect size is achieved. Tip: always make a rat nearest your hair colour. For me, by using a hair rat it helps secure my hair and gives me the security that the bang will last all day.
So with the confidence and tips gained from the retro hair workshop I will share with you how I have perfected the technique (NB: my hair is fine with the fringe being down to my mouth):
    Snap Shots!

  1. You will need: rollers, a hair rat, hair grips, hair clips and hair spray (headscarf optional)
  2. Wash your hair as you would and then side part on both sides and to the crown of the hair - piccie (1). (I actually thinks it works better on dirty hair and this tutorial is done on three day unwashed hair). 
  3. Tie back the rest of your hair so it's out the way and put in your rollers. I split this section of hair in the middle and put six rollers in - piccie (2).
  4. Leave this is as long as possible - preferably over night.
  5. When ready, take out the rollers and your hair will be all curly - piccie (3).
  6. Take a round brush and brush through - piccie (4).
  7. Take your hair rat and curl the hair over your hair rat and roll towards your forehead - piccie (5).
  8. Insert bobby pins to the side - remembering your faux bang should 'smile' and now 'frown'. As I always where my faux bang with a headscarf it does not bother me how messy the top gets as it is covered. If you want to wear it with a pony tail this part will need to be neat (or however you prefer).
  9. Spread the hair (as it should be mostly in the centre of the hair rat) so it covers the hair rat - piccie (6).
  10. Now I put lots of hairspray on mine as I like it rock solid. You can use a pomade to make it shiny - again this is personal preference.
  11. Now if you intend to wear this in a headscarf you will need to tie back your hair. I think a pony tail to hold the headscarf in place does not work so I grip mine.
  12. Tie the headscarf hiding the hair clips and the messy bit on top and ta-dah you're done!
Faux Bang Success
I would say the biggest tip I can give you is confidence and practice! I'm so glad I went to the Rockalily Cuts evening as it gave me the tricks of the hair trade to do it plus by adding my own twist the bang works 99% of the time! 

Happy Faux Banging x
P.S. You'll be pleased to know I have bought the cord for my Mother's Day wash bag and it is now complete. I just need to wrap and post it. Byeeeeee.

Sunday, 17 February 2013

Mother's Day Wash Bag

Hello Ladies and Gentlemen,

With Mothering Sunday fast approaching I thought I better pull out my stitching fingers and make her a wash bag (as mentioned in a previous post). So without delay I started the hunt for a good tutorial. I simply googled 'sewing wash bag' and lots of great tutorials came up. Again I searched for one that would be slightly challenging and decided on this one by Handmade Jane: Kid's Wash Bag Tutorial: 

http://handmadejane.blogspot.co.uk/2011/11/kids-wash-bag-tutorial.html

Although it said 'kid's' I knew the pattern size could be easily changed so all I needed to do now was search for some yummy fabric.

I decided to look for fabric that is nautical - well it is a wash bag after all. I headed straight over to my favourite fabric website Fabric Rehab and looked at their wonderful designs under the 'Nautical and Nice' section. In the end it came down to two - Coastal Houses Blue or Coastal Shells. It was a close call but I chose the Coastal Houses Blue because the pattern reminds me of a quaint coastal town in Cornwall, like St Ives, with all the lovely cottages and lighthouses all jostling for position - love it. Also as the wash bag required a waterproof lining (see link in tutorial for this as I sourced it from the same place) the best colour match I could get was for the Coastal Houses Blue. Here is a piccie of the fabulous fabric below:

Coastal Houses Blue Fabric
I patiently waited for the fabrics to arrive and as soon as it did I got stitching! Now, like the other posts, I won't go into detail on how to make the wash bag as this is clearly explained in the tutorial above. What I will do is help aid those who are beginners (like me) and to say how I overcame my hiccups. Below are the tools - plus my sewing machine - I will need for this exciting project.

The Essentials
I took my gorgeous fabric and measured it to 42cm long x 37cm wide. Now, this was my first challenge - to make sure that the fabric was cut straight and all the same size. I used my cutting board, rotary cutter, ruler, tape measure and chalk and got measuring up. I found this doubly hard as I don't have a wide surface, but please do not attempt this on the floor! I tried and it turned out to be a disaster so I took all my tools to the kitchen and used the side board where I had a lot more success. My cutting board has lines across it so provides a good guide to help cut the edges straight. After a lot of patience I cut the fabric the same size. Tip: Cut the fabric about one to two centimetres bigger just in case the lines aren't straight. This will allow you enough leeway so can make any alterations if necessary.

Pinning
I aligned the fabrics and pinned the wrong side of the cotton fabric to the wrong side of the waterproof fabric together. I then pinned the right sides of the waterproof fabric together so that the right side of the cotton fabric was on the outside. Tip: Remember to remove any pins you do not want. It is hard to explain, but when you pin the cotton and the waterproof fabric and then pin these pieces together you will know what I mean! I followed the tutorial to the letter...it was challenging but I enjoyed it! Again, I forgot to check my bobbin and thankfully it ran out when I had done around the edges but it could have been a disaster! Tip: Check your bobbin before sewing!

After cutting my fabric, it took me about 90 minutes to make the wash bag. I enjoyed running the fabric through the sewing machine and watching the pieces of fabric merge together to make a fancy finished item. All I have left to do is buy the cord and thread it through the whole that runs around the top (this maybe a trip to town next weekend - any excuse!). I am so pleased with this little wash bag and I know my mother-in-law will be too.

The Finished Wash Bag
Hint and tips
  • Equipment: Iron, cutting board, metal ruler, rotary cutter, fabric scissors, tape measure, fabric, pins, tailors chalk, thread and a sewing machine
  • Patience - Again, I mention this every time but as I'm setting out on this adventure I can't stress it enough!
  • Check the bobbin for thread - I was lucky this time, but do check it - especially stitching large amounts of fabric
  • Do not cut the fabric on the floor. Use a table, kitchen side, anything that would can look over.
  • When cutting fabric the same size I would recommend you cut the fabric a couple of centimetres larger just in case the fabric is cut wonky - you can always trim it down
  • Remove any excess pins as you go or they may end up inside your wash bag - ouch!

Enjoy and take your time!

Happy Stitching x

Thursday, 14 February 2013

Eyebrows... the Vintage Way

Good Evening Ladies and Gentlemen...

Way back in the early noughties I graduated from university. I couldn't wait to get my photos of the graduation day. When they came through the post I took one glance and almost died as I never had realised how bad my eyebrows were. They were like two privet hedges perched on my forehead. For some reason this photo captured them in all their hairy glory and at once I had to attack them with a Flymo. Since moving to London eyebrow maintenance has been much easier as there are plenty of places that do brow-maintenance and my preferred method is threading. I actually find threading almost relaxing. Threading is by far the best way to remove those pesky hairs - it removes all the fine ones and gives you a great shape... that is if you don't want anything other than a standard TOWIE. Since following the alternative look I have asked numerous different threading beauticians to do the 1950s arched eyebrow.... but to my disappointment all have said "no".


Before
Recently I found out that Lipstick & Curls were doing a Vintage Mini Makeover over at What Katie Did in Notting Hill. Lipstick & Curls specialises in vintage hair and make-up and they featured in lots magazines, worked with a number of different vintage clothing brands and have worked with celebrities including the late great Amy Winehouse. I read what delicious treatments were on offer and to my delight I noticed 'Brow Grooming Session, Pluck, Shape and Style!' on the list. This could be just the ticket for the style I've been after for ages so I made an appointment and allowed the little buggers to grow like a meadow.

Eventually the time of my appointment came which was handy as I had the Amazon Rain-forest growing on my brow. I got ready in usual fashion, applied make-up but held back on the eyebrows. It's surprising how much eyebrows finish off your face and I did feel a little naked when I left the flat. Here is a picture before (this is approximately eight weeks growth):


Before


For those that don't know I thought I'd better let you know a bit about What Katie Did. What Katie Did is a faux vintage lingerie and hosiery boutique located at the north end of Portobello Road, Notting Hill. WKD offer the most gorgeous selection of underwear ranging from bullet bras to waist cinchers to stockings. They also sell Besame cosmetics and Bernie Dexter pieces (I was lucky enough to receive the Bernie Dexter Scarlett Poppy dress at Christmas). WKD is one of London's retail gems tucked away in a discrete location under the Westway and in my opinion independents like WKD make London... well... London. In the past twelve months I've bought some gorgeous lingerie and the best stockings and hold ups and it's a real pleasure to shop there. The girls are always friendly and helpful (and stunning). On this occasion Katie herself was there and it was a real pleasure to meet the lady who is the inspiration for the lingerie and hosiery.

As I was there I tried on a few things and of course I was itching to buy but January/February are not good months for my bank balance. So I finished my cuppa and got myself ready for preening. I was greeted by Amanda from Lipstick & Curls. She sat me down and started plucking my eyebrows... I felt a bit sorry for her as they were very untidy but she charged on and after 15 minutes the job was done! Verdict...... WOW! Amanda had given me the perfect eyebrows, she had finally given me the look I have been after for ages!


After
I'd like to say a massive thank you to Amanda of Lipstick & Curls and to all at What Katie Did for a wonderful morning. Please, please, please get together again, I will be first to book. 

Happy Eyebrows!x

After

Tuesday, 5 February 2013

Rockalily Cuts and Pink Flashes!

Good Evening Ladies and Gentlemen,

A subject that always has been close to my heart (or should I say my head) is my hair. Since being a teenager I have been obsessed with it - from the colour, to the cut to the style. I would describe my natural hair as dark blonde and fine and a bit volume-less. In my teenage years and still to this day, I'm always looking at products to help add volume to my hair starting with shampoos and conditioners and then styling products. One thing I have always loved is the excitement of the hairdresser experience. From the time I make the appointment I think about what to have done: short, bleached, red, trimmed, highlighted - I'm sure I bore everyone to tears talking about it! For a while now I've been going to Rockalily Cuts on Kingsland Road, E2. 

Rockalily Cuts, Hoxton

My latest visit was at the weekend; I booked it weeks ago and have been looking forward to it ever since. I showered, dressed, put headscarf on (to hide my dirty great rootz) and off I trotted. Transport links to the salon are super with the nearest overground station being Hoxton (and there's tons of local buses).

As soon as you grace Rockalily Cuts you see straight away its like no other salon you've been to before. It's totally unique and very special. Every effort has been made to make you feel relaxed and comfortable. There is real attention to detail in making the shop look and feel different to the norm; it's like no other salon you've been to. I was offered a nice homely cuppa (I've been offered Babycham before) while I waited for the gorgeous Lucie.

Roots 'r' us
Lucie (stylist and creator of hair magic) ushered me into her chair and told me to whip off (oo-err) my headscarf. I did and revealed some of the longest roots known to man. To put it in perspective they were longer than some motorways; but then I haven't been for 16.. that's right, SIXTEEN WEEKS! This is definitely too long and I will try my hardest to go at least every 10-12 weeks in future. Lucie went on the attack and began mixing the colour to banish the roots; then she applied enhancer and I sat there cooking away like a cupcake.


Enhancer added

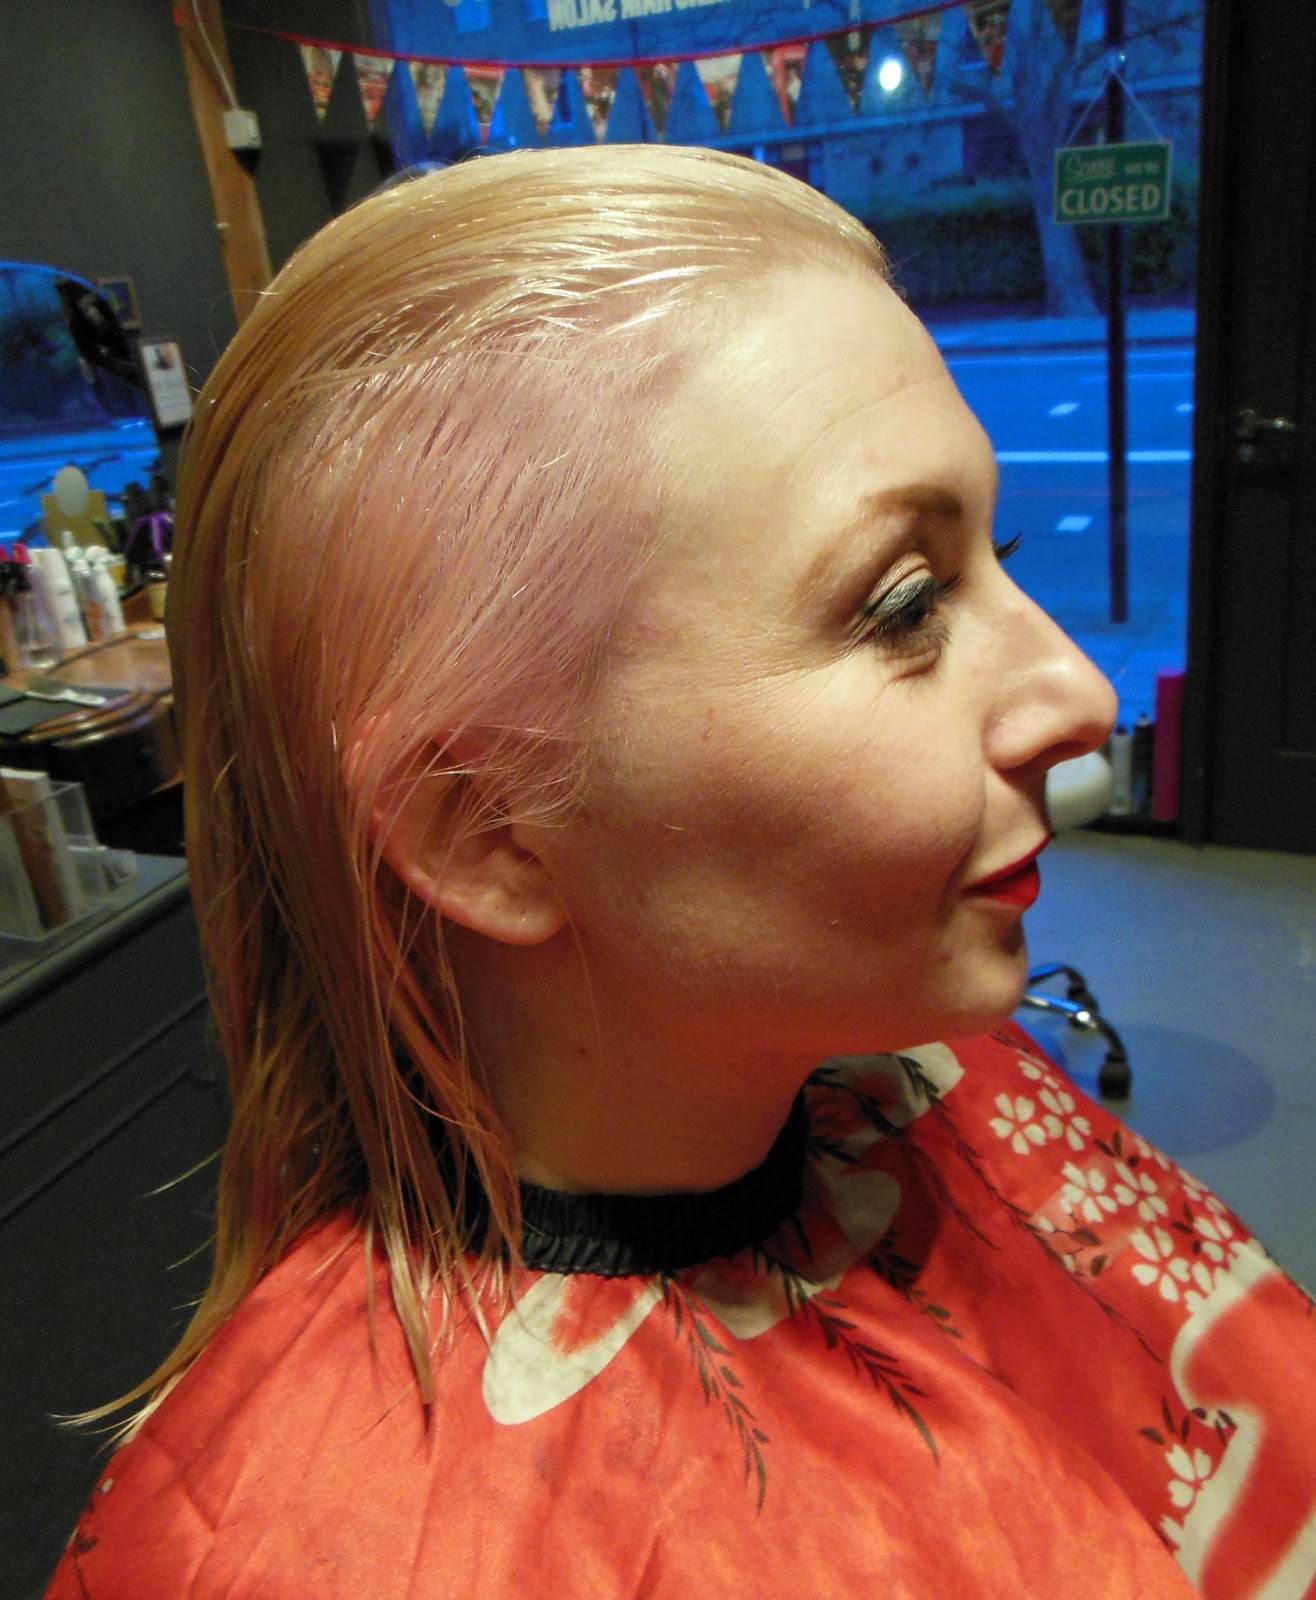
Whilst the colour was doing its thing Lucie and I chatted about having a pink flash on the underside of my hair. Now I have been talking about this for months and months but when it comes to hair I'm a bit of a wuss. Sounds daft doesn't it? I have a tattoo of a half naked pin up girl on my leggy and I'm worried about a lil' splash of pink in my hair... so I thought funk it and decided to go for a candy-floss pink!

Pink flash

So after half an hour in the oven it was time for my hair to be washed. It was a wash combined with a lovely head massage... very relaxing. Lucie then parted my hair ready to add my pink flashes! As she was applying the dye to my locks I started to panic a bit because out of the bottle the dye looked more like lobster colour! As soon as it went on I wanted it off but Lucie and Emma were superstars and helped put my mind at rest reassuring me it would all sort itself out. Of course they were right and it was candyfloss pink perfection. I felt very embarrassed for my flip out but was over the moon that it had all gone to plan; sorry ladies, I should never have doubted you!


After the colouring Lucie then carried on with my haircut. I have the utmost respect for her, she is clearly very talented and before long I was sporting a new doo. She dried, curled and then styled my hair in to two perfect victory rolls...... ta-dah, I was complete. My hair was immaculate - creamy blonde, candyfloss pink flashes, perfect cut and styled to full vintage glory. 

Rockalily Cuts is a unique salon in East London - I don't think there is anywhere else quite like it. It is not just a hair salon, it is a place where you go to relax, make friends, chat and when you leave you are guaranteed a truly magnificent cut, colour and style. I actually look forward to my hair growing so you can go back again. I only found out about Rockalily Cuts by chance. I was on the train to Manchester last year and I got chatting to a girl who told me all about it. If we haven't started talking I may never have known about it. 

Thanks to Ree Ree, Lucie and the team for a great day...see you soon x


Vintage magic

Wednesday, 30 January 2013

Sharing the Sewing Passion


Good evening Ladies and Gentlemen,

Since making my beautiful headscarf on Saturday, I have been wearing it with pride. I wore it all day on Sunday and found it extremely comfortable - making this stitching project a further success. This has now lead me to hunt for some more glorious material so I can make my next one (plus an excuse to go to Ray Stitch or place an order with Fabric Rehab!). With this success under my headscarf and my big mouth (as I have been telling friends, family and the wider Twitter community of my delights and new found talent) I have landed myself with commissions. I love this - the thought of meticulously planning my next project and getting stitching and doing it for people who want it is so exhilarating - its making me wonder why I did not start this years ago. 

My new headscarf

Until this year my sewing skills (or should I say sewing confidence) was limited and only went as far as sewing buttons on to my husbandy's shirt. Any other tasks, like when a thread was pulled, had to wait until I saw my mother-in-law who is a natural at this. It seems that the tables have now turned, now that I am armed with a Singer and a willingness to create that my new found flare is needed. My mother-in-law wants a nice wash bag (this is a great little project for me and with Mother's Day fast approaching I have the now got the perfect gift). Also my husbandy wants bespoke handkerchiefs and other little fabric-y goodies. The other added bonus to all of this is that these gifts will be handmade and made with love (and no doubt some sweat and tears along the way).  Let's hope I get a few extra pennies in my pay cheque this month to help move these ideas to fruition!

With all these great stitching projects waiting in the wings, I want to get started now but I don't know which one to start first. One thing I do know is that I shall only start on one stitching project at a time. This sound advice came from my a good friend (and sewing guru) of mine and I believe this to be sound advice, especially as I know what I am like. This is typically what happens with things that don't quite go to plan: I start a project, hit a snag, try and work it out, get frustrated, then get annoyed, throw all my toys out the pram and then give up and move onto something new - something that is less taxing. As I have mentioned in virtually all my sewing blogs that patience is vital when setting out on this journey and suddenly I've found out that I have more of this than I thought and thank goodness. 
If I was to have this old attitude with sewing I don't think I would have made anything yet with all the little glitches I have had to overcome in such a short amount of time. There is no issue in planning your projects so you can perhaps save money on bulk buying fabric, etc, but I will only physically start one project at a time and see it through to the end before starting a new one.

With the anticipation of undertaking these sewing gems I have been looking for some tutorials and I have stumbled across some great ones (all these tutorials and links will be included when I do these sewing projects). These tutorials have all ready helped me overcome my early worries, like where to buy waterproof fabric and how to resolve the issue of not having an upside down print on the wash bag! Prep, for me, is part of the excitement of my sewing journey - it adds to the experience and gets my sewing juices flowing. 

The best part of this is that I love the fact friends and family are giving me the opportunity to practice my new passion and share my new found passion and creativity with them.

Happy Stitching x

Saturday, 26 January 2013

Mitered Corners and Headscarf Success!


Good Evening Ladies and Gentlemen,

Today I thought I would attempt to make my perfect headscarf. As I have mentioned in one of my previous blogs, the main reason I want to make headscarves is because I find it difficult to find the perfect  dimension to fit my head comfortably and have enough material left over to do a bow or something on top. This is also a simple project for a novice to begin with so I got stitching.

So in order to make the headscarf I looked at how to do hemming and more importantly, mitered corners. These little corners make square and rectangular fabric so neat and tidy that I just had to learn how to do them. I went on to You Tube and found this great tutorial by TreadleLady - link below:

http://www.youtube.com/watch?v=rdOSLpZ37kU

...plus another great site was recommended to me by my Twitter sewing friends - see link below:

http://www.craftstylish.com/item/13024/how-to-make-cocktail-and-dinner-napkins/page/all

Both tutorials are great and looked easy to follow so I began on my stitching quest. BTY - I'm not going to give a blow by blow account as you can get this from the super tutorials above. I'm going to describe how I got on as a beginner and what additional pearls of wisdom I can share to all you new fellow stitching novices.

First attempt - the willie warmer
I thought I ought to practice first as although it looked simple from the tutorials, I had a sneaky suspicion that these little corners were more tricky than they seemed. I used some left over material from my tote back and ironed the edge to about an inch (sorry if I jump from inches to cm - I like to mix a bit of old and new together !). I then brought this back to the sewing machine and followed the tutorial. Well, my first attempt was a shambles! It ended up looking like a willy warmer gone wrong and the corners were so uneven that I could only sew the hem three out of the four sides!


So attempt two - I measured the fabric and cut it using my new Pyrm rotary cutter. With even corners and ironing back about a half an inch of fabric I took to the sewing machine again. This attempt was better although the corners were still not great and the hem was rather wonky.

My new motto has definitely got to be 'if at first you don't succeed; try, try again' as I gave these tricksy corners a final go. I measured and trimmed the fabric. I ironed about a third of an inch all the way round and tried out these corners again - and bingo - I was impressed. Third time lucky! Tip: although bigger is normally easier to practice on, I didn't find this.  With this third attempt being a triumph I thought I would give my headscarf a whirl.


Measuring up
Cutting up
This time I made sure all the measurements were completely accurate. I cut an 82cmx82cm piece of fabric using my Fissler scissors, Pyrm rotary cutter, metal ruler, tape measure and craft mat.  This was the first time I had cut fabric to size before and my tip on this is to buy a quilting ruler. I have not bought one yet but I think this help to achieve straight lines and be able to put enough pressure on the fabric to stop it from moving. Anyway, after much measuring, cutting and slicing I was ready to prepare my scarf for stitching. I ironed a hem a third of inch wide and constantly measure as I ironed to ensure that the hem was consistent all the way around. This may sound anal but by doing this you are more likely to get a straight hem and great mitered corners. After pressing I went and did my corners. I followed the tutorial to guarantee I did not make any slip ups. Tip: Do try to make sure the corners are the same length as this is crucial for final hemming.  I pinned the hem as there was almost a metre of material and would aid the sewing of the hem. I took the fabric back the machine and sewed my hem and ta-dah- one completed headscarf! This made me very happy and although it took about 3 hours to get the technique of the mitered corners right (plus bobbin winding, re-threading of the machine and other little dilemmas) I now have a headscarf that I made and will wear with pride!

Hint and tips
Pinned headscarf ready to stitch
  • Equipment: Iron, craft mat, metal ruler, rotary cutter or fabric scissors, tape measure, fabric, pins, thread and a sewing machine
  • Patience - oh my, I mention this every time but as I'm setting out on this adventure I can't stress it enough!
  • Check the bobbin for thread - luckily mine ran out on attempt three so was not a major disaster, but I had forgotten so please check  - especially when stitching large amounts of fabric
  • Make sure you measure the hem - this is will help when making the mitered corners
  • Measure the fabric correctly - I thought I had and instead of being an 80cmx80cm, it is actually 78cmx78cm so not quite perfect! I think I should have cut the fabric at 83cm or 84cm but I will know for next time
Enjoy and take your time!

Happy Stitching x