Saturday, 17 August 2013

Seeing Red? Zips, Waistbands and Hems...

Hello Ladies and Gents,

This is the second blog on making a circle skirt and they'll be a limited amount of photos... I was merrily taking pictures and when my Husbandy was looking through them when he spotted that they hadn't come out as the camera was on the wrong setting...I wasn't amused to say the least but I will try and explain the best I can and your imagination will also help!

So, I'm about to join the front and the back of the skirt together. I marked a 1.5cm seam along the side of my fabric and pinned the pieces together (right sides facing). I stitched the sides together using my Singer 2250, carefully following the line I had marked on the fabric. With one side done, I then moved onto the other which involved the invisible zip. Now I had been eager to use my invisible zipper foot for a while so now the moment had come! With my blog and Coletterie blog called "Installing an Invisible Zipper" at the ready, I was good to go!

When installing the invisible zip turn the fabric wrong side facing each other and rights sides on the outside. Mark a 1.5cm seam along the length of the zip and marking the bottom of the zip with tailors chalk. Unzip the zip and pin the zip right-side-down onto the right side of the fabric. Take the skirt to the machine and stitch making sure the zip teeth go in the left hand hole in the invisible zipper foot. Once done, do the same to the other side, pinning the right-side-down to the right side of the fabric only this time put zipper teeth into the right hole on the invisible zipper foot. Phew... invisible zip done! I must confess it took me more than one attempt to get right - especially as when doing the right hand side I puckered the fabric so had to do it again...and again. Practice does make perfect and one day I'll be the master of stitching invisible zips but until then I will do my best and not give up! To finish the seam I swapped over the pressure foot, turned the fabric inside out so right sides were facing, placed a pin at the bottom of the zip as well as pinning the two sides together and stitched. 

#selfie #nowaistband
So in theory I had a skirt and all it needed was some tarting up... how hard could it be! Now in my case I found the instructions for inserting the waistband a bit sparse so I went on to You Tube and found this great tutorial by Professor Pincushion called 'How to sew a classic waistband'. This tutorial is great for beginners and it really got me out a jam. 

With my fabric ready, I pinned the waistband to the right side of the fabric along the stay stitch which was stitched earlier. I then sewed along the edge of the waistband as close to the edge I could make it. I then took this to the iron and pressed. Once pressed you then had a nice smooth line to put in the top-stitch. With top-stitch complete, I folded over the fabric onto the wrong side of the fabric and hand sewed the waistband using a slip stitch making sure not to pierce all the way through the fabric. I then hung the skirt up over night.

Well I left it hung for a little longer than a night but it had all hung beautifully
Measuring up the hem

and I was ready to do the hem. I read the pattern and measured from the top to the bottom leaving a 1.5cm hem at the bottom. It was at this point that I could tell I had not been very accurate when cutting out the pattern so instead of measuring 1.5cm from the bottom, I measured from the top and measured at 61.5cm and joined up the marks. I then stitched using the sewing machine all along the tailors chalk mark. After stitching I took the fabric to the ironing board and pressed the fabric along the stitch I had just done. I then folded the fabric under to make a neat role and pressed and pinned - see photo below. Once pinned I did herringbone stitch all the way around to make a neat hem and ta-dah my skirt's complete.

Rolling under to make the hem
I enjoyed making this circle skirt by Simplicity but I will say a few things... 1) the pattern comes up big! When I had stitched it altogether (including the invisible zip) I had a size check and it virtually fell off! So this involved a lot of unpicking and cutting but all this made good practice for me so I saw the positive side. I followed the size 16 pattern (which says a 30" waist) and in the end made a size 12 (which says a 26" waist) so please double check before you stitch. 2) The other thing I would do differently is make the waistband double the thickness and perhaps insert some interfacing. By doing this it won't be so fiddly and make the waistband more firm and 3) The pattern is for beginners but still found the instructions a little confusing and perhaps lacking in detail. I do enjoy a challenge and working things out for myself but sometimes it can take the enjoyment away by not even having enough info to look up about! All this said, I will definitely make the skirt again and next time use a more exciting fabric!

Top Tips:

  • Equipment: Fabric (2m) with matching zip and thread, fabric scissors, paper scissors, tailors chalk, pins, sewing pattern, sewing machine, invisible zipper foot, general purpose zipper foot, tape measure, iron and time!
  • Don't be afraid to research how to do something... if you're like me you like to figure things out for yourself but when you're learning you need to take 5 and research how others have done it to help overcome those little challenges
  • Double check the measurements before taking the fabric to the sewing machine! Although I didn't mind in the long run, if you were using a more delicate fabric it could stretch or damage the fabric which would be a nightmare. Pin the fabric together and make any adjustments with safety pins

Useful Websites: 
Happy Zipping x

Monday, 12 August 2013

Seeing Red? Red Circles of Fabric that is!

Hello Ladies and Gent,


Tools for the job
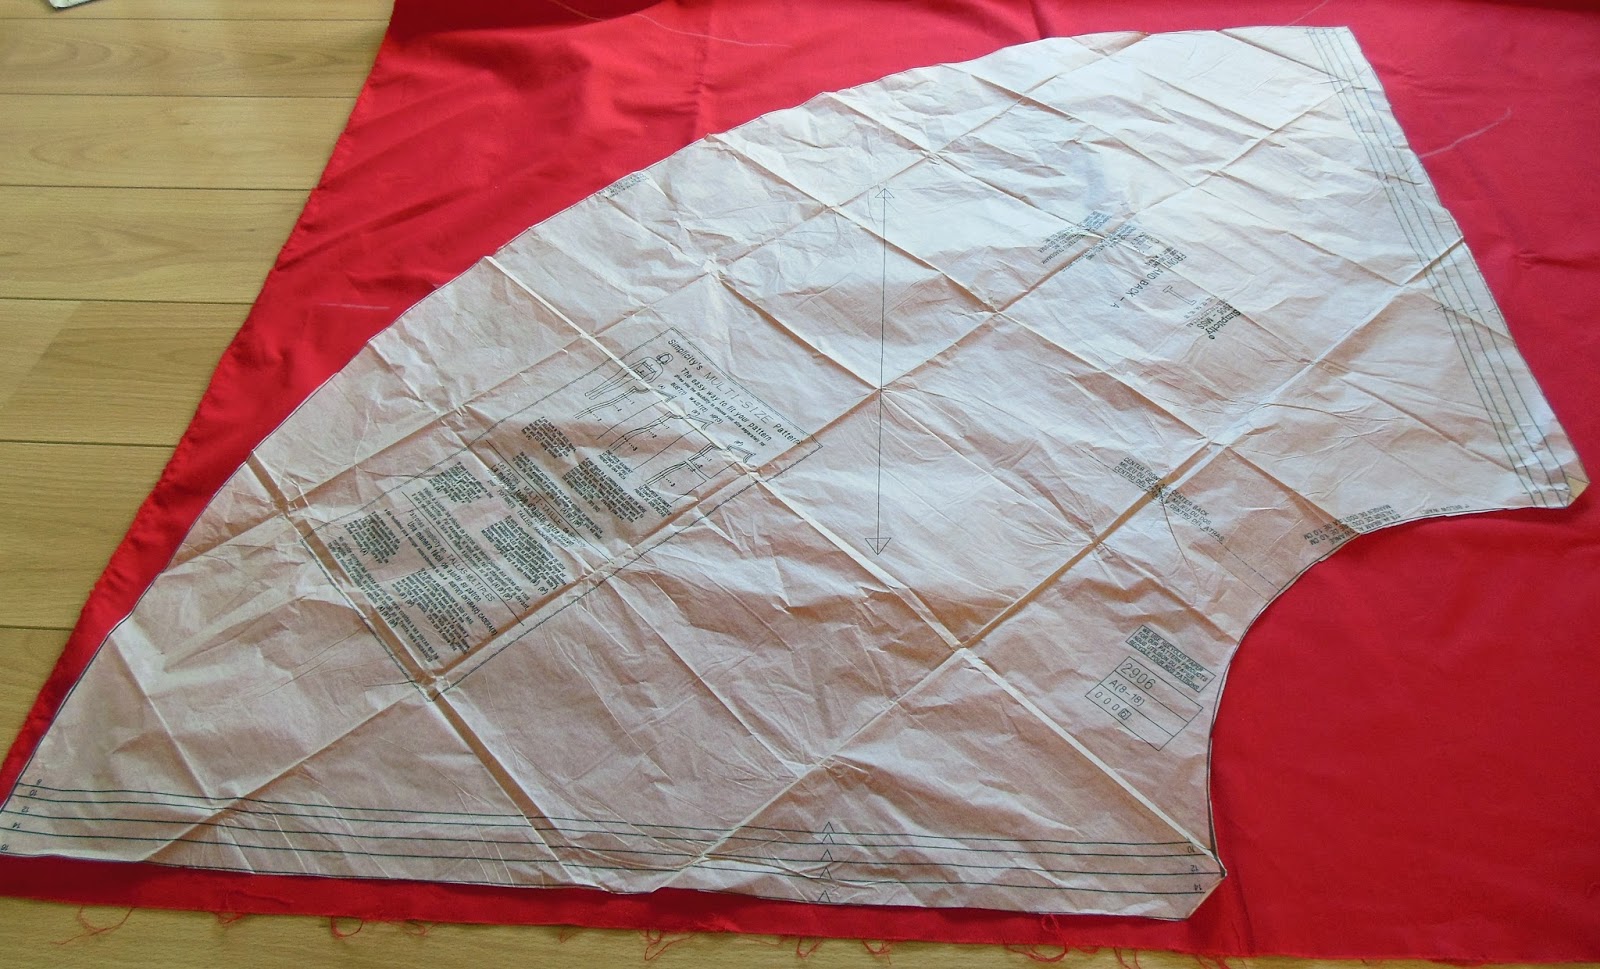
So I thought I would share with my latest sewing project... which is to attempt to make a circle skirt from a new pattern! When I went to my sewing class earlier this year, Claire-Louise aka The Thrifty Stitcher was kind enough to give me another pattern to try out at home. The pattern she gave me was the Simplicity 2906 which has two skirt patterns to follow but as I had all ready got a pattern for an 'A' line skirt I thought I ought to give the circle skirt a whirl. 

Now the dilemma of what fabric to use! I wanted to get some nice tartan fabric,
Useful hints from Sandra Bardwell
but I thought I would find matching the fabric up rather treaky so thought I better stick within my limits for now so chose a lovely crimson colour. I bought my fabric from Ray Stitch and I can't tell you how impressed I was with my visit. I called the shop the day before to see if they had the crimson fabric in stock along with a red 25cm invisible zip. I was thrilled when they said yes and told them I will see them the next day. When I arrived at 9.05am on Saturday morning they were open and had remembered my call and my goodies were all out ready for me! I was over-joyed that they had remembered and made my trip seamless (no pun intended). Now armed with my fabric (which was washed and pressed) I was ready to start creating!


Cutting lines
The first thing I did was measure myself - sadly my waist was still the same as when I made my skirt in April, but at least I've not grown in size. I took my measurement and I was a size 16 for this pattern. I cut the pattern piece out following the lines carefully and slowly. It was quite tricky as the pattern is large but I persevered  Top Tip: Gently press the pattern to ensure it is at its smoothest. I pressed the pattern when I ironed the fabric or iron it direct on a cool setting. Once cut out I then lined up the pattern on the fabric. This is when I had to remember grainlines and all that good stuff...which at first I had forgotten. I turned to my blog, Tilly and the Buttons blog as well as my good book called 'All you need to know about machine and hand sewing - Sewing Basics' by Sandra Bardwell. Although the pattern came with instructions its written in code for a novice so another Top Tip is always look up something if you are unsure of what it means. Like me I had to remind myself of the selfredge and the grain and I'm pleased I did as I originally pinned the pattern on wrong! 

I prepared my fabric (remembering to put strips of tailors chalk on the wrong
Mark the wrong side of the fabric
side of the fabric) and smoothed it by running my hand over it. Top Tip: Remember that the edge that is cut is not always 100% so don't pin the pattern against the edge. I had to look at this a few times and on the pattern you will have a long arrow which shows the grain line. In this instance the grain line was perpendicular to the selfredge. With my pattern securely pinned to the fabric, I took my fabric scissors and cut around the pattern and snipping a triangle where there were notches. The notches are there to help you line up the fabric pieces. I had to do this twice to make the front and the back piece of my skirt. Top Tip: If possible, this would be easier on a large table. I don't have this luxury but I cleared a large space on my wooden floor and cut carefully around the pattern.


Lining up the grain
Now with my fabric cut I wished I had an overlocker to stop the edges from fraying. However you can make a make-shift overlocker type thing on any sewing machine by using the zig-zag stitch. I set the machine to the longest stitch set on zig-zag and with one side sewn into the fabric and the other side just falling off the edge to catch the thread it secures the edge and helps reduce fraying. I did this to the sides and the bottom of my skirt. Tilly and the Buttons also recommends this but she does it when the hem is complete but I did it before hand - not sure if it makes a difference - time will tell.

I then double checked the instructions and realised I needed to put a 'stay stitch' in the top of the fabric to stop it from stretching. I didn't know what it was so I googled it - it is a long basting stitch that stays in - simple. So for this I set the sewing machine to a straight stitch on the longest setting and ran the stitch 1cm away from the top. Again, following the instructions I marked a 1.5cm hem down the sides with tailoring chalk in preparation for joining the pieces together and that all important invisible zip!

This is where I shall leave it today and tell you in another blog how I get on with the rest of my task! The one thing I will share is that I really enjoy the challenge this pattern is giving me! Its using the skills I have done previously plus being brave enough to try out new ones - lets hope the invisible zip comes as naturally!

Top Tips:

  • Equipment: Fabric (2m) with matching zip and thread, fabric scissors, paper scissors, tailors chalk, pins, sewing pattern, sewing machine, invisible zipper foot, general purpose zipper foot and time!
  • Gently press the pattern to ensure it is at its smoothest. I pressed the pattern when I ironed the fabric or iron it direct on a cool setting.
  • Always look up something if you are unsure of what it means. 
  • Remember that the edge that is cut is not always 100% so don't pin the pattern against the edge.
  • If possible, work on a large table. I don't have this luxury but I cleared a large space on my wooden floor and cut carefully around the pattern.

Useful Websites:


Happy Sewing xx 

Sunday, 11 August 2013

My Vintage Clothes & Accessories Paradises...

Hello Ladies and Gents,

Firstly let me apologies for not blogging for a while...with the absolutely stunning weather the British Isles has been having I have been more outside than in but today is to be a day of relaxation and recovery so an-in day it is... plus I see grey skies! I thought I would share with you my latest vintage finds and where I found them... I love finding out about new hidden gems so thought I would share them with you all. 


Dress & bolero - Vintage Fashion Fair
Vintage Fashion Fair - http://www.vintagefashionfairlondon.co.uk/
A good friend of mine told me of this vintage fair... it takes place once a month at Cecil Sharp House, near Primrose Hill. I went to the fair in May and it sold an assortment of clothes, jewellery, shoes and homewares - plus other bits and pieces. Its a snip to get in at £3 with a select range of original vintage stock with a lovely tearoom and by being indoors you can go come rain or shine - well worth a visit. 


Pop Up Vintage Fairs - Islington
Another great vintage fair is the Pop Up Vintage Fair. I visited an event held in the Islington Town Hall. It has a wide range of original vintage clothes, jewellery, shoes, homewares plus it has pop up hair and make up booth, repro items, artists, card stalls, tea and cake stand and probably other wonderful stalls that I can't remember! From memory I think it was £3 to get in and runs every month, but I'm not sure if it in the same place every month. They have a facebook page with full details and if you goggle 'Pop Up Vintage Fairs' it will tell you when the next one is.

Pepper Lane Vintage, Ludlow - http://pepperlanevintage.wordpress.com/
Dress & bolero - Pepper Lane Vintage

This little gem of a shop was stumbled across by pure accident! Husbandy and I were in Ludlow and I was hunting through the charity shops. One of the ladies in the shop said you would love the shop down the road called 'Pepper Lane Vintage'. I rushed out the shop and went on the hunt...when I found it it was like a vintage dream selling original vintage clothes (for both men and women), jewellery, shoes, homewares and furniture.  They have an online shop but going to the shop itself opens your eyes to all the stock the place has - perhaps Ludlow is now the holiday destination of choice?? 


Cardi - Pop Up Vintage/ Skirt - Blackout II
Blackout II - http://www.blackout2.com/
This hidden gem in the centre of Covent Garden is a delight for all those original vintage items. This shop is stocked to the rafters of original clothes (mens and womens), jewellery, hats, handbags and shoes ranging from the 1930s to the 1970s. This shop is over two floors and after some hunting you will find an outfit you wondered how you lived without. 


Ooh La La! Vintage Swap and Sell Shop - Facebook
This site is run through Facebook. Lovely people list vintage items of women's clothes, jewellery, shoes and handbags from all over the world  (a picture with some description on the garment) and if you want it you leave the comment 'interested' - this then ensures you get first dibs on the item. I have purchased some ear-rings and handbag from this site and have been delighted with them!

I'm sure you all have you own little favourite places to find your perfect vintage items.... please do feel free to share them with us and if you pop to any of them listed above let me know what you think!

Top Tips when shopping vintage style:

  • Take a tape measure...I always find this useful as original vintage clothes are on the small size and to avoid disappointment I give it a quick measure up
  • Examine the item thoroughly... this takes minutes and can save disappointment and frustration later
  • Take cash... seems a simple thing but the amount of times I've gone with just a £5 in my pocket and then had to scurry the streets is countless!
  • Taking care of the garment... now this is on a case by case basis. If an item is cotton I do risk putting it in the washing machine on a cool, low spin cycle. However this is not the case for everything as my dry cleaning bill proves so make a judgement also what the worth is before washing the garment
  • If buying a vintage item online don't be afraid to ask for more pictures or more information - at the end of the day you need to know the quality and make sure you are happy before buying 
Happy Shopping x

Thursday, 18 July 2013

Practice Makes Perfect....

Hello Ladies and Gents and how are we all on this beautiful sun-kissed evening? I just can't get enough of it hence the lack of blogging! As I've decided to have a lazy evening I thought I would share with you what I've been up to...

Well my sewing senses have been tingling and I thought I should start a new project! I was merrily looking at the gorgeous Bernie Dexter collection on the What Katie Did website and tweeted a link about the delightful Veronique Blush Dress in the collection and how much I needed it in my every expanding collection of retro and vintage dresses. My tweeter friend 'inkfairy' saw my tweet and said that there was a great pattern of a similar design that I should give a go! I thought ok, lets have a look at this pattern. The pattern is by Sewaholic and the pattern is the Cambie Dress which is a pattern specifically designed for pear shape ladies like myself. I did some research (as always) and it said the pattern was for advanced sewers... this put me off a little (for the moment) so thought what else can I sew instead? This is when I had a brain wave (or was it a heat wave???) and decided to see what fabrics I had in my stash before I embarked on such grand ideas. I saw I had some waterproof fabric and some satin fabric along with plenty of other pieces... I thought to myself 'I know what I can do...I'll make a shower cap for my mother-in-law and a quilt for my friend who is expecting any minute!'


Sewing in the Sun!
So I assembled my tools and took my sewing basket outside and set up camp. I started preparing all the fabric for both the shower cap and the quilt and before long I had 30 squares of 4"x4", the backing of 28"x24", 2 x 20"x2", 2 x 28"x2" and two large circles all ready for the Singer! Soon I was cooking from the sun so decided to have a break and lie in the shade!


The afternoon quickly rolled passed and I ventured in to start all the 
Shower Cap!
sewing. The shower cap literally took about 30 minutes of sewing and 5 minutes to thread the elastic through! I was amazed at how simple it seemed compared to the first time. I then started to make the quilt which again only took about 60 minutes to complete. I was so impressed with myself - particularly as these two projects seemed so simple the second time round!


Quilt front and back!
What I'm trying to share with you all is that practice does make perfect. I was surprised at the ease it was to make these two items and even more that I didn't need to refer to my blog as I had logged how to make them in my brain sack. It did make the experience more pleasurable not having to check instructions every two minutes but if I start a new project I will of course follow the instructions the first time! This opened my eyes and perhaps the stunning Sewaholic Cambie Dress will have to wait a little longer. I feel I need to practice the skills I've all ready learnt before taking the next step. With this new found flare I'm now on the hunt for some tiki fabric to make another 'A' line skirt...so watch this space!

Below are a links to my previous blog plus a few other great links...

Happy Practicing x


P.S. The Bernie Dexter Dress will be in my collection soon...it's just so fabulous!! 

P.P.S. I just wanted to let you know my dear friend was over the moon with the gift of the quilt for her baby boy and here it is all ready in use. I'm so proud that I was able to share a gift that I had made with a dear friend. I hope it comes in handy and helps keep his little knees warm in winter.

Quilt being model by Baby Aidan


Sunday, 30 June 2013

Quilting... the Rockabilly Stitch Way

Hello Ladies and Gents,

Well I thought I would update you on one of my stitching projects as it has been a while. A little while a go I shared with you I was starting a stitching project for a good friend and now it is successfully completed! For my birthday my good friend and sewing advisor bought me a sewing book called 'Cute and Easy Quilting and Stitching: 35 step-by-step projects for you and your home' by Charlotte Liddle. I browsed through the pages and found the perfect gift to make for my friend - a baby quilt. After reading the pattern I knew I could make it - especially as it seemed quite simple and you can customise it as much or as little as you want - perfect for me!

Option 1 - Template
So the first thing I did was raid the fabric stash that has been growing over recent months. I looked through what I had and decided that I had enough fabric to follow the pattern so I went for it. My fabric was all ready washed so the next thing I did was iron everything...this ensures the fabric is smooth and easy to manage. I then had to make 30 squares of 4"x4" in order to make the quilt element. Now to do this I started off by cutting out square templates out of paper (option 1), pinning them to the fabric and cutting around them. After a few attempts of this I was concerned the squares would not be even so I thought of another way (option 2) - to use a
Option 2 
metal ruler, a 
rotary cutter and the markings on my cutting board. This method made the squares more even, less fiddly and a lot quicker to do. I cut out 7 plain fabric, 5 spotty fabric and 18 flowery fabric (4 different flowery patterns). With the squares I went on to design the lay out the quilt. Once I was happy with it, I then started sewing with my faithful singer machine (not hand sewing I hear some of you cry!). One day I will hand sew a quilt but this pattern can be done either way but I really wanted to use my
Quilt Pattern
machine as I hadn't used it since I cleaned it and put a new needle in. On using the machine I couldn't believe what a difference it made, so top tip, do maintain your machine and change the needle frequently! My machine has only had light use but even I, a beginner, could tell the difference.


This is where I became lazy and in hindsight I should have done this a bit differently. Instead of pinning a row of squares together, I just took two squares and sewed them using the pressure foot as the guide. I did this for each square and ended up with five rows of six. A thing I'm not lazy about (which I'm sure my husbandy will disagree on) is ironing the fabric as you go. Once I had five rows of six squares I ironed the
The lazy way...
seam to make it lie flat and keep the material in shape. When joining the rows together I did pin the edges and again followed the pressure foot as the guide. With all rows now joined it was starting to look more like a quilt! Again don't forget to iron the seams open. The next trick was to cut out the boarders....


Pinning the boarders
Now this is when I had to use maths to solve my problem. The two shorter pieces were the same width as the length of the quilted pieces (5x4"=20). I cut out two pieces of 20"x2" in the plain fabric. I then cut the long side pieces which had to be the same length as the quilt, plus the boarder - the total measurement being 28".  I cut out two pieces of 28"x2" in flowery fabric. I pinned the shorter boarder to the quilt and sewed with the sewing machine. I then pinned the long boarder and again sewed this on.... I was very pleased with myself at this stage and was having loads of fun doing it! 

My quilt was almost complete and all I had to do was attach the backing piece. For this you use one piece of material in what ever design you like. Again, I used a floral design and cut the fabric 24"x28". I pinned the fabric (right sides facing) and stitched around the edge leaving a four inch gap at one end so the wadding can be inserted. Once stitched I turned the quilt inside out and ta dah... I was finished! And I truly was finished as there has been a change of plan since its original use. Once completed I wanted to show off my work so I put it over a little table we have. My husbandy saw it and loved it so much we now use it as a table cloth! So I best get cutting more squares and making another one for my friend as the baby is due very soon! It just shows how versatile this simple pattern is. Without the wadding it is not a table cloth and with the wadding it could be used as a quilt. Sewing is a great way to express yourself... take a pattern and put your own stamp on it... and you'll have loads of fun doing it!

Top tips:
  • Equipment: Fabric (30 x 4" squares, 2 x 20"x2", 2 x 28" x 2" and 1 x 28" x 24"), Cutting Mat, Rotary Cutters, Fabric Scissors, Pins, Iron, Ruler and Sewing Machine.
  • Use what ever fabric you like - it's your quilt!
  • Do pin the squares together...it may seem tedious but you'll have a much neater outcome - trust me :)
  • Do maintain your machine and change the needle frequently! My machine has only had light use but even I, a beginner, could tell the difference.

Happy Quilting x

Thursday, 20 June 2013

'Coles Vintage Tea Rooms' ... another hidden gem in Rayleigh


'Anyone for tea?'
Greetings Ladies and Gents,

Today's blog is all about the delights of Rayleigh, Essex! I wrote a blog on Lindy Lou's (which is in Rayleigh) in March and I can't express how super this shop is. It sells primarily replica patterns for men and women from the 1940s along with some original vintage pieces. The great part about this shop is that there is no pressure to buy anything but I bet you don't leave empty handed! 

After our journey to Rayleigh we needed to re-fuel so we 
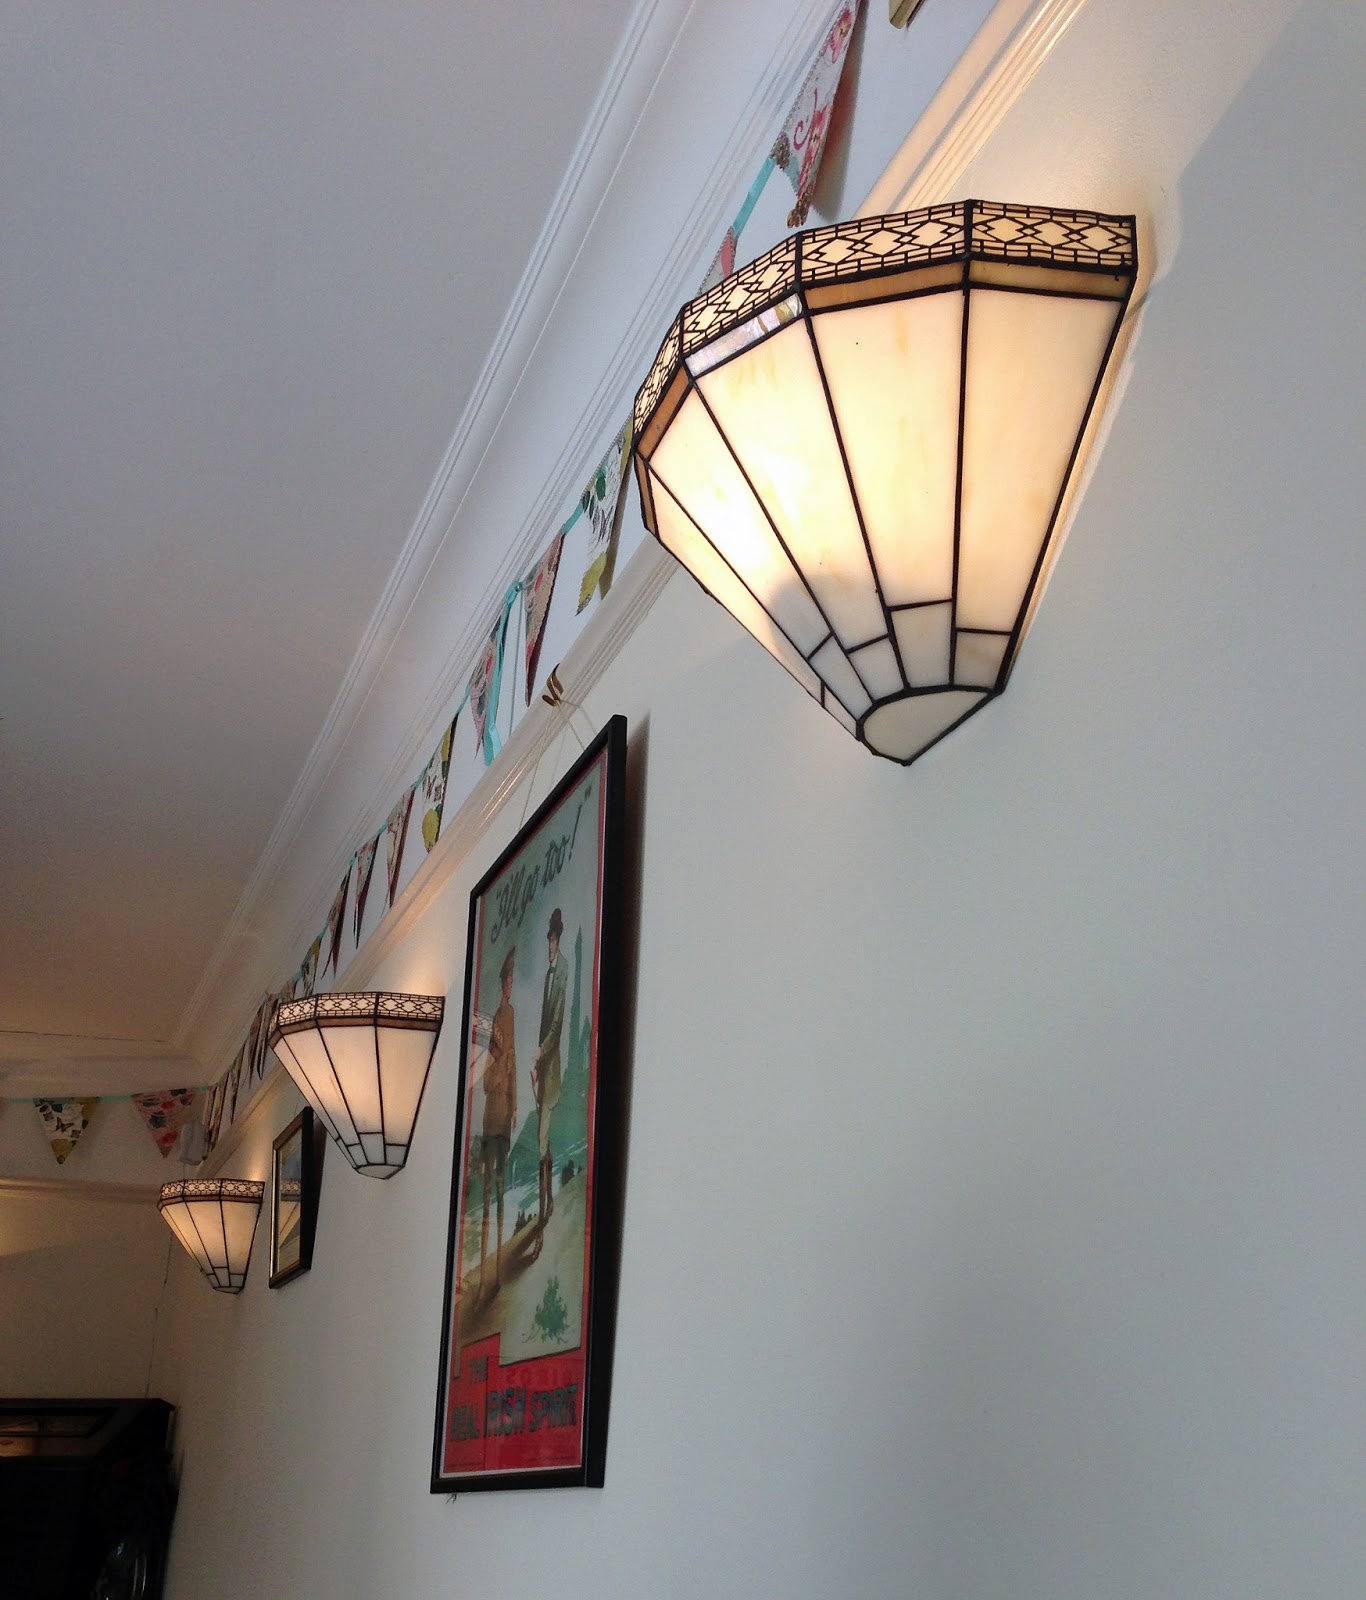
Decorative lamp shades
headed straight to Coles 
Vintage Tea Rooms. When we came to Rayleigh in March we saw this little cafe but decided to head home instead as it was so cold! This time we made sure we had plenty of time and went for a snack-let. On entering the cafe you are hit by the attention to detail. It's decorated like a 1940s tea-room with art-deco lights, old newspapers, vintage tea sets, bunting and even an art-deco bathroom! We sat down and ordered some lunch - I ordered ham, fried egg and bubble and squeak and husbandy ordered Cumberland sausage sandwich both with lashings of tea. 


Afternoon Cream Tea
The food arrived and we tucked in - I haven't had bubble and squeak for an age and it was divine - I even managed to grab a mouthful of sausage and it was scrumptious. After eating our lunch we were toying on whether to have cake now or later... but as I'm weak the decision to eat cake was now! There was a counter displaying a vast array of different cakes from chocolate to coffee and walnut to scones. I ordered my favourite cake which is the lemon drizzle cake and husbandy ordered the Afternoon Cream Tea. The Afternoon Cream Tea came with two scones, jam and clotted cream plus strawberries and small pieces of chocolate brownie all beautifully presented on a cake stand with a pot of tea. The lemon drizzle cake came with a sprinkling of icing sugar and a strawberry. The cake was just so light and moist - my mouth was having a little party and it did not want to end! My husbandy said that they were the
Lemon Drizzle Cake
best scones he 
had ever tasted (and he has tasted a few!). The tea at Coles Vintage Tea Rooms (which makes a damn fine cuppa) is there own infusion and the tea selection is endless - you can even buy the leafs to make your own at home! The food was delicious, the cafe had a relaxed atmosphere and the staff were friendly - my idea of a perfect cafe

My Handsome Husbandy
After all the indulgence we thought we best stop otherwise we would need to buy bigger clothes! With full bellies we waddled up to Lindy Lou's where the search to cloth my man began. My husbandy is a tall, slim fella (6ft 4in) and has trouble finding trousers that are long enough... so with some thorough searching through the racks we found a good selection of 33 inch leg. He tried them on and it was like they were made for him! He also wanted a jacket, but didn't have the one he wanted and we thought 'bum', but to our delight the owner said she could make a made to measure and even in the same fabric - smiles all round! We were in Lindy Lou's two hours...the time just flew by. We walked away with two pairs of trousers with a jacket on order... plus a head-piece for me!


Rayleigh is a true hidden gem in south Essex. Not only does it have a great vintage shop and splendid tea room but it is has plenty  more to offer... I could spend a whole weekend there and still need longer. It has a lovely high street with shops you normally find on a high street plus other shops you wouldn't expect to find. I wanted to rummage through the charity shops and fabric shops but ran out of time! There is also a healthy vintage scene in Essex - especially in Southend-on-Sea - so come on; what are you waiting for... 

Happy Indulging x

P.S. Nearest Train Station: Rayleigh (trains leave London Liverpool Street approx. every 15 mins). Only a 8 minute walk from the station. 90 minutes in the car from West London and ample of parking.

Friday, 14 June 2013

Sewing, Facing and Invisible Zips.... The Finale

Dear Ladies and Gents....

Let me firstly apologies for the delay in getting the final installment to you on completing the 'A' line skirt - mostly to 'The Thrifty Stitcher', Claire-Louise - life has got in the way and now I will finish what I started.

So with all the sides overlocked it was now time to join all the pieces together. With the pieces pinned together and the sewing machine set to a straight stitch, follow the tailors chalk line to join the two back pieces to the front piece - taking the pins out as you go. Now its time to insert the invisible zip! Take the 10 inch invisible zip and line the top of the zip with the top of the skirt and mark with tailors chalk where the bottom of the zip is to go on the fabric. The zip goes right side down onto the right side of the fabric - this is then pinned into place (remembering to be 15mm away from the fabric edge). On the sewing machine change the zipper foot to an invisible zipper foot. Align the foot over the zip. To align the zip, it should go down the small hole to the left as you look at the sewing machine and stitch as close to the zip teeth as you can remember not to backstitch as it may damage the fabric and needle. Sew down the side of the zip until the place where you marked the fabric. Top Tip: You need to go as far down as you can so its secure but not too far down otherwise you will catch the zip lever and snap the needle. Also remember as there is not back stitch at either end don't forget to unpick the last loop and manually tie a knot. Now, do the same the otherside. Un-zip the zip and pin the zip to the right side of the fabric remembering to keep the same distance from the fabric edge. Top Tip: do not panic at this point! My brain could not work out how it would work, but trust me and the experts - it does! Do the same as the other side and slip the zip teeth into the right hand hole on the invisible zipper foot. You're almost there! Now swap the invisible zipper foot to a general-purpose foot. Start at the top of the zip and stitch as close as you can get and then all the way to the bottom of your skirt and ta-dah you have a skirt-ish!! I appreciate this is complex but do persevere... once done it is so satisfying! A great tutorial to help you out is 'How to sew an invisible zip' by ctquiltingvideos - link below.

Joining the facing
Now there is only a couple more part to do and one of them is fixing your facing. A facing is not required all the time but for this skirt one was inserted. To create the facings trace the pattern onto dressmakers square patterned paper using the pattern from the skirt. Before tracing remember to take out the darts and measure down approximately 3.5inches - do this for both the front piece and back two pieces. This then needs to be pinned to the fabric and cut out using fabric scissors - remember to place the front facing on the edge of folded fabric to make one long piece and cut out two back pieces. Once cut out pin the back pieces to the front pieces remember the 15mm hem line. Once the three pieces are joined together, overlock the sides and the bottom. Once overlocked, pin the right sides together at the top of the skirt. Now to ensure you don't go over you zip, mark each side with a pin - this will be your start and end point. Go back to the sewing machine and sew the facing to the skirt. Turn the facing into the skirt and its almost done!


The hem ready to the hand-stitched
The final part of the skirt is the bottom hem. As I wanted my skirt to have a more vintage feel I hand sewed this by using a herringbone stitch. I would describe this as hand sewn zig-zag stitch; only catching a tiny thread on the outer fabric and catching the hem as you go - this should also appear invisible on the outside. I decided to do this bit at home as the day was all ready drawing to a close - but one thing was for sure...I had made a skirt :)

Top tips:
  • Equipment: Hemming ruler, fabric scissors, fabric, dressmakers square patterned paper, pins, sewing machine, invisible zipper foot, invisible zip and patience!
Useful websites/ blogs:
  • 'How to sew an invisible zip' by ctquiltingvideos - http://www.youtube.com/watch?v=V2Dz6tk_fW4

Blurred photo of finished item!
I wear the stunning blue skirt regularly and its been complimented a great deal. I never appreciated the time and effort it takes to make a garment and I now have first hand stitching experience. Before I made a skirt I used to think about where my clothes were made and now this is more important than ever. I do try and buy British made where I can and that is why businesses like Vivien of Holloway and other independent shops are so important to me and to keep the British textile industry alive.

For anyone learning to sew I would highly recommend 'The Thrifty Stitcher'. The course is relaxed with clear guidance and support. The day goes so quickly and you will learn a great deal of skills in a short amount of time and retain them for years to come! Again, I'd would like to say a massive thank you to Claire-Louise and to all at The Thrifty Stitcher for a wonderful creative day - I will use all these wonderful skills to make another skirt and other clothes! 

Happy Stitching x